GitLab
Integrating your Gitlab application with DeepSource requires a Gitlab application. This document outlines the configuration, permission requirements and app configuration to get started with your GitLab account and DeepSource Enterprise.
Creating a GitLab application
- Click your profile picture and select Preferences.
- Select "Applications" from the sidebar.
- You'd be prompted to fill a form to create a new application. Enter the following details:
Replace ORGANIZATION_NAME with the name of your organization, and HOSTNAME with the actual hostname on which you plan to deploy DeepSource to.
| Field | Value | Example |
|---|---|---|
| Name | DeepSource ORGANIZATION_NAME | DeepSource Stark International |
| Redirect URI | https://`HOSTNAME`/accounts/gitlab/login/callback/bifrost/ | https://deepsource.stark.com/accounts/gitlab/login/callback/bifrost/ |
| Confidential | true | |
| Scope | Check true for api, read_user and read_repository |
- Click on "Save Application".
- You will get
APPLICATION_IDandSECRET. Enter these values in the DeepSource Enterprise admin console.
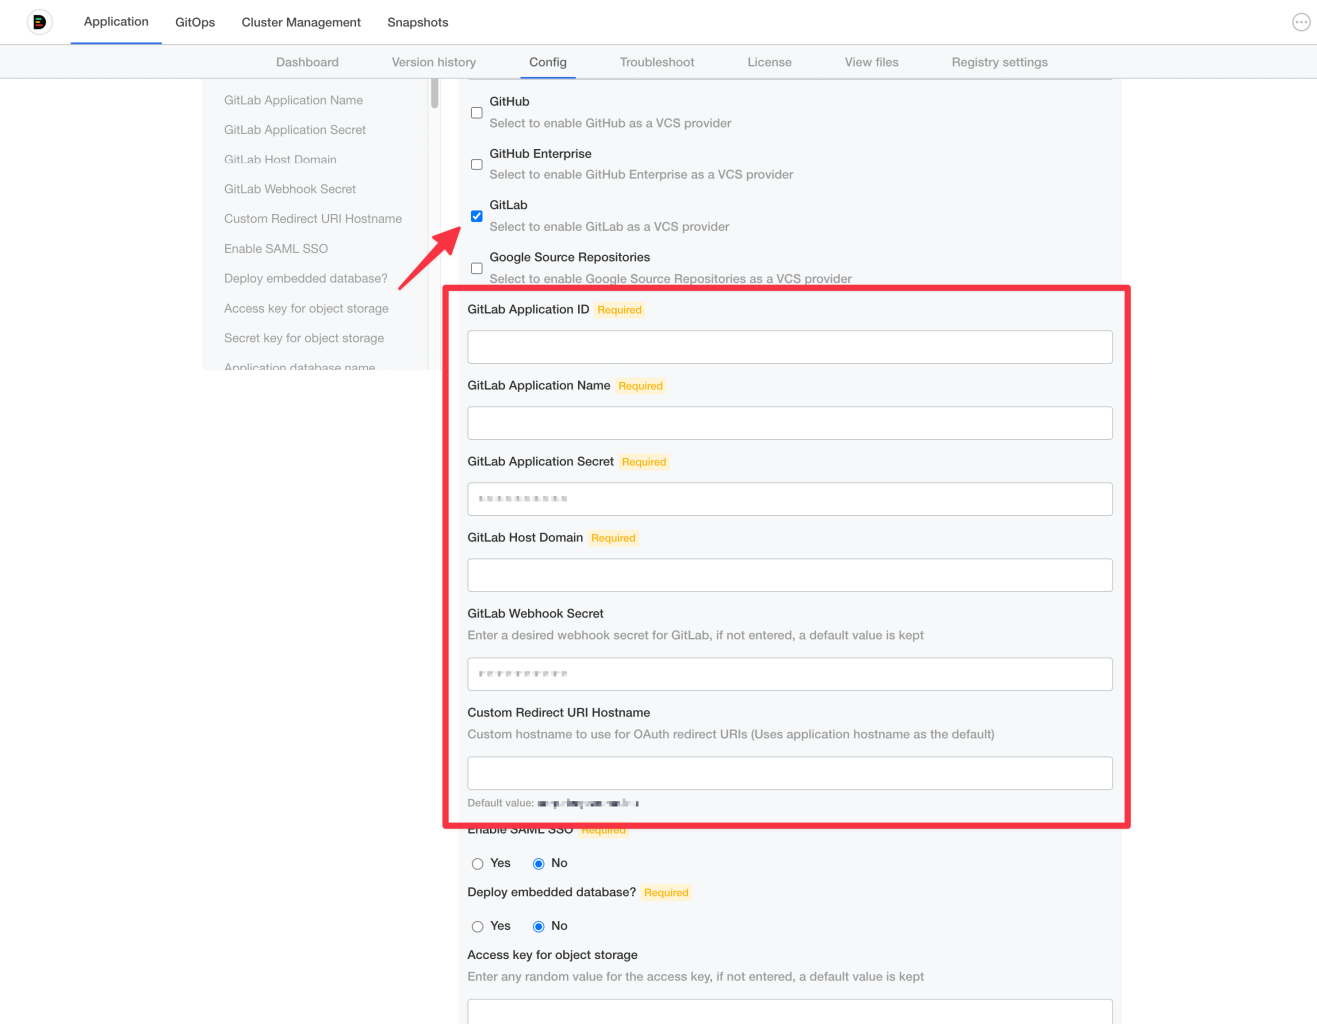
Configuring the GitLab application in the Admin Console
After you create your GitLab application, you need to configure these in the Admin Console for the application to use it.
-
Visit the Admin Console
-
Navigate to Application -> Config.
-
Select the checkbox for GitLab.
-
Fill up the values from the previous step for:
- GitLab Application ID
- GitLab Application Name
- GitLab Application Secret
- GitLab Host Domain
- GitLab Webhook Secret
-
Click Save config
You can ignore the Custom Redirect URI Hostname field if you are using the same domain for all traffic.