Let’s fix code health issues and security vulnerabilities identified by DeepSource, using both manual fixes and automated remediation options.
Fixing Code Health Issues
When addressing code health issues flagged in the DeepSource dashboard, you have two options. The first approach involves manually fixing the issues, while the second method involves Autofix™ — our auto remediation engine.
Manual Fix
If you choose to manually fix the issues, you can follow these steps:
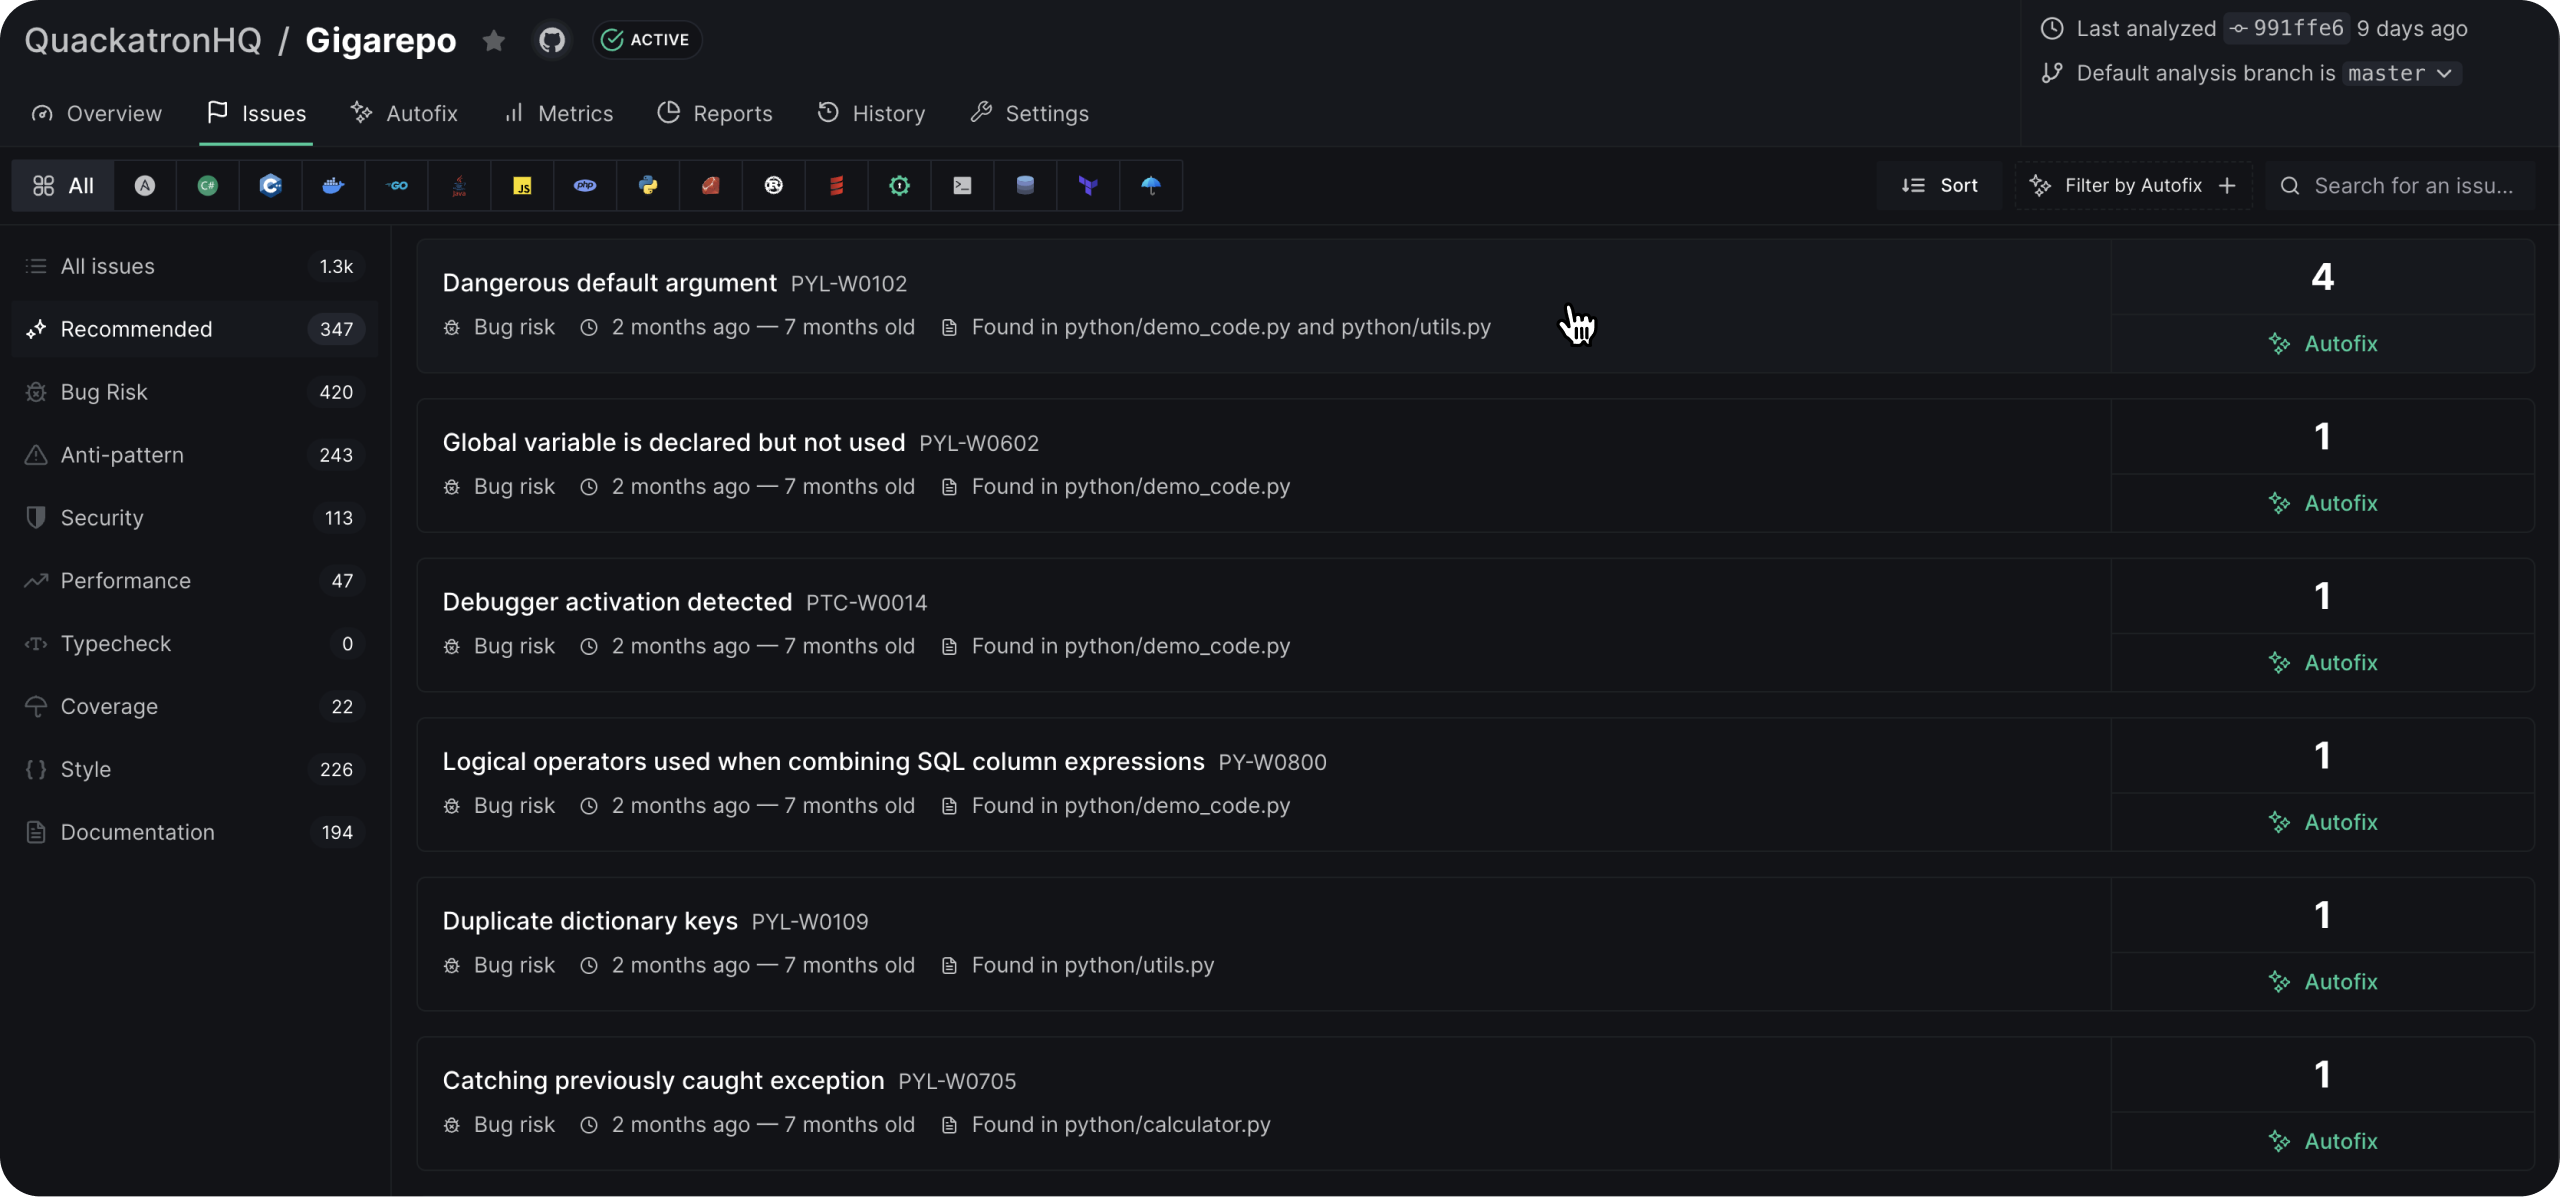
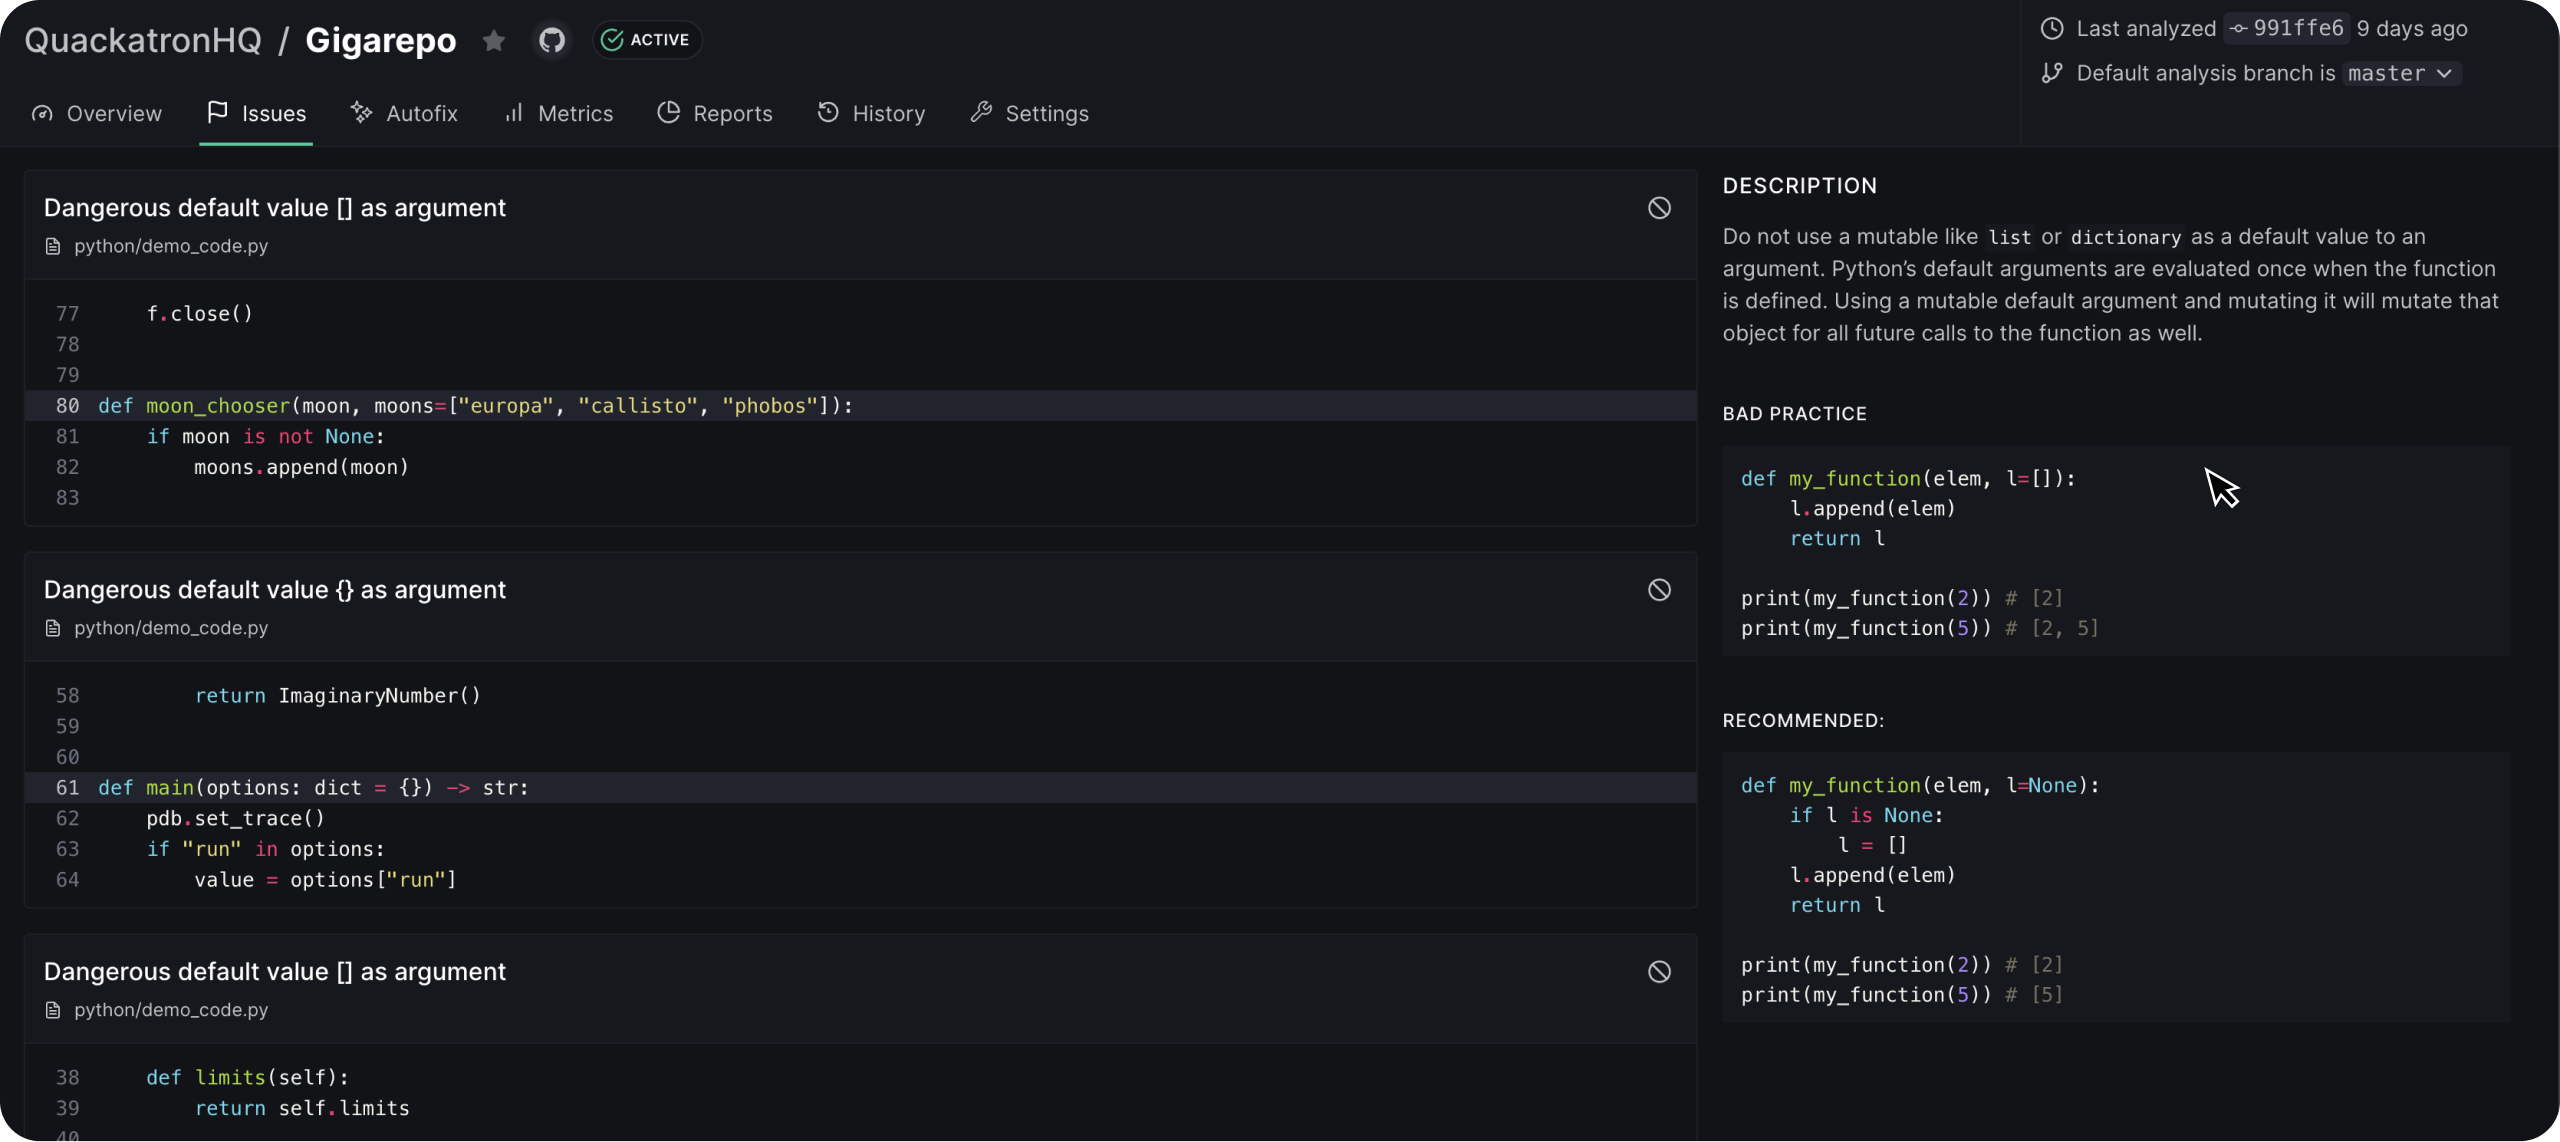
- Open any issue from the Issues tab and examine the occurrences of the issue. You can identify where the issue exists in the codebase and read the issue description to gain a full understanding of what needs to be fixed and the code changes that are required to address the problem.
- Referring to the contextual code can provide you with a better understanding of the issue. Manually make the necessary edits in your code and push a commit.
- DeepSource will automatically analyze every pull-request and new commits on all new and existing pull-requests.
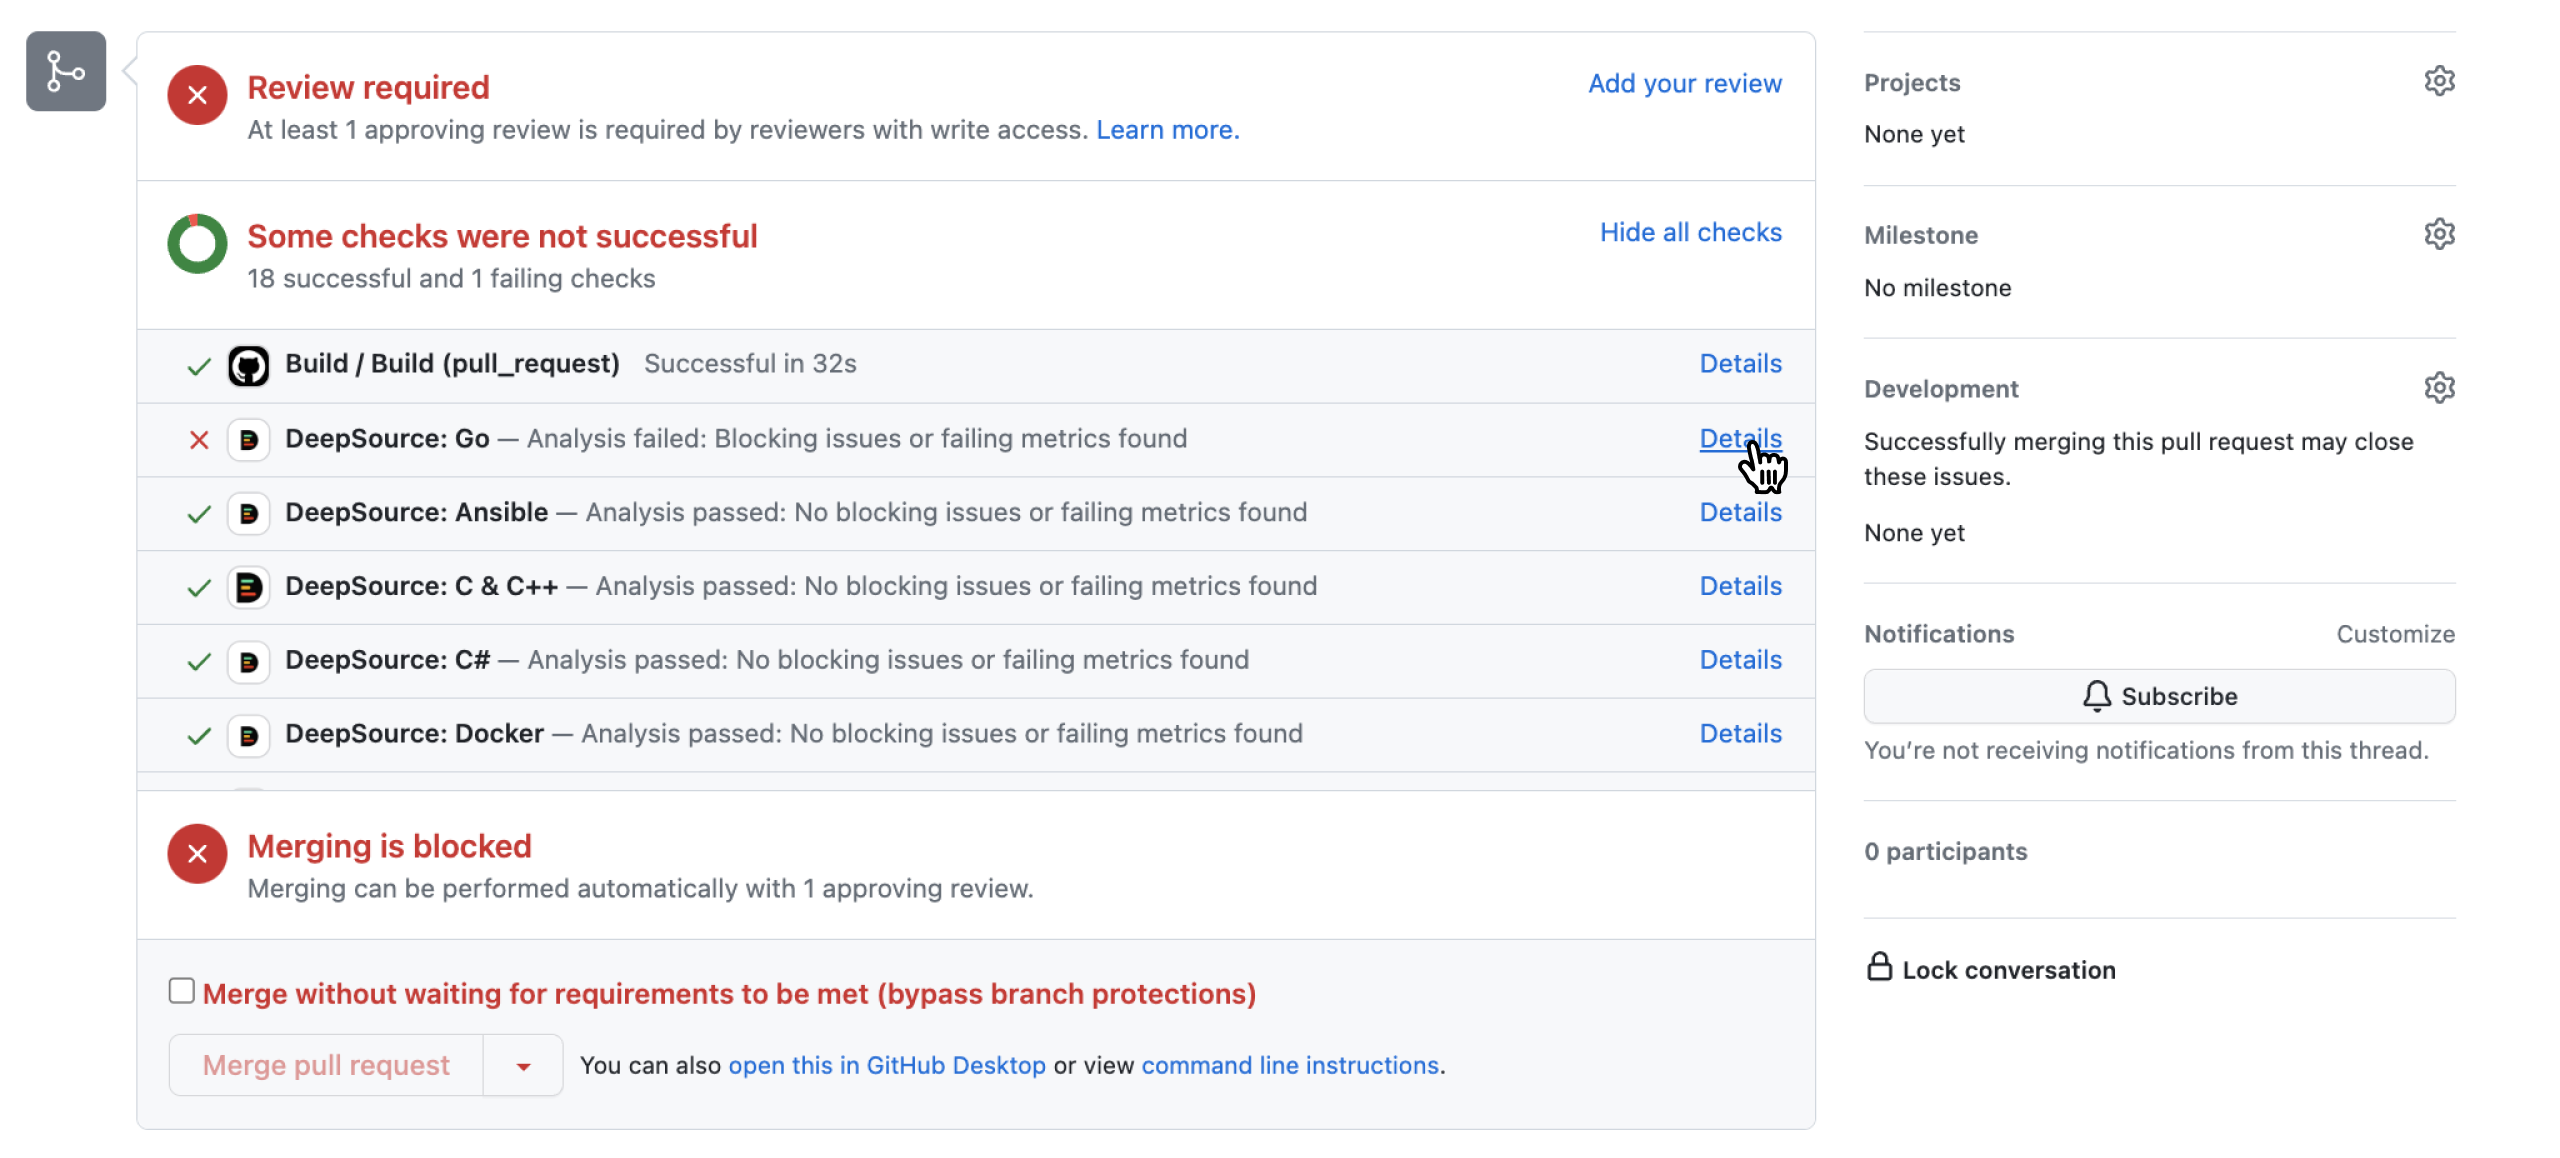
- Once the checks finish, you will see checks that have passed and some that have failed. If a check passes, it means that the DeepSource Analyzer did not find any issues in the changes made in the PR. If a check fails, it means that there are issues that need to be addressed.
- You can click on the ‘details’ view to gain more context on the failing checks and learn how to address the issue effectively.
Autofix™
Installing the Autofix™ app
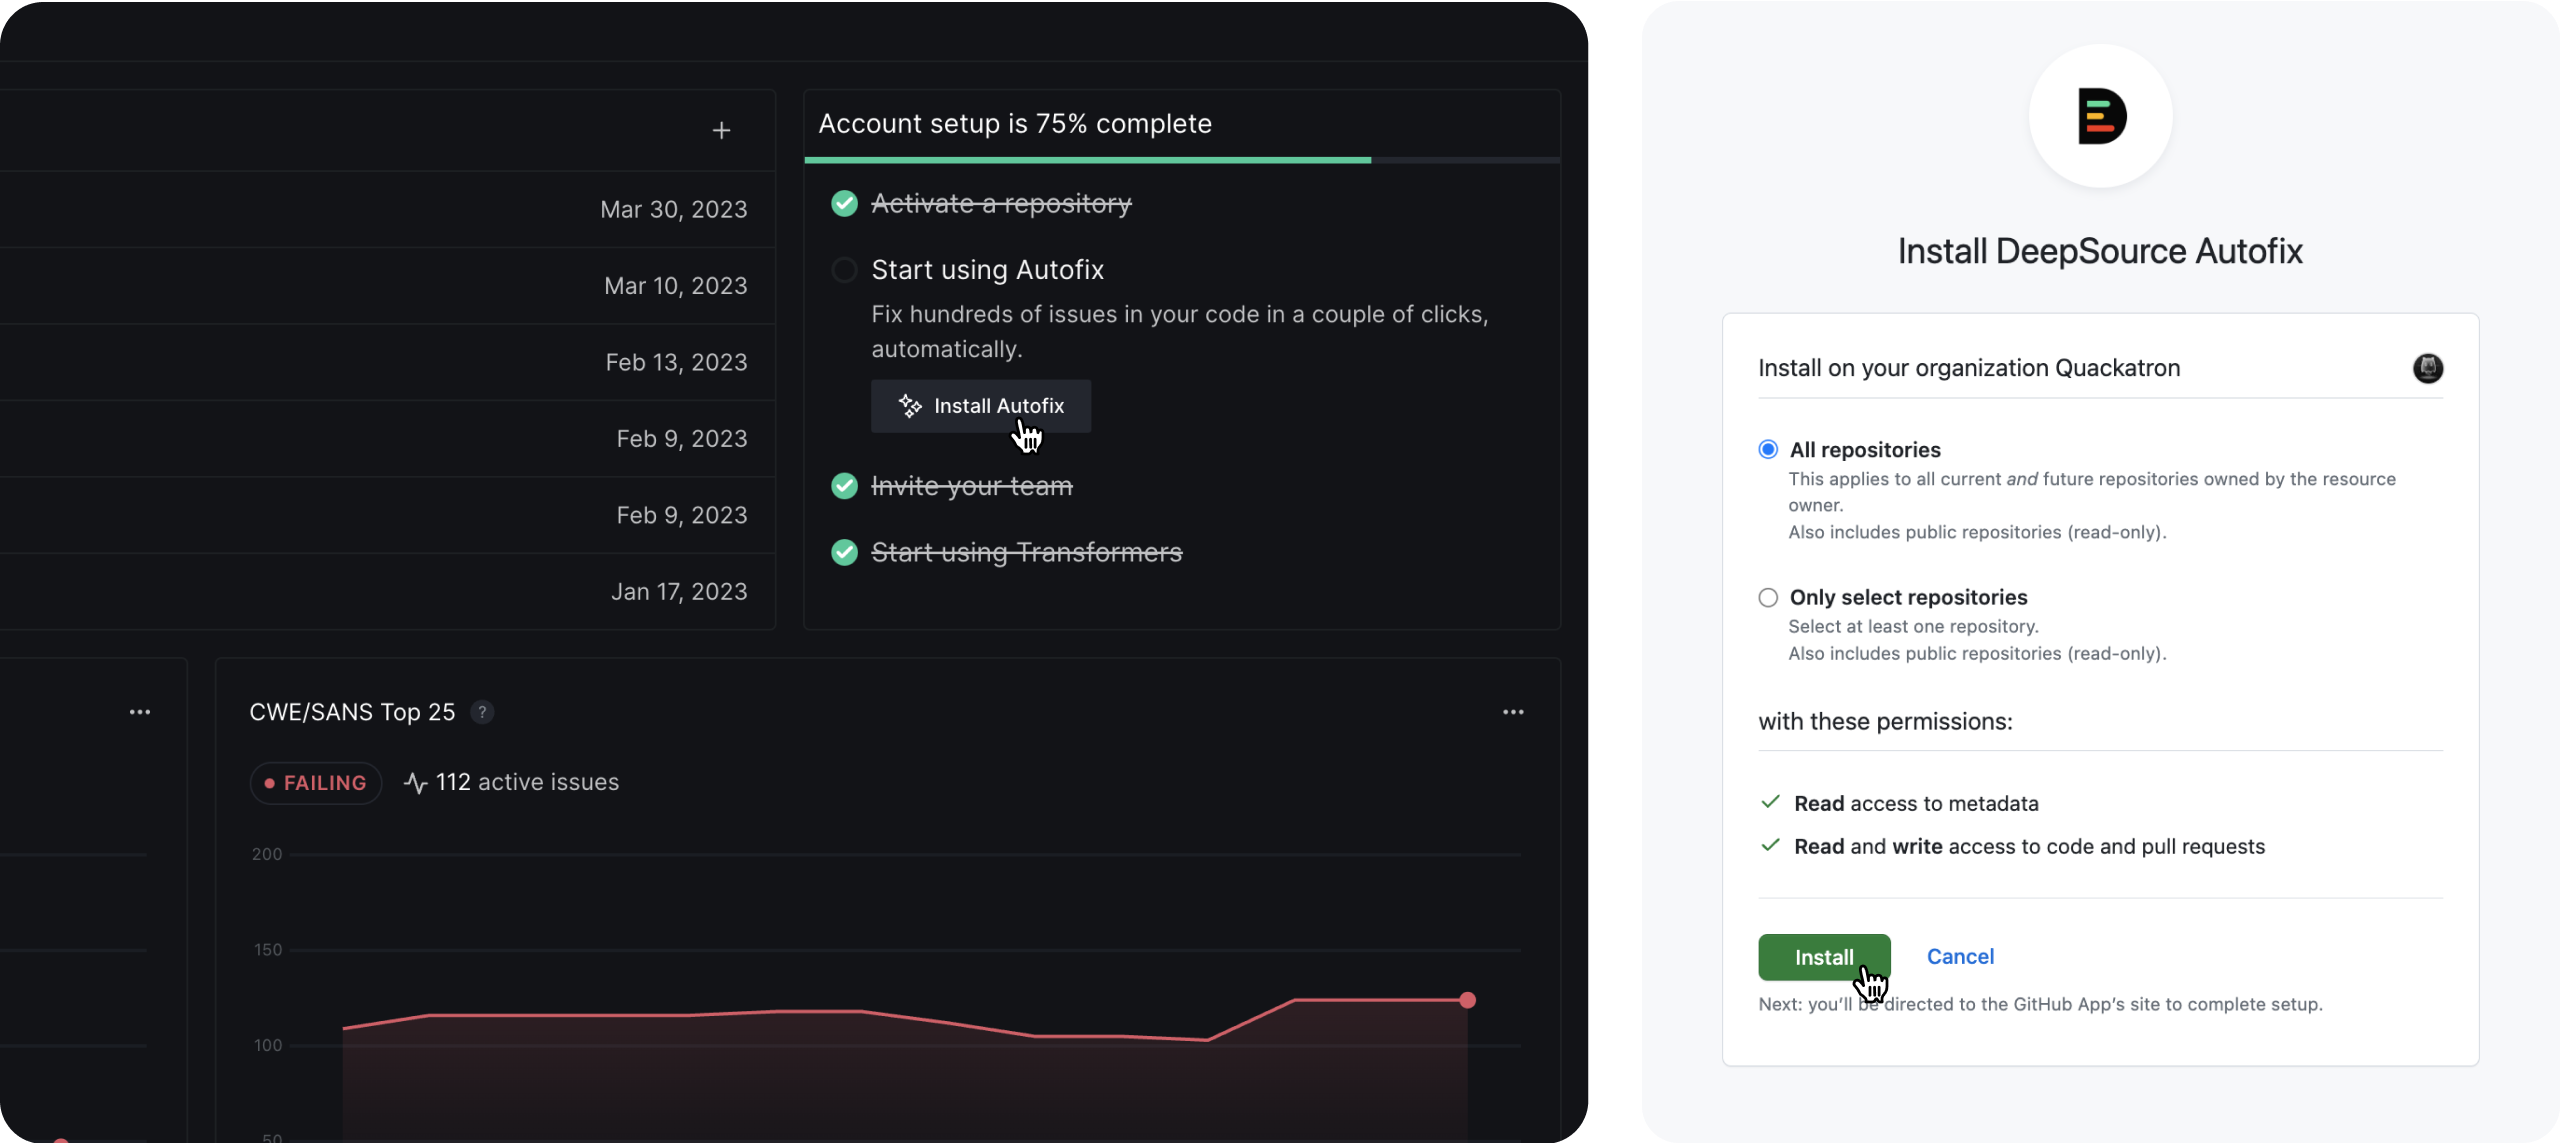
In the dashboard, you’ll see a prompt to install the Autofix™ app. Simply click ‘Install Autofix’ to begin. If you’re using an organization or team account, you can choose to install Autofix on all repositories or select repositories. After you click ‘Install’, you’ll be taken to the VCS provider’s App site to finish the setup.
Using Autofix™: The dashboard workflow
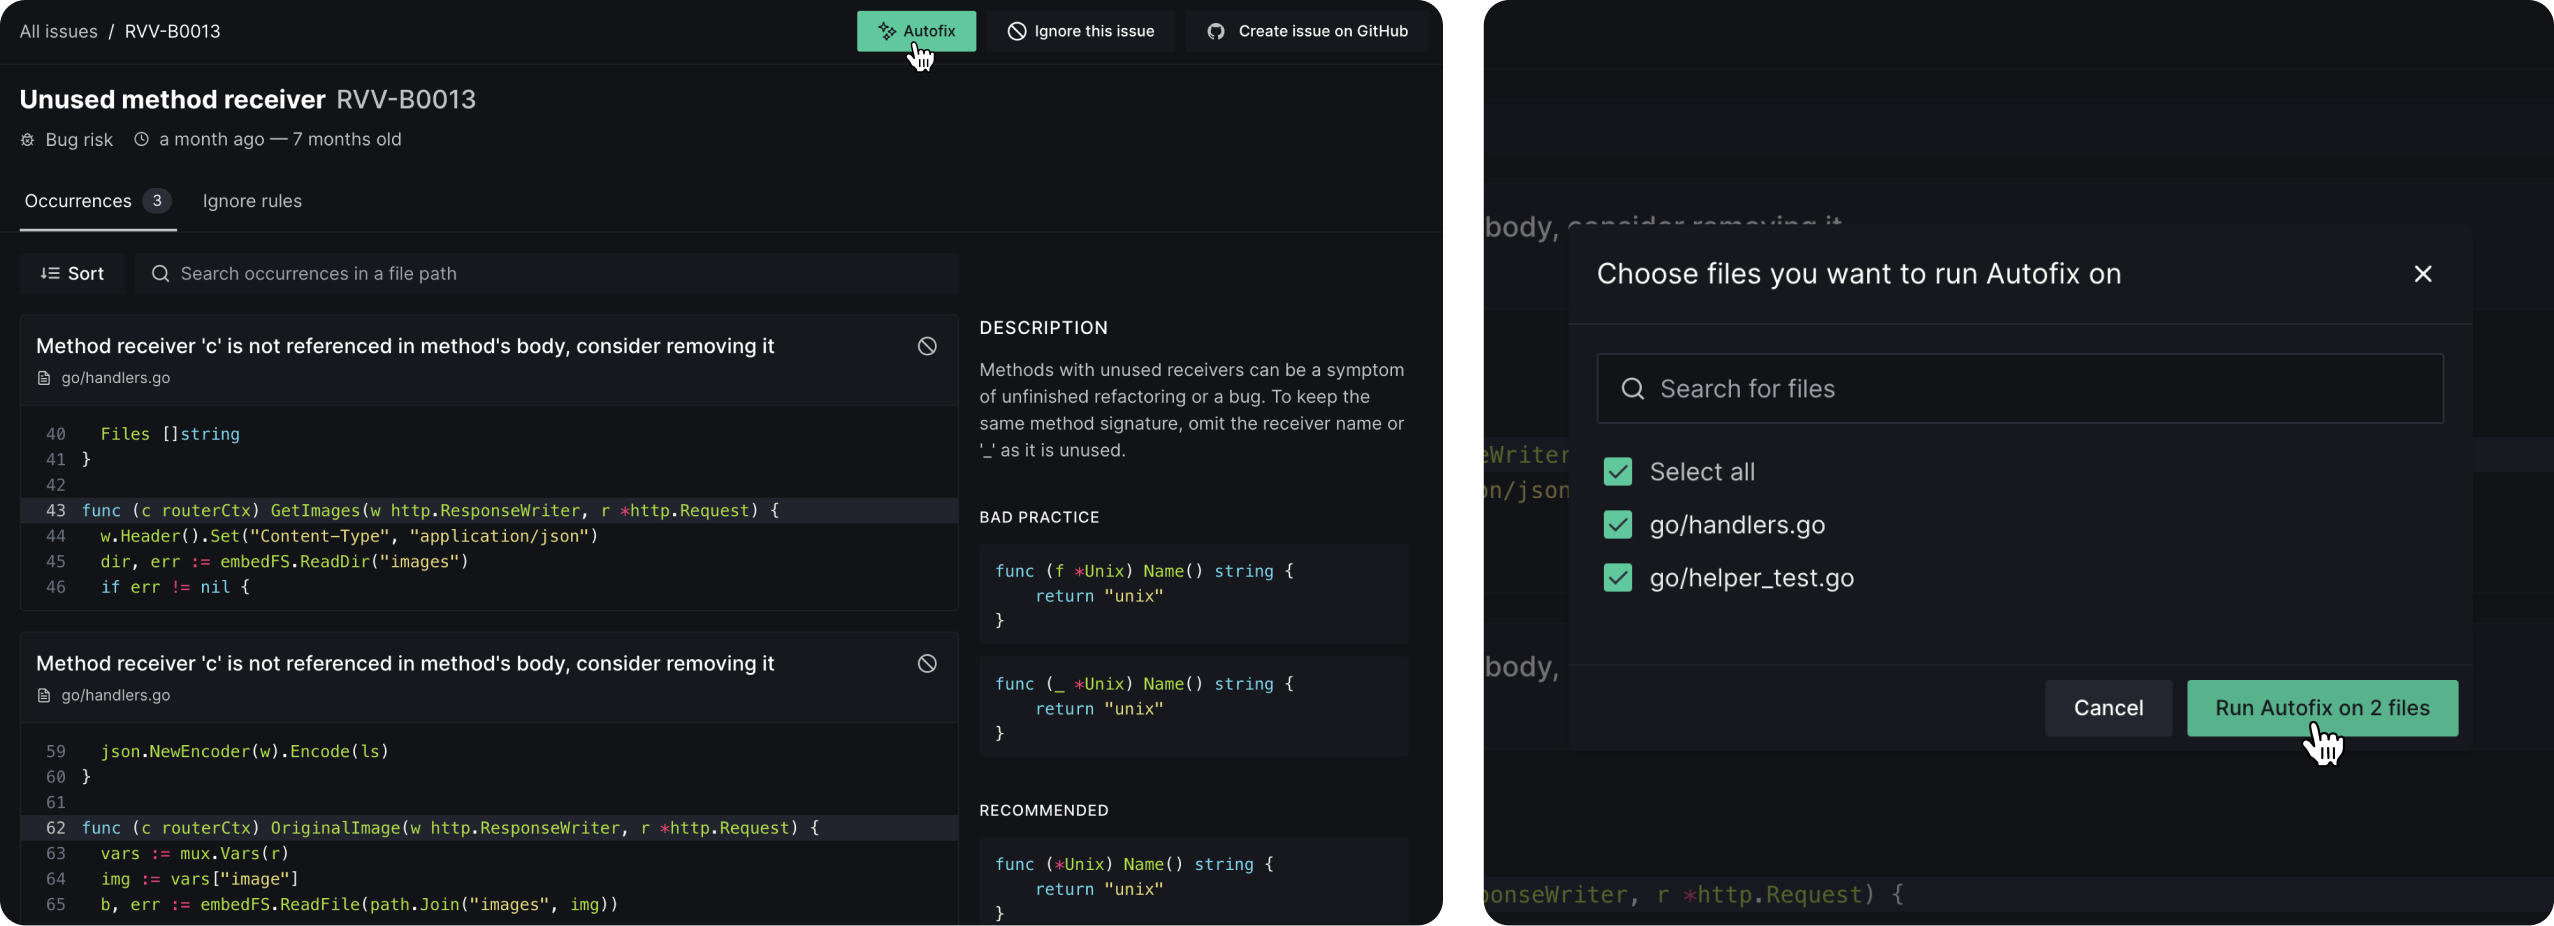
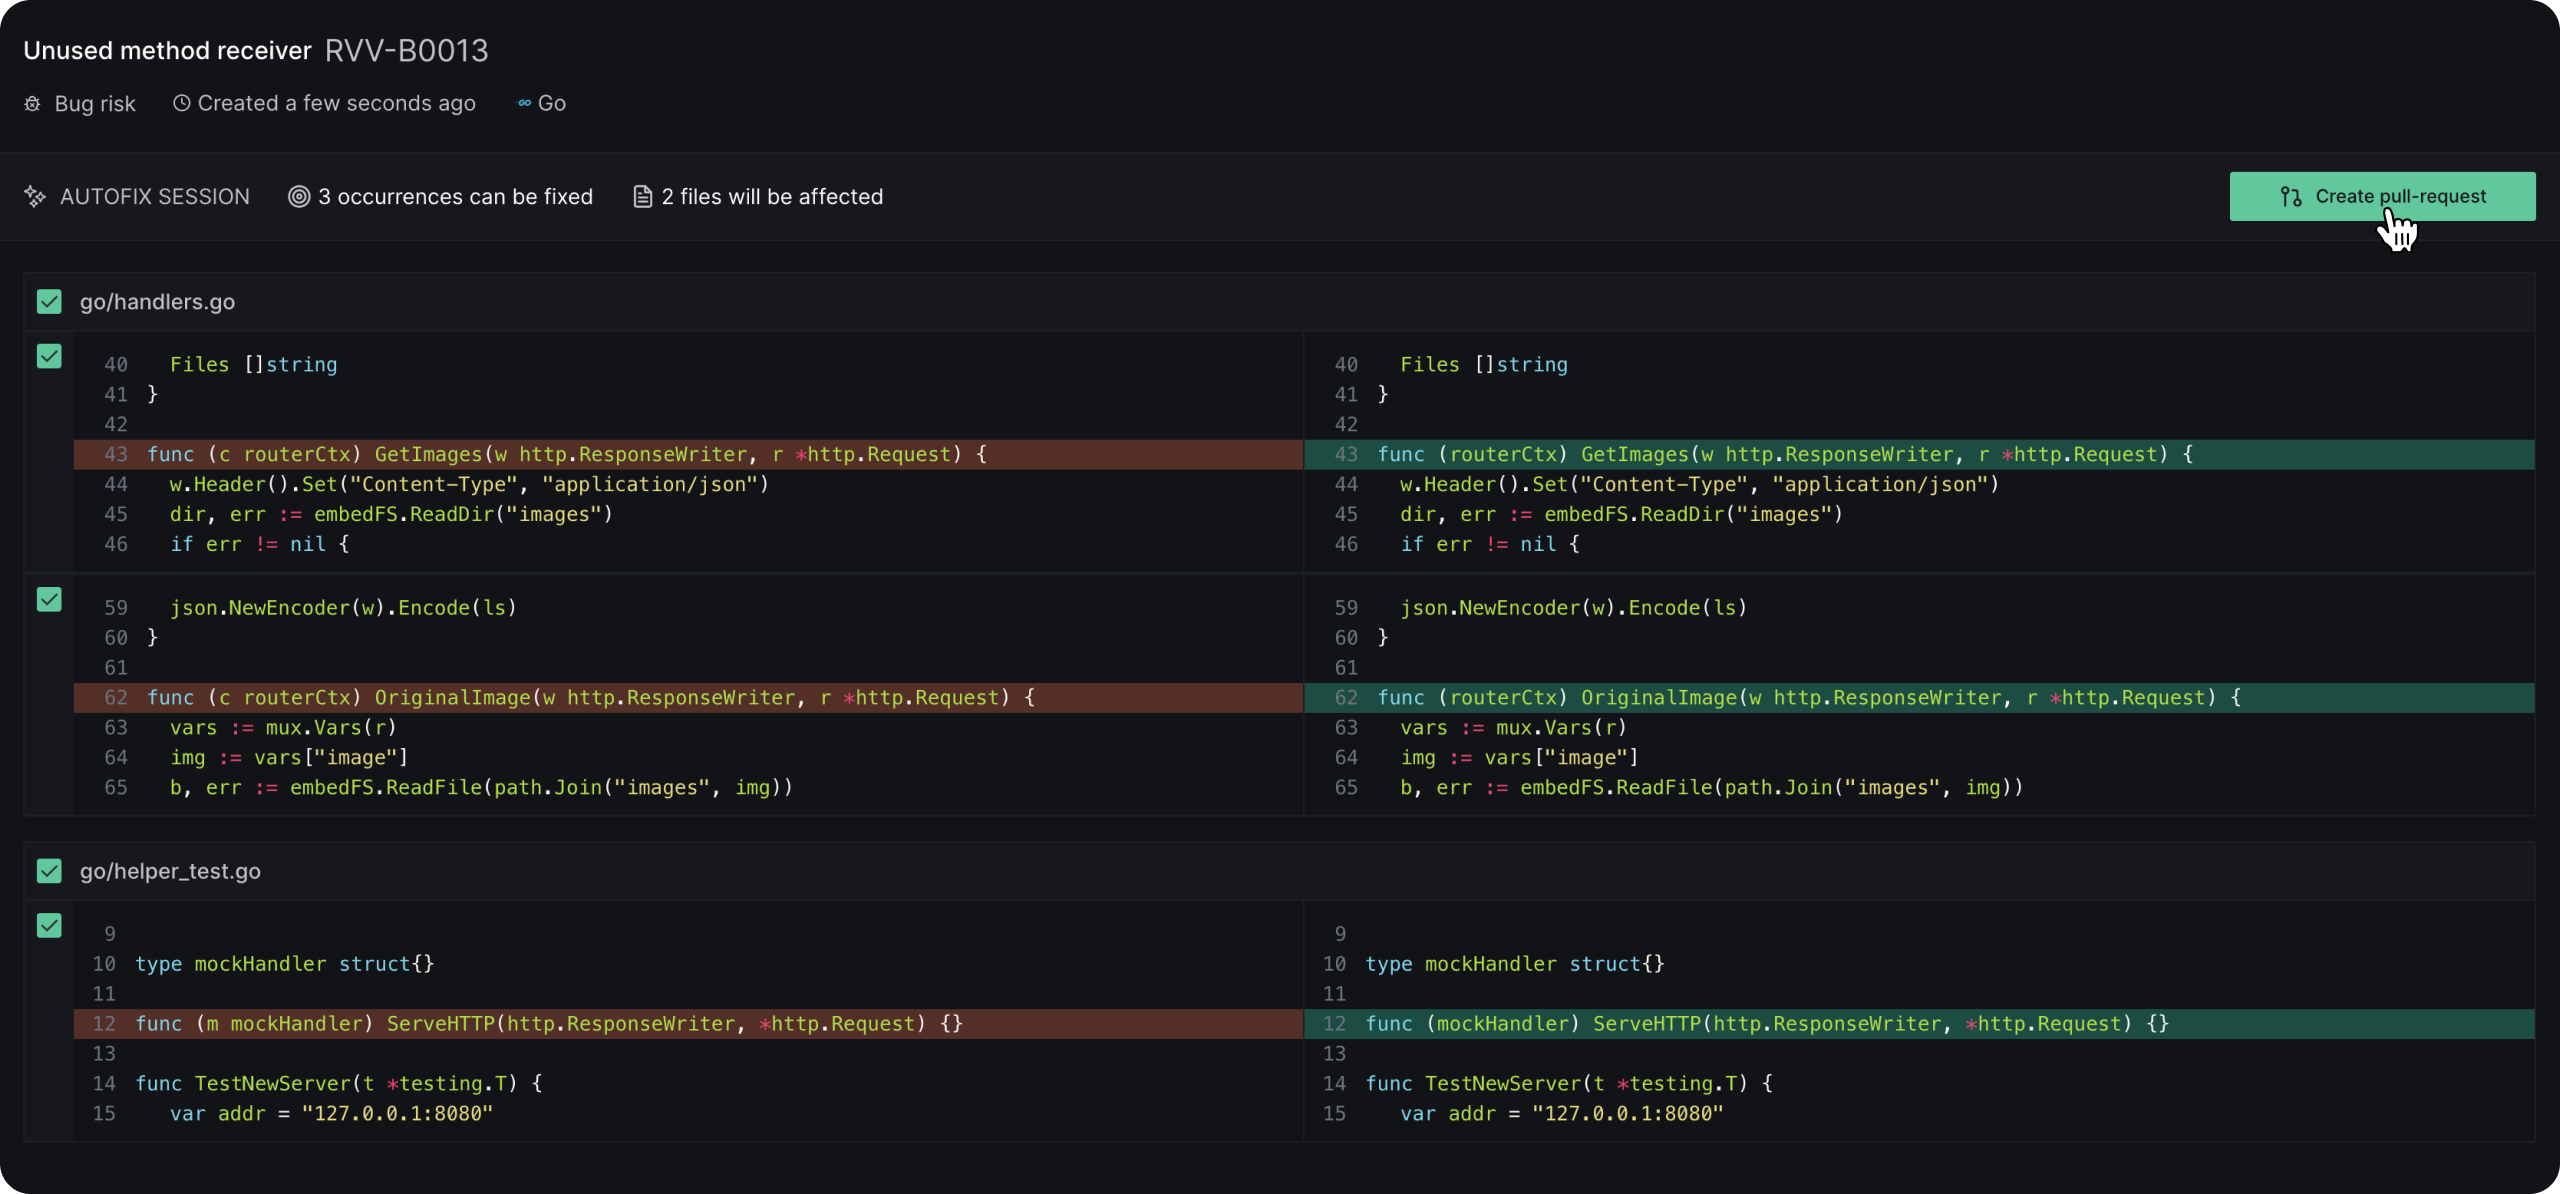
If you open an issue from the dashboard that has Autofix™ support, you’ll see the Autofix™ button on the top. All you have to do is click on it and confirm which files you want to run Autofix™ on.
It takes a few seconds for DeepSource to generate the fixes, and once you’ve verified all the fixes, click on the ‘Create pull request’ button, and DeepSource will create a pull request with fixes for this issue on your repository automatically.
Using Autofix™: The pull-request workflow
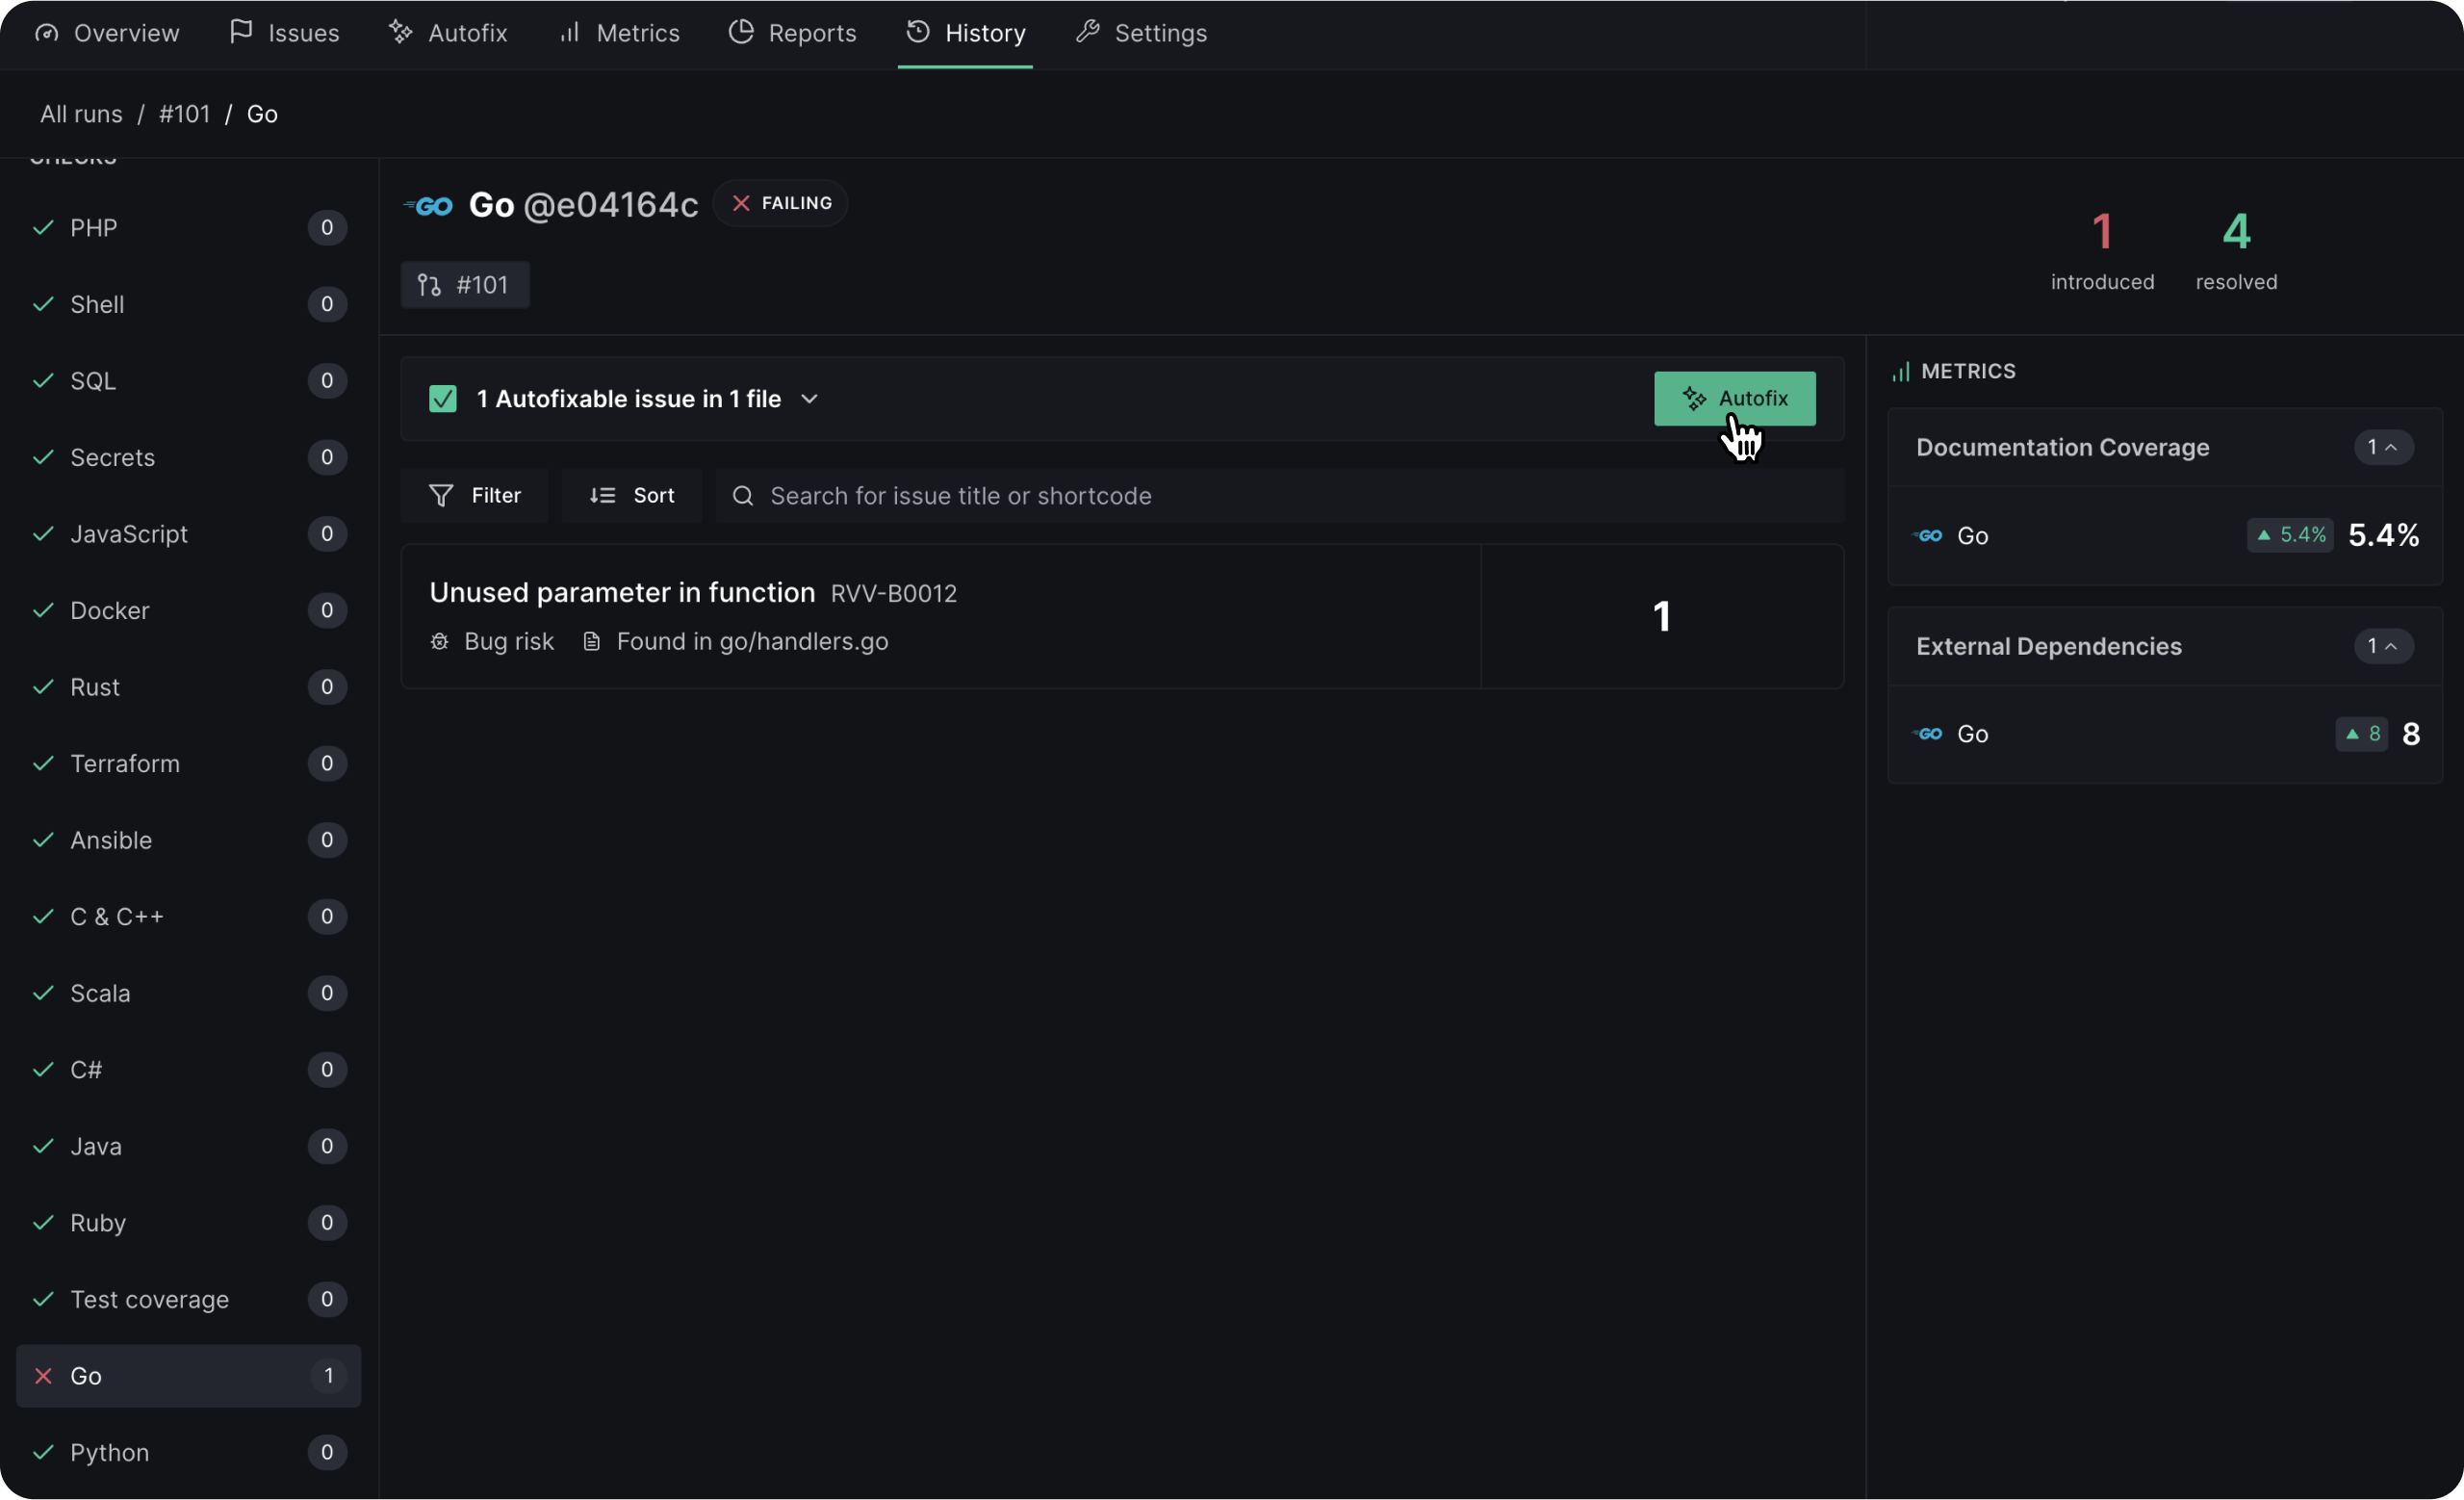
Once you’ve made a new pull request on your GitHub repository, DeepSource analysis will start right away. Once the checks finish, click on the ‘details’ action adjacent to a failing check to view the issues you’ve just introduced.
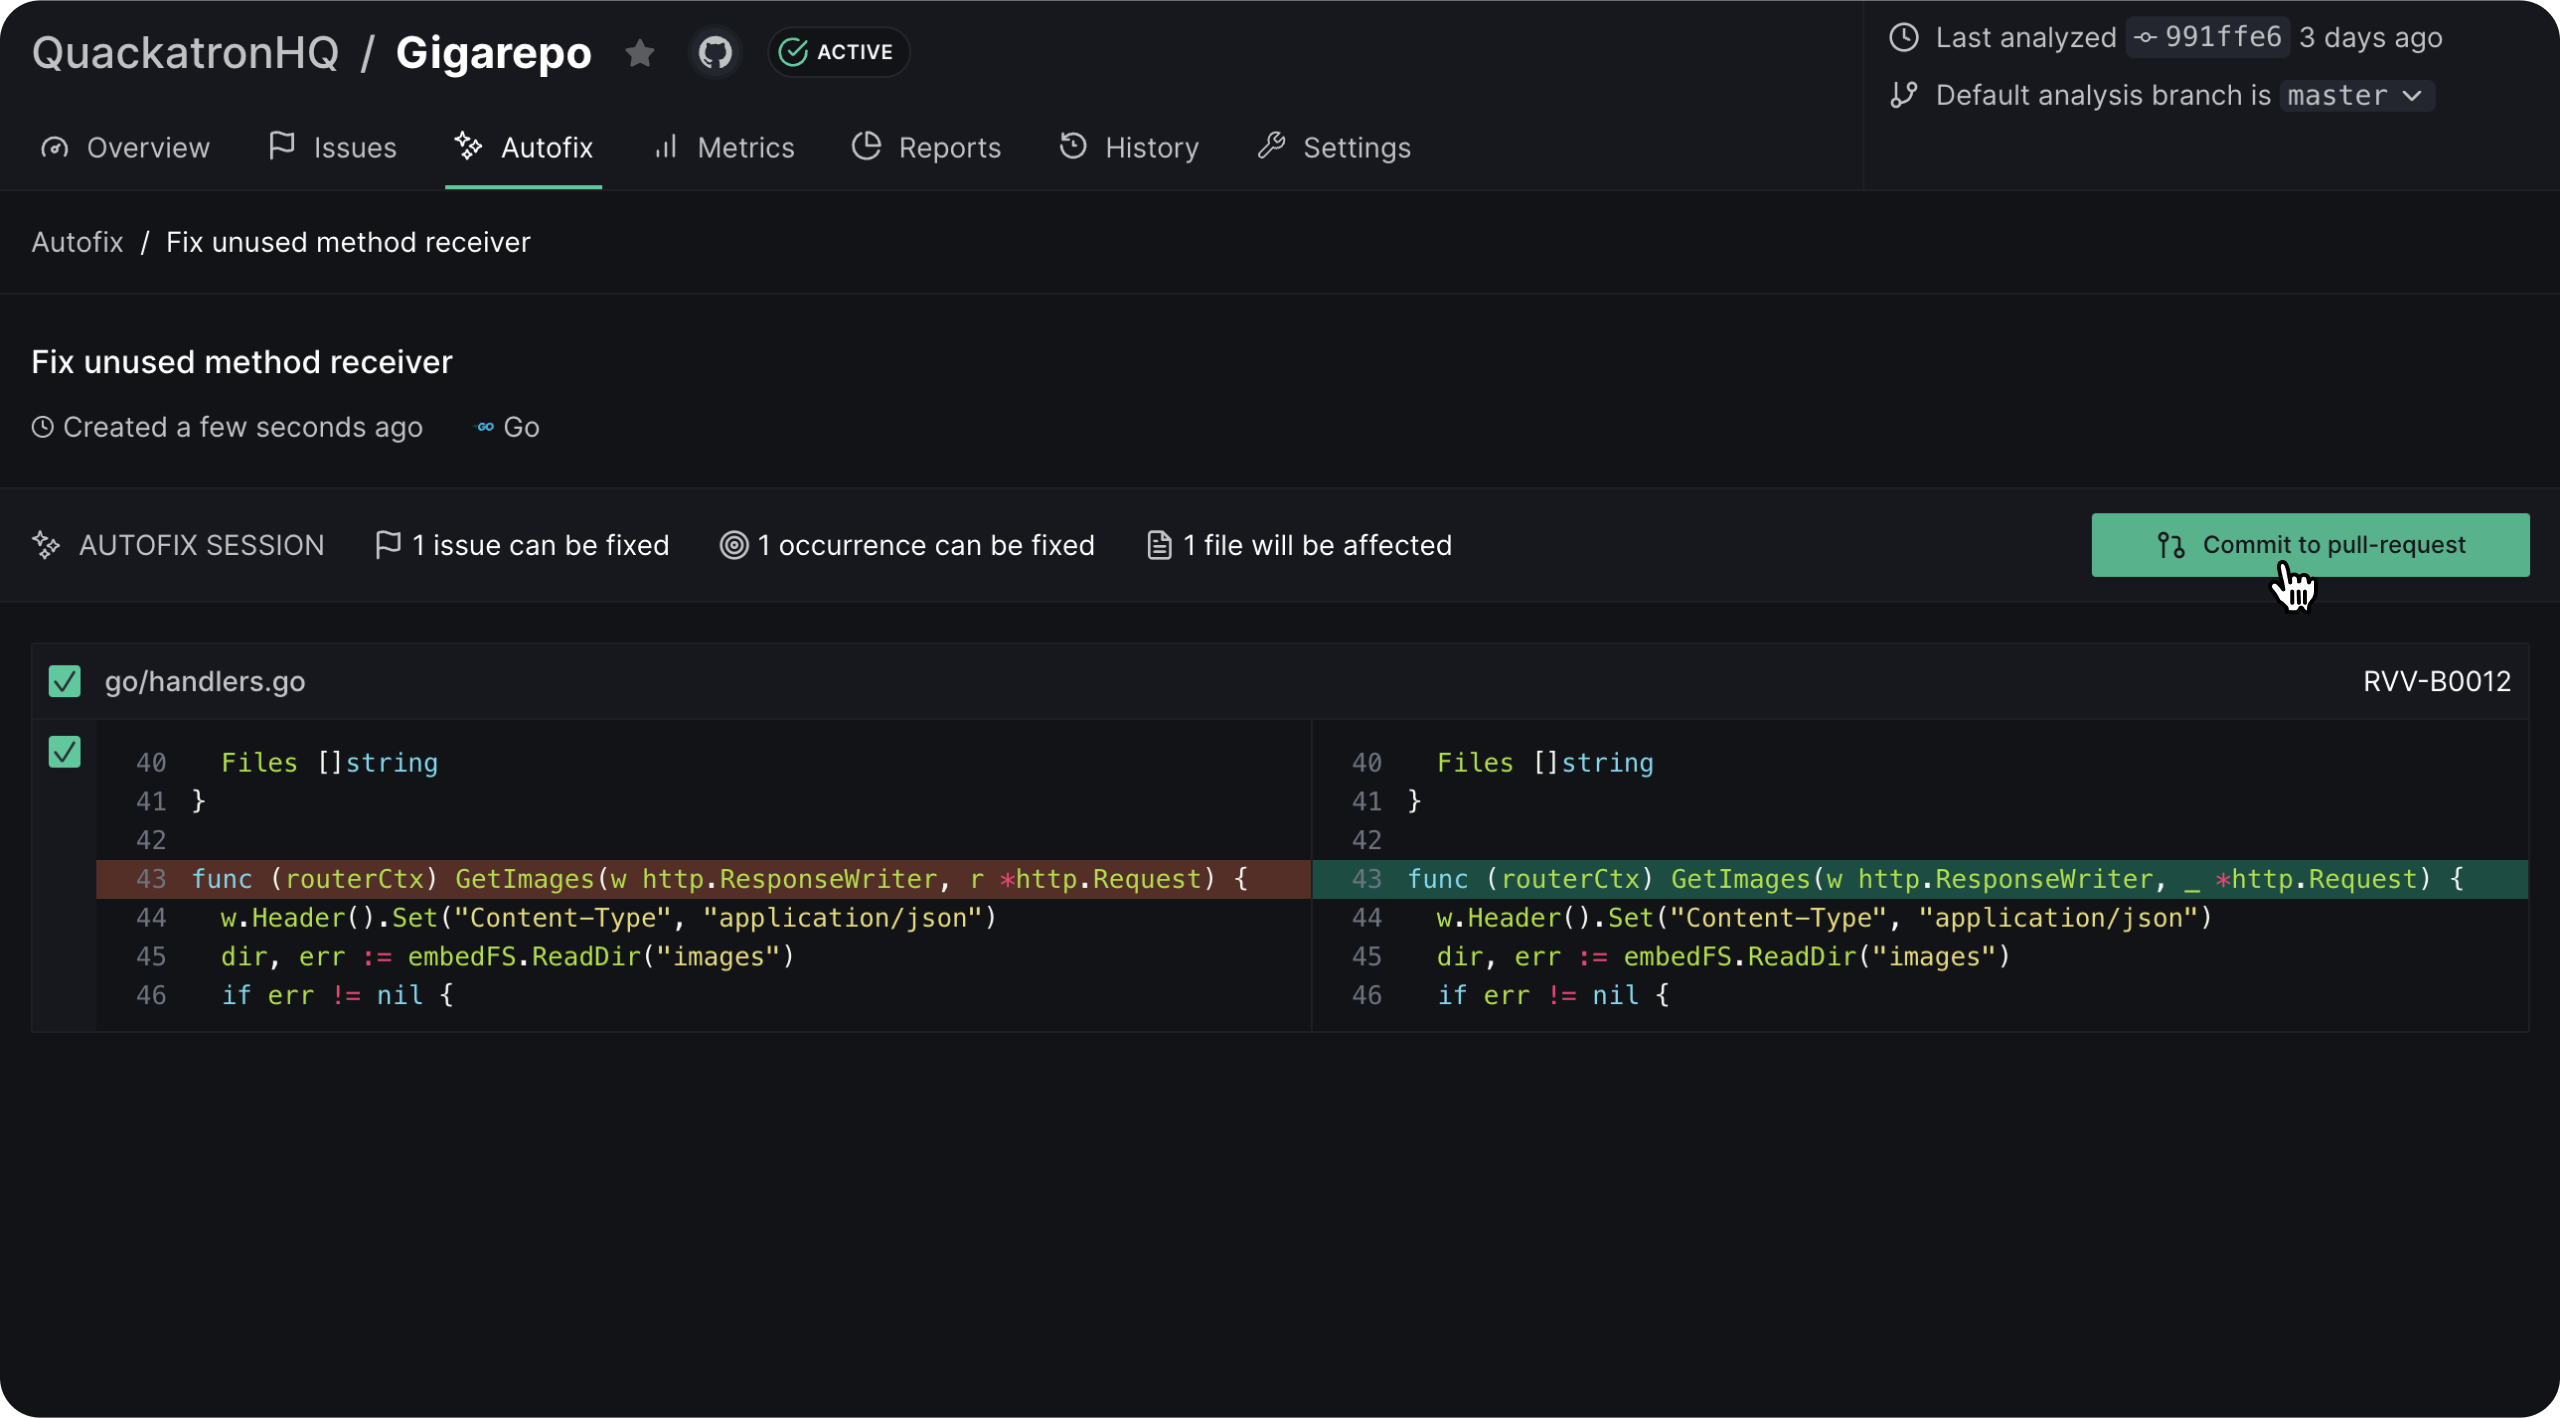
If any of these issues support Autofix™, you’ll see the Autofix™ button. In this case, the only difference is that running Autofix™ will create a commit directly on the PR.
Fixing Security Vulnerabilities
When DeepSource identifies security vulnerabilities in your project dependencies, you can remediate them using either Autofix (when available) or manual fixes.
Vulnerability Details
Before attempting to fix a vulnerability, it’s important to understand its details. DeepSource provides comprehensive information about each vulnerability:
- Vulnerability Title and CVE: Displays the full name and unique CVE identifier
- Affected Package: Shows which package contains the vulnerability and its version
- Severity Metrics: Multiple scoring systems (CVSS V3/V4/V2) to help assess severity
- EPSS Score: Shows likelihood of exploitation percentage
- Reachability Status: Indicates whether vulnerable code is called by your application
- Dynamic Risk Score: DeepSource’s custom metric combining CVSS, EPSS, and reachability analysis
Dynamic Risk Score helps you prioritize vulnerabilities based on real-world impact, allowing your security team to allocate resources more effectively.
Using Autofix for Vulnerabilities
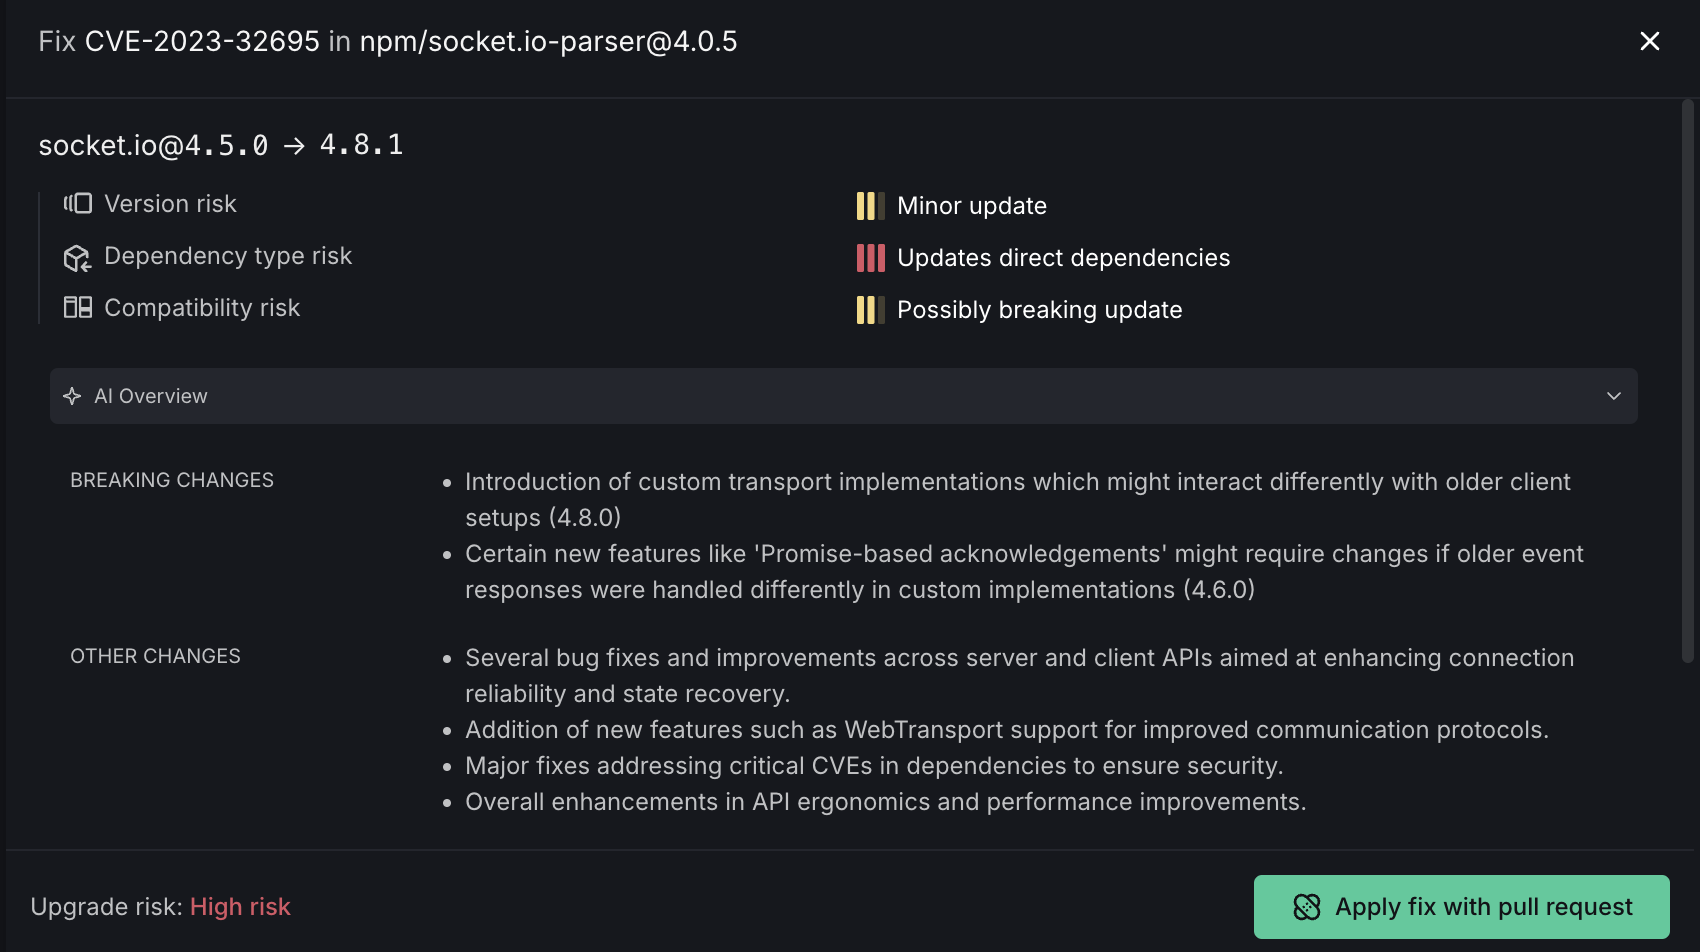
When available, Autofix provides the fastest way to remediate vulnerabilities in your dependencies:
The Autofix interface shows:
- Package Upgrade Information: The vulnerable package version and target fixed version
- Risk Assessment:
- Version risk indicator
- Dependency type risk
- Compatibility risk
- Update classification (Minor update, Updates direct dependencies, Possibly breaking update)
- AI Overview: Information about the fix, including a summary of changes and breakage risk score
To apply the fix, simply click “Apply fix with pull request” to automatically create a PR with the necessary changes.
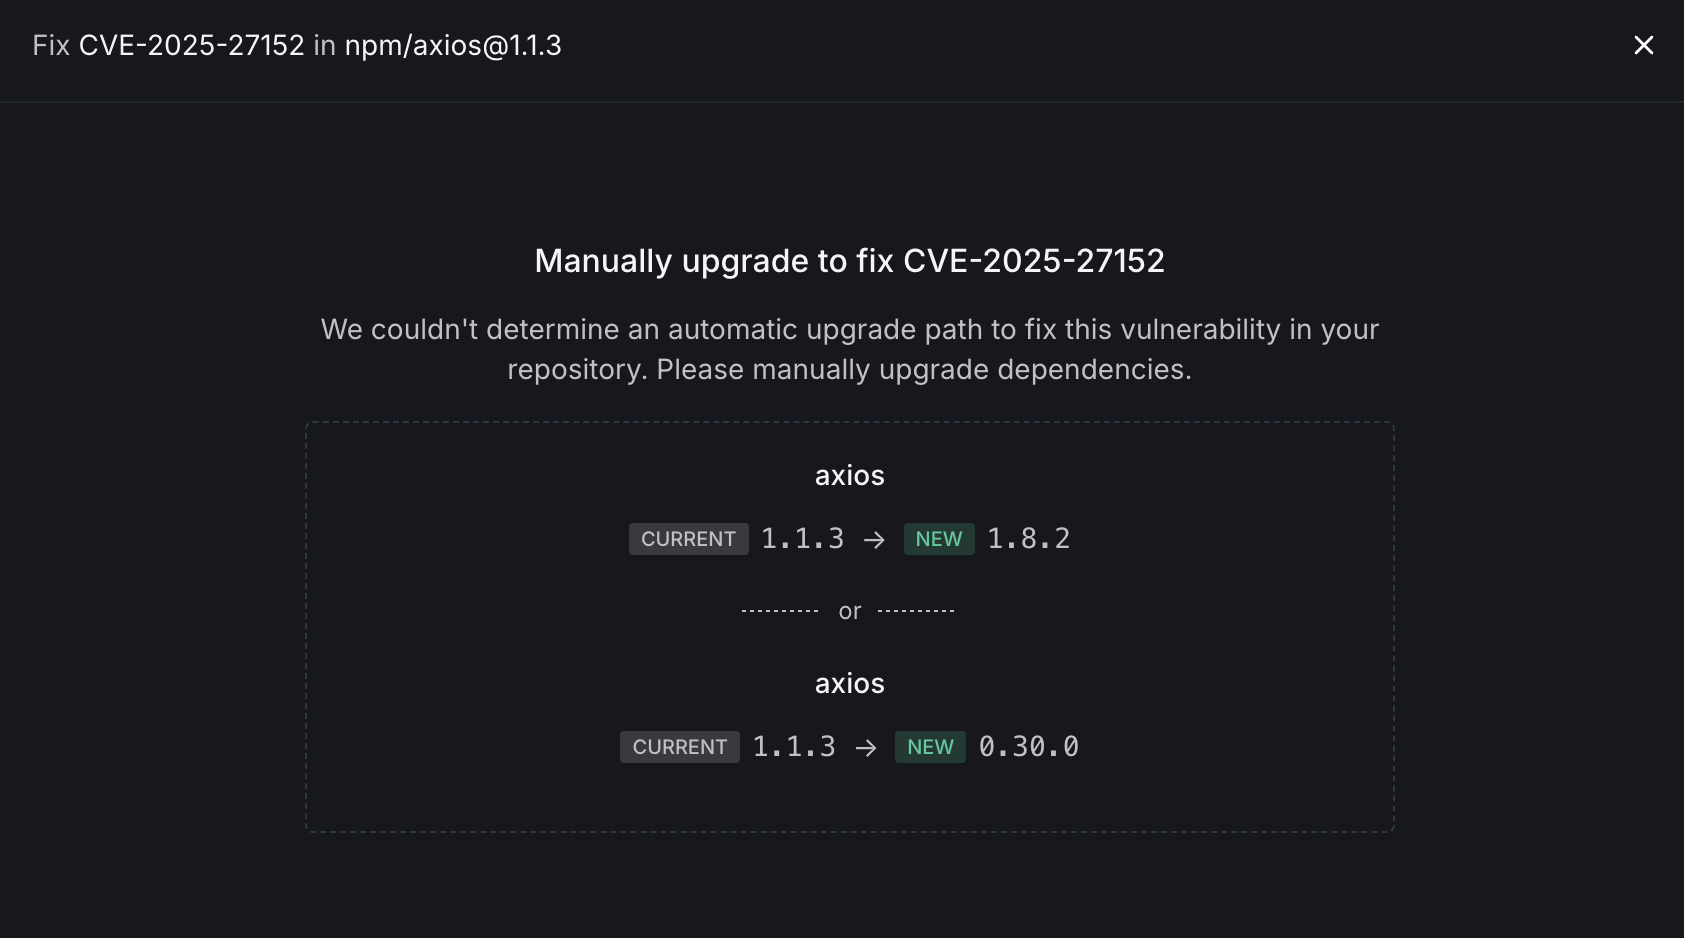
When Autofix isn’t available for a vulnerability, you’ll need to manually upgrade your dependencies:
The manual fix view provides:
- Package Information: Identifies the vulnerable package and version
- Upgrade Options: Presents multiple potential upgrade paths:
- Option 1: Upgrade to a newer version in the same major version line
- Option 2: Consider alternative versions that may involve more significant changes
After identifying the appropriate upgrade path, manually update your dependency manifest file and run your package manager’s update command to apply the changes.
Understanding Reachability
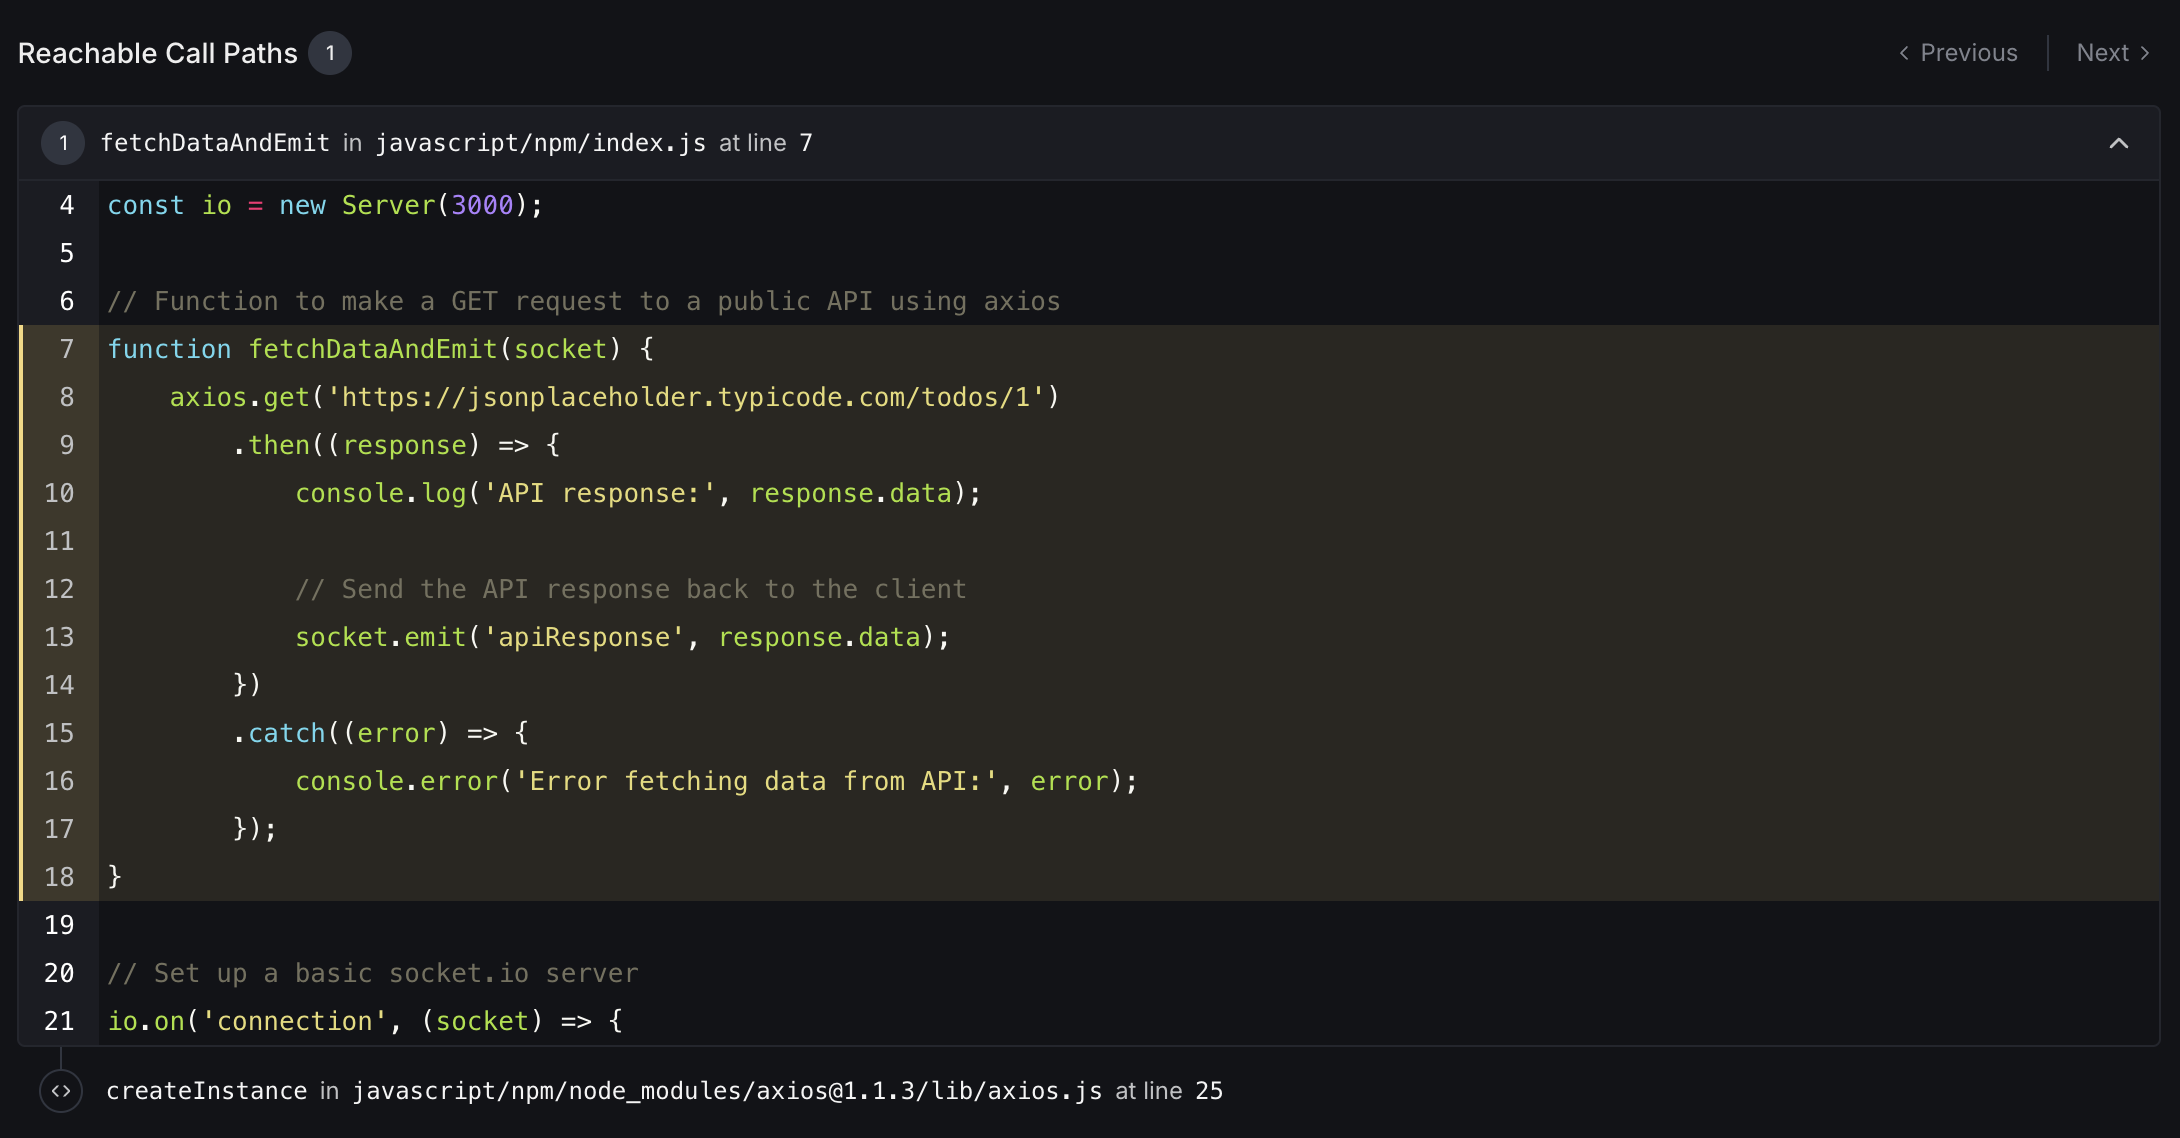
To help prioritize vulnerability fixes, DeepSource provides reachable call graphs for many vulnerabilities:
This section shows:
- Function Trace: The call chain from your application code to the vulnerable dependency
- Code Context: Relevant source code with line numbers and syntax highlighting
- Vulnerability Location: Exactly where the vulnerable code is being called
This information helps you understand how a vulnerability could be exploited in your specific application context, making remediation efforts more targeted and effective.
Steps on how to ignore an issue can be found here. 