
Setup
Learn how to set up and configure webhooks to listen for events from DeepSource.
Whenever an event is triggered, DeepSource sends a POST request to a URL configured by you. These events are usually specific points that happen during certain actions like Analysis, Autofix™, billing, team updates etc. You can use this to update an external issue tracker, to notify about check results on Slack or Telegram, and much more.
Note
Webhooks can be enabled for organization accounts only.
Begin using webhooks with your DeepSource account in just three steps:
- Create a webhook endpoint for your integration.
- Use the DeepSource dashboard to add that endpoint to your organization.
- Sip coffee while we send events to your configured URL.
You can find the list of all available events in the Events documentation.
Creating an endpoint
To create an endpoint, go to Settings from your sidebar and navigate to the Webhooks tab. If this is your first time using Webhooks, click 'Add a new endpoint'.
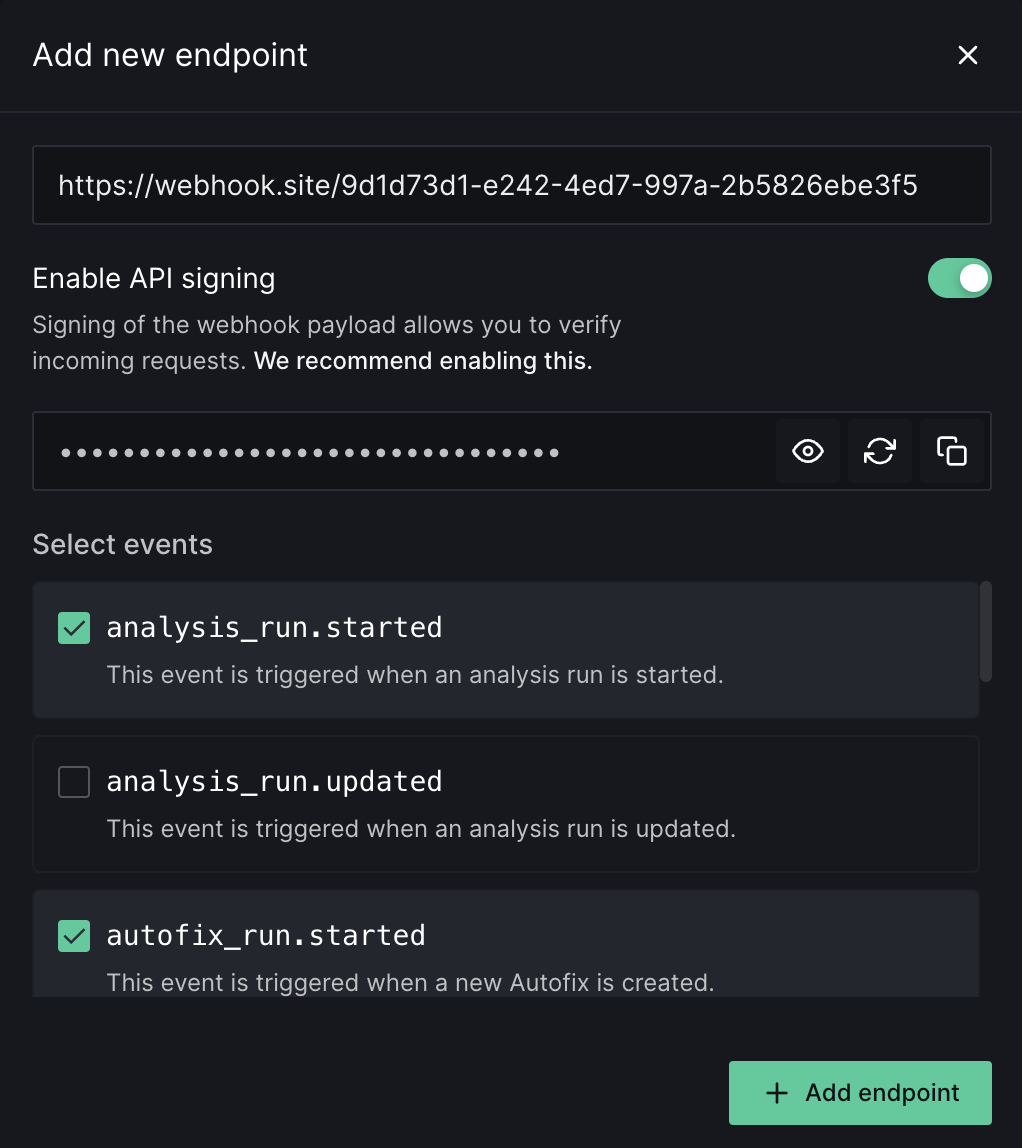
There are three options to configure:
- Endpoint URL: This has to be a public-facing endpoint that accepts a
POSTrequest. The payload will be sent to this endpoint whenever an event is triggered. - Enable API signing: This will send an HMAC signature of the payload, created using the secret configured by you. Enabling this will allow you to verify if the request was indeed sent by DeepSource. We recommend enabling this.
- Webhook secret: Secret for API signing mentioned above. This needs to be at least 16 characters.
Once you fill in these details, you will have to select at least one event. You can find the list of all available events in the Events documentation.
Once created, the webhook configuration will be saved, but webhooks will be activated only after verification of the test payload
Enabling an endpoint
To enable an endpoint you will have to verify the endpoint by sending a test event.
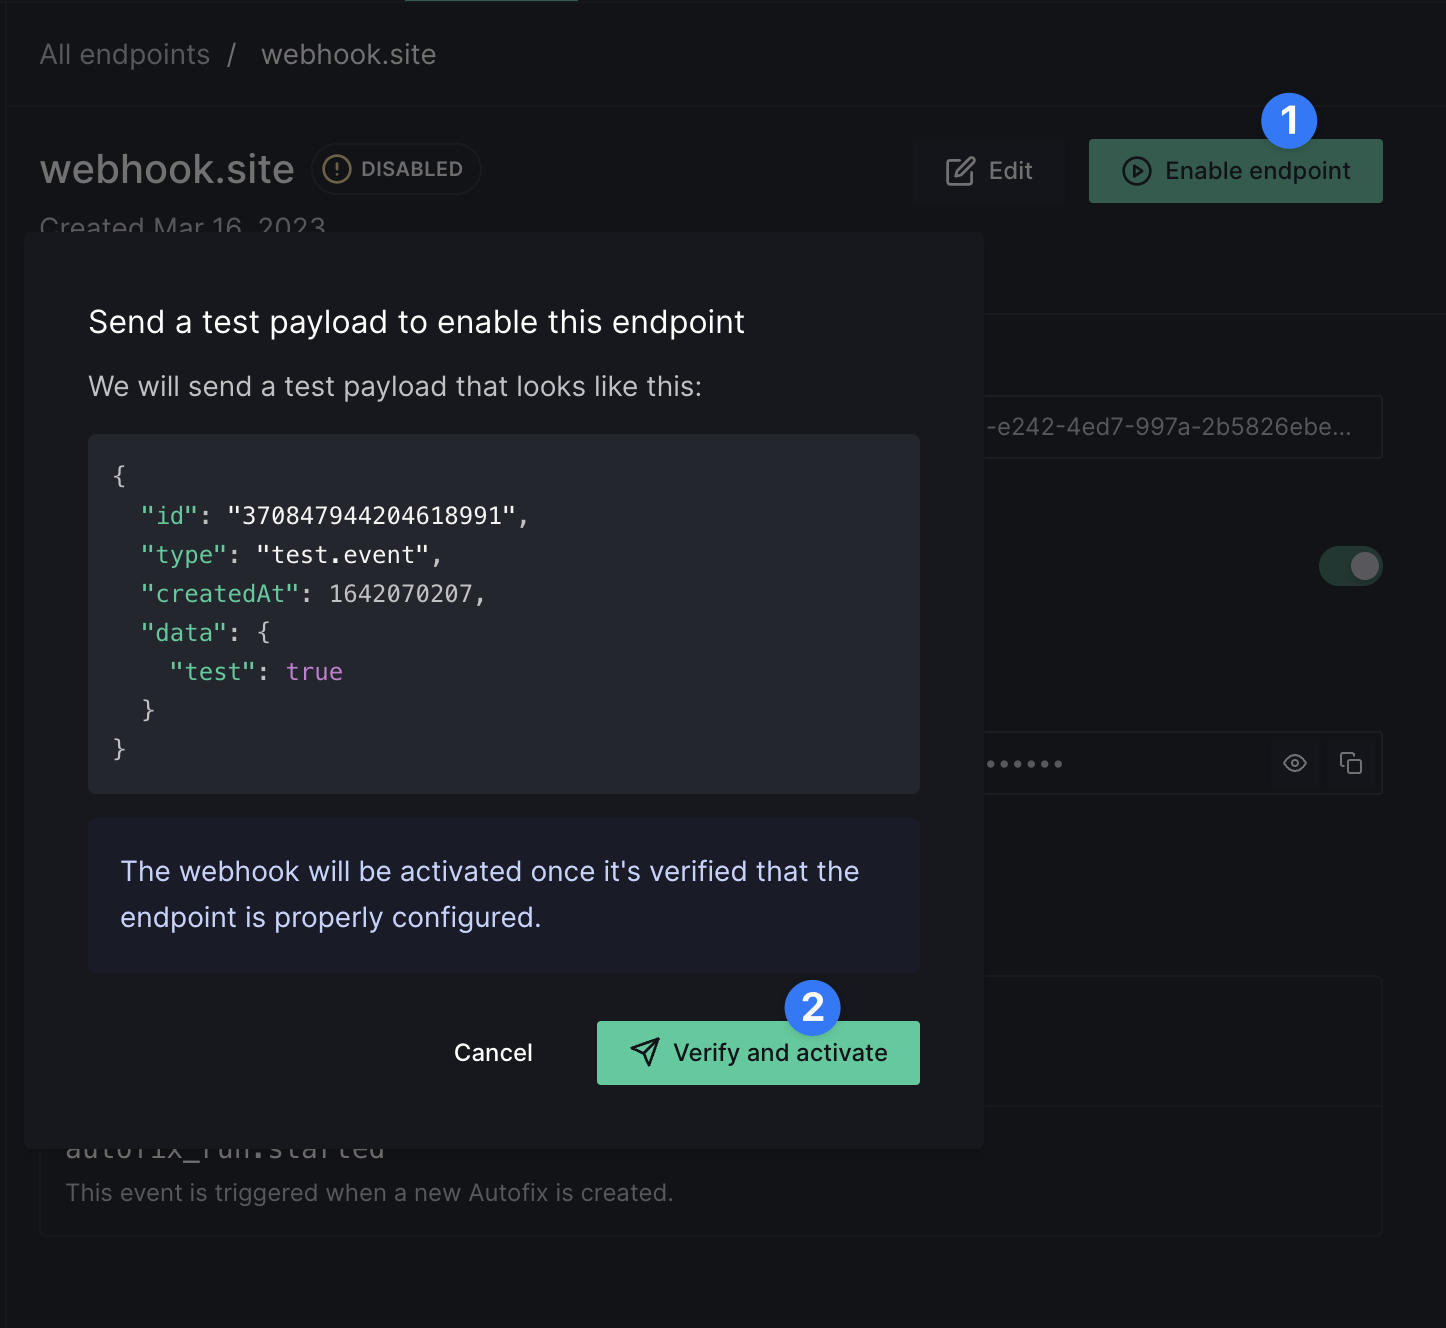
Once we receive a 2XX response from the endpoint, the webhook will be activated.
Testing an endpoint
After activation, you can test your endpoint whenever you want by sending a test payload. The test payload is the same one used for activation.
Verifying the payload
If API signing is enabled, every request will have a x-deepsource-signature header. This signature is generated by hashing the payload with the secret provided by you. It can be used to verify the authenticity of the payload. HMAC is widely supported across programming languages and frameworks, here are a few implementations to get you started.
Event Structure
Each webhook event is structured as follows:
{
  "id": "<EVENT_ID>",
  "type": "<EVENT_TYPE>",
  "createdAt": "<UNIX_TIMESTAMP>",
  "data": {
    "object": { ... },
    ... // Additional fields
  }
}id: A unique id to identify this webhook event delivery.type: The triggered webhook event's shortcode.createdAt: A UNIX timestamp of when this event was created.data.object: The object associated with the webhook event. For e.g., in the case ofanalysis_run.updatedwebhook event,data.objectis anAnalysisRunobject.- Other than
data.objectthere can be additional fields depending on the webhook event.