Supported Analyzers
| Analyzer | Version | Shortcode | Repository |
|---|---|---|---|
| AWS CloudFormation | 0.83.0 | cfn-lint | https://github.com/aws-cloudformation/cfn-lint |
| Dart Analyze | 3.2.0 | dart-analyze | https://github.com/dart-lang/sdk/tree/main/pkg/linter |
| Kube Linter | 0.6.4 | kube-linter | https://github.com/stackrox/kube-linter |
| Slither | 0.10.0 | slither | https://github.com/crytic/slither |
| Solhint | 4.1.1 | solhint | https://github.com/protofire/solhint |
Setting up Community Analyzers on your repository
Incorporating Community Analyzers into your workflow is a simple process.- Begin by adding the analyzer into your
.deepsource.tomlconfiguration file. This step is akin to activating core analyzers in DeepSource. - Set up the
DEEPSOURCE_DSNenvironment variable within your Continuous Integration (CI) system. - Finally, integrate the analyzer into your CI system. For your convenience, we provide pre-formulated CI snippets for all major CI systems. Simply select and insert the appropriate snippet for the respective analyzer from the Analyzer Directory into your chosen CI system’s configuration.
-
Enable the analyzer by adding it to your repository’s
.deepsource.tomlconfig file. For example, if you want to enable Dart Analyze on your project, add the following to your.deepsource.tomlfile:We recommend you perform this action from your dashboard by navigating to the respective Repository → Settings → Configuration and then clicking on the Regenerate Configuration button. In case, you are activating a repository for the first time, please use the Activate a repository feature from your team’s dashboard.toml -
Set up
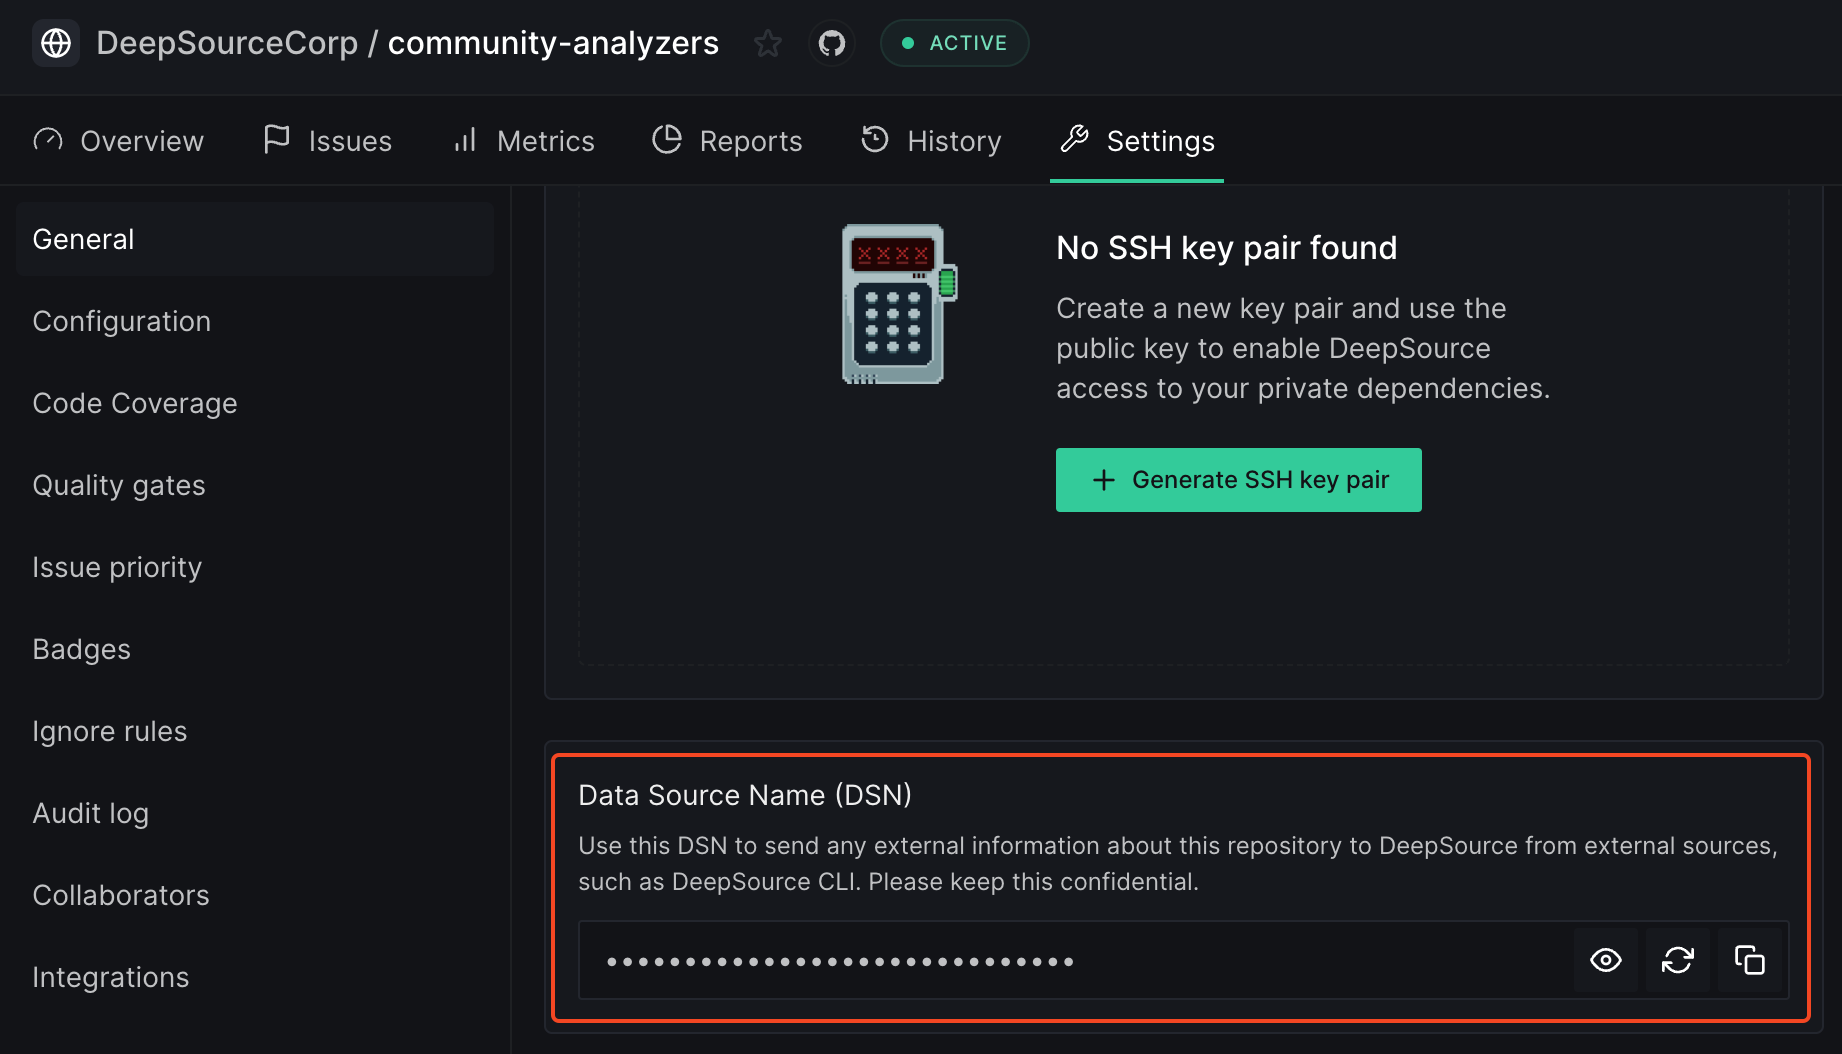
DEEPSOURCE_DSNenvironment variable for the project in your CI/CD pipeline. The DSN is used to associate the analysis report to the repository. This needs to be configured before sending the analysis report to DeepSource. To look up the DSN:- Go to the Settings page of the repository dashboard in DeepSource
- Go to the
Generaltab - Click on Copy button to copy your DSN mentioned under
Data Source Name (DSN)

-
Set up a workflow file to run the analyzer on your CI/CD pipeline. We want to achieve the following in the workflow file:
- Install and run the analyzer on an event of your choice. We recommend you do this on every push to the default branch of the repository and branches that have a pull/merge request open.
- Send the analysis report to DeepSource once the analyzer has run and generated a SARIF report.
yaml
If you already have a workflow file for your CI provider, or it is not listed in the analyzer’s page, you can add the following step to your workflow file to send the analysis report to DeepSource (in the syntax of your CI provider):We have used an example of GitHub Actions here. You can port the command to your CI provider’s syntax. Please make sure to replace the
YAML
<analyzer-shortcode> and <path-to-sarif-report> with the actual values.How does it work?
Once you have set up the analyzer on your project, open a pull request or push a commit to your default branch. You should be able to see the issues from the analyzer on your project’s dashboard in DeepSource. Please note that the Issues are shown on the dashboard only for the reports sent for runs on the default branch of the repository, as configured on DeepSource. For a Pull/Merge Request, you’ll see only new issues in the files that are introduced and not all the issues. This is to help you focus on the new issues introduced by the PR and not deal with noise from issues that are not related to the changes in the pull request.New issues are the issues that are not present in the default branch of the repository. In the behavior described above, DeepSource compares the file’s issue in the PR with the ones present in the default branch, and shows only the new ones in the analysis run.