General
In the General section of the Settings menu in DeepSource, you can perform the following actions:- Manage your VCS provider connections.
- Choose to fail checks when data isn’t reported.
- Generate an SSH key pair.
- Access advanced settings, such as deleting a team. By selecting this option, you can permanently remove your team and all its contents from the DeepSource platform.
Secrets Analyzer
You can choose the detection engine used by the Secrets Analyzer in the Preferences section.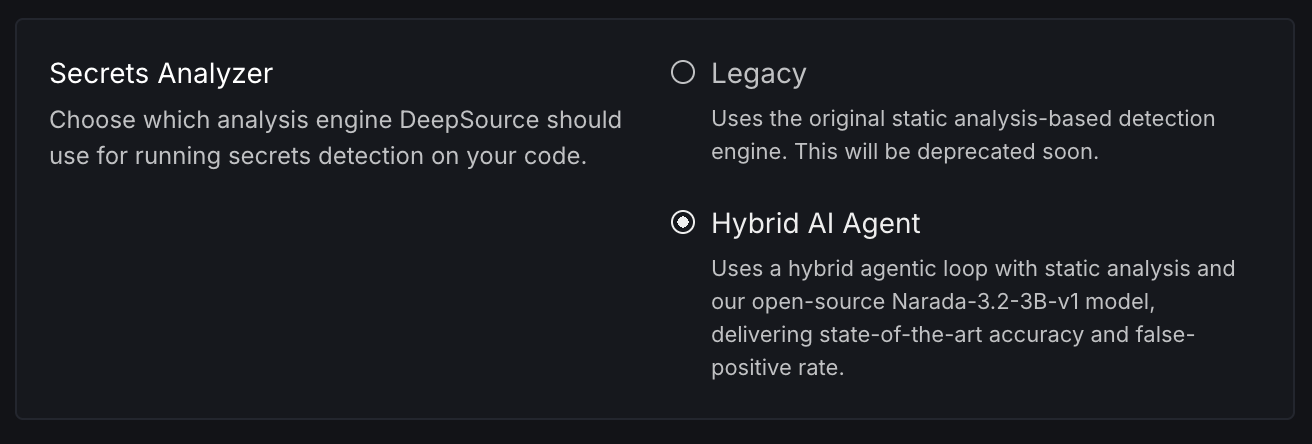
Changing the detection engine for the Secrets Analyzer is available on all plans on DeepSource Cloud. We currently do not support this on DeepSource Enterprise Server.
Billing
Upgrade plan
To upgrade your DeepSource plan, you can choose between two options: the Starter plan or the Business plan. These plans are designed to meet the needs of small to medium-sized teams. For larger teams with specific needs, there is an Enterprise plan that supports on-premise deployments. Choose the plan that best suits your team’s requirements.View usage details of the current plan
You can view the usage details of your current DeepSource plan by navigating to the usage details section. Here, you will find information about the number of seats used, commits analyzed, code formatter runs, and Autofixed runs used. This information can help you track your team’s usage and ensure that you are making the most of your plan.Edit billing information
To edit your billing information, you can navigate to the billing section and make changes to your billing email, billing address, and credit card information.For the Enterprise plan, billing is managed manually, and if you need to make any changes to your plan, you must contact DeepSource support. To do so, click on ‘Contact DeepSource,’ and a member of our team will respond to your inquiry as soon as possible.
Access control
Provider permissions
To simplify access management in DeepSource, you can enable Provider Permissions by toggling it on. This feature allows you to automatically sync access settings from your GitHub account, saving you the time and effort required to manage access settings manually.Access permissions
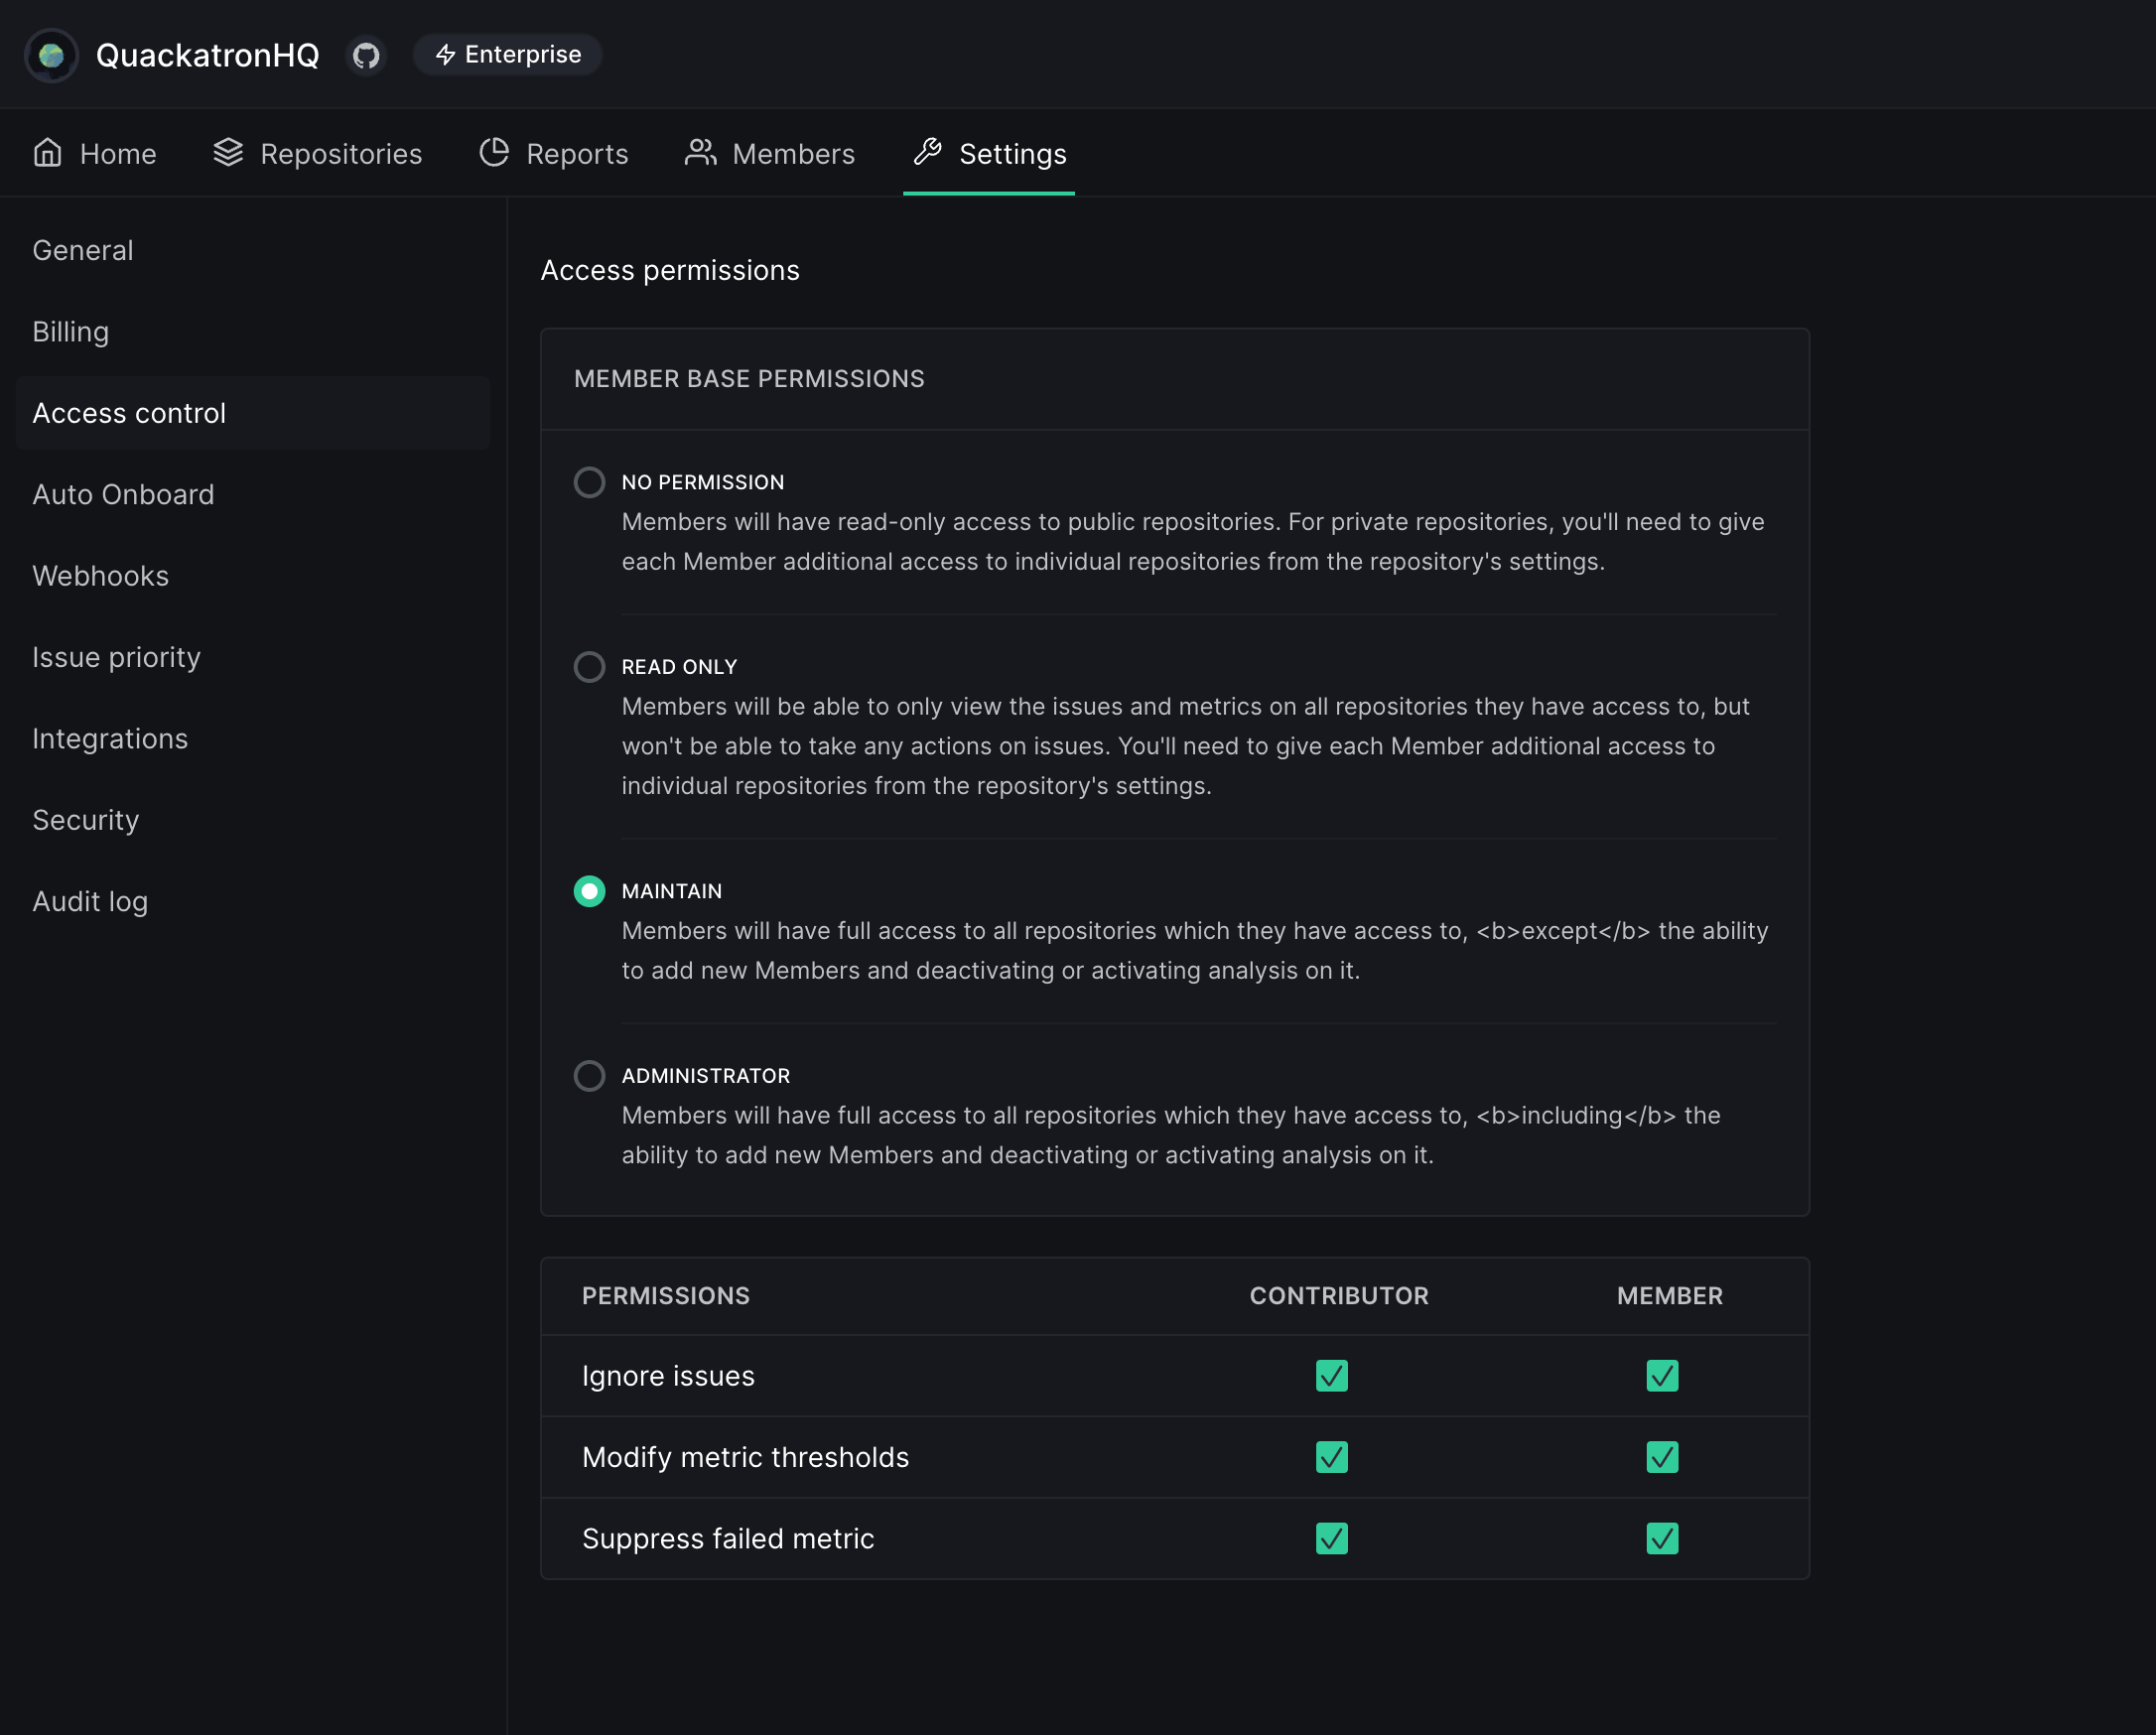
Member base permissions
Team Administrators can set base permissions for team-owned repositories. These base permissions apply to all team members when accessing any of the team’s repositories.Base permissions do not apply to contributors or administrators. If a team member is granted a higher level of permission for a repository by an administrator, the higher level of permission will override the base permission.
Issue, metric thresholds, and suppress metric permissions
Team Administrators to grant or revoke permissions to members and contributors for ignoring issues, modifying metric thresholds, and suppressing failed metrics. This helps ensure that the right people have the appropriate level of access to manage issues and metrics effectively. To grant or revoke these permissions, go to the Issue, Metric Thresholds, and Suppress Metric Permissions section. From there, you can select which level of access to grant: member, contributor, or both. You can also choose to revoke access if necessary.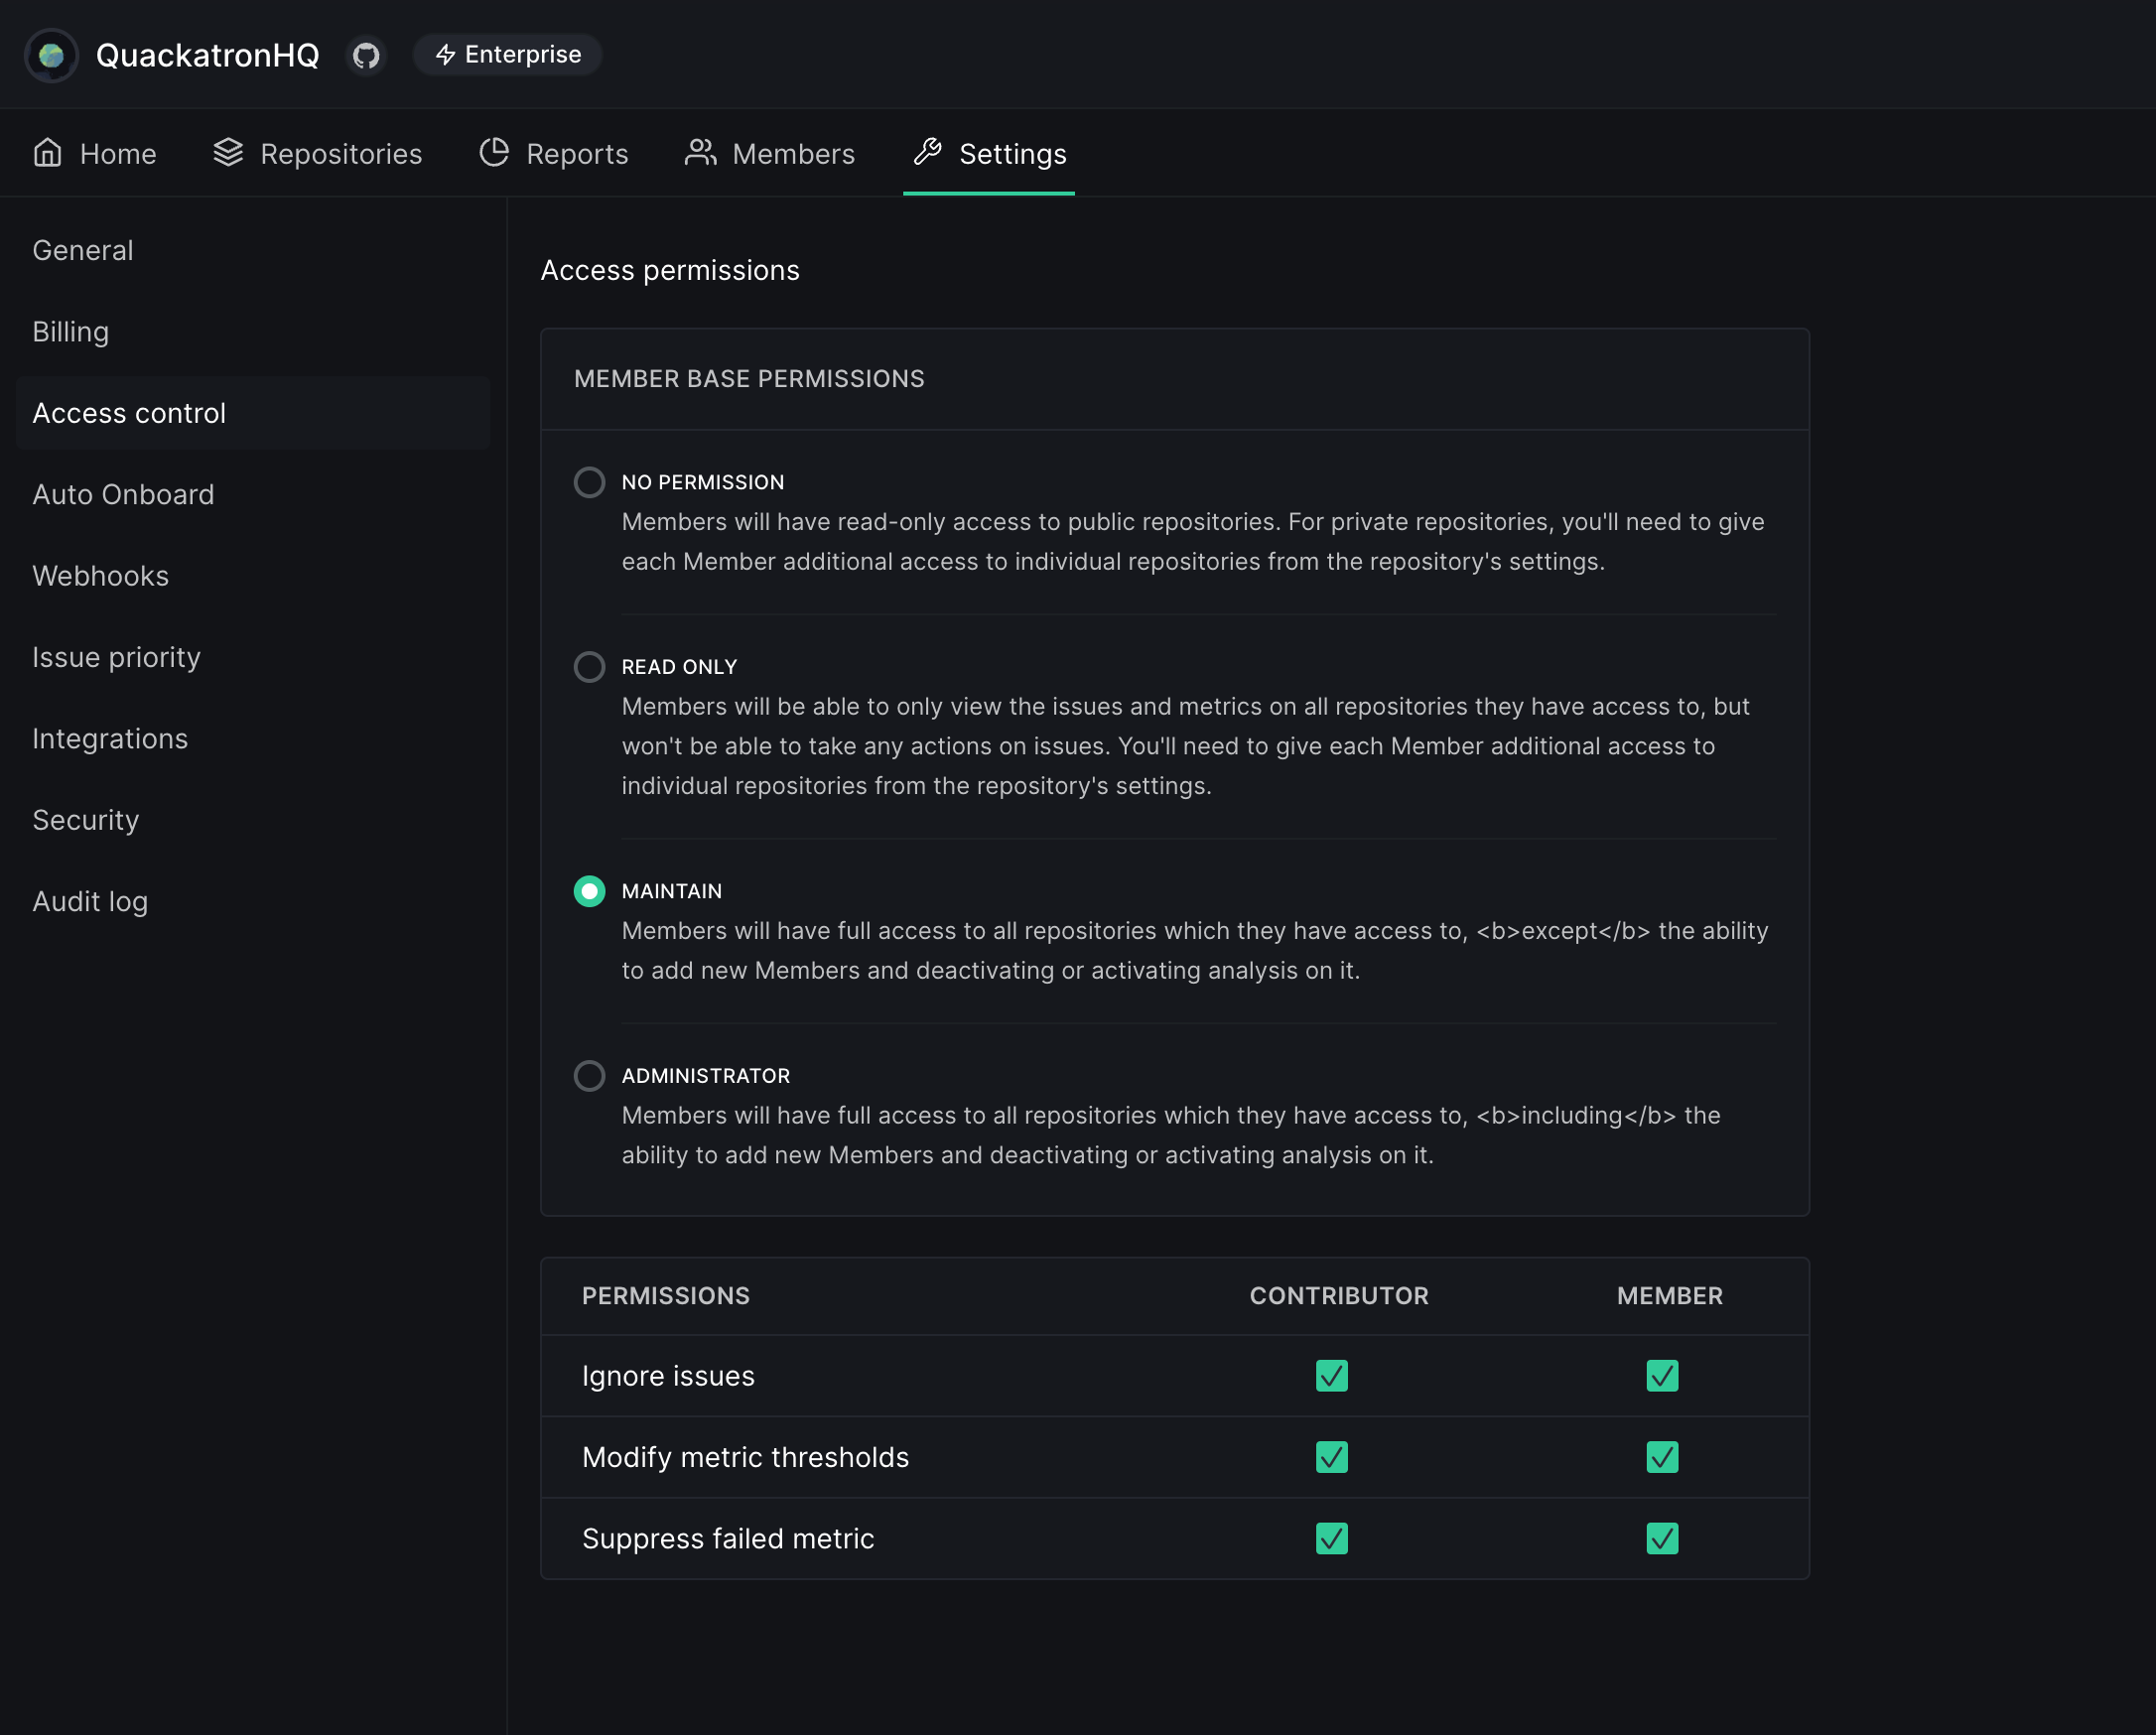
Autofix™ AI
-
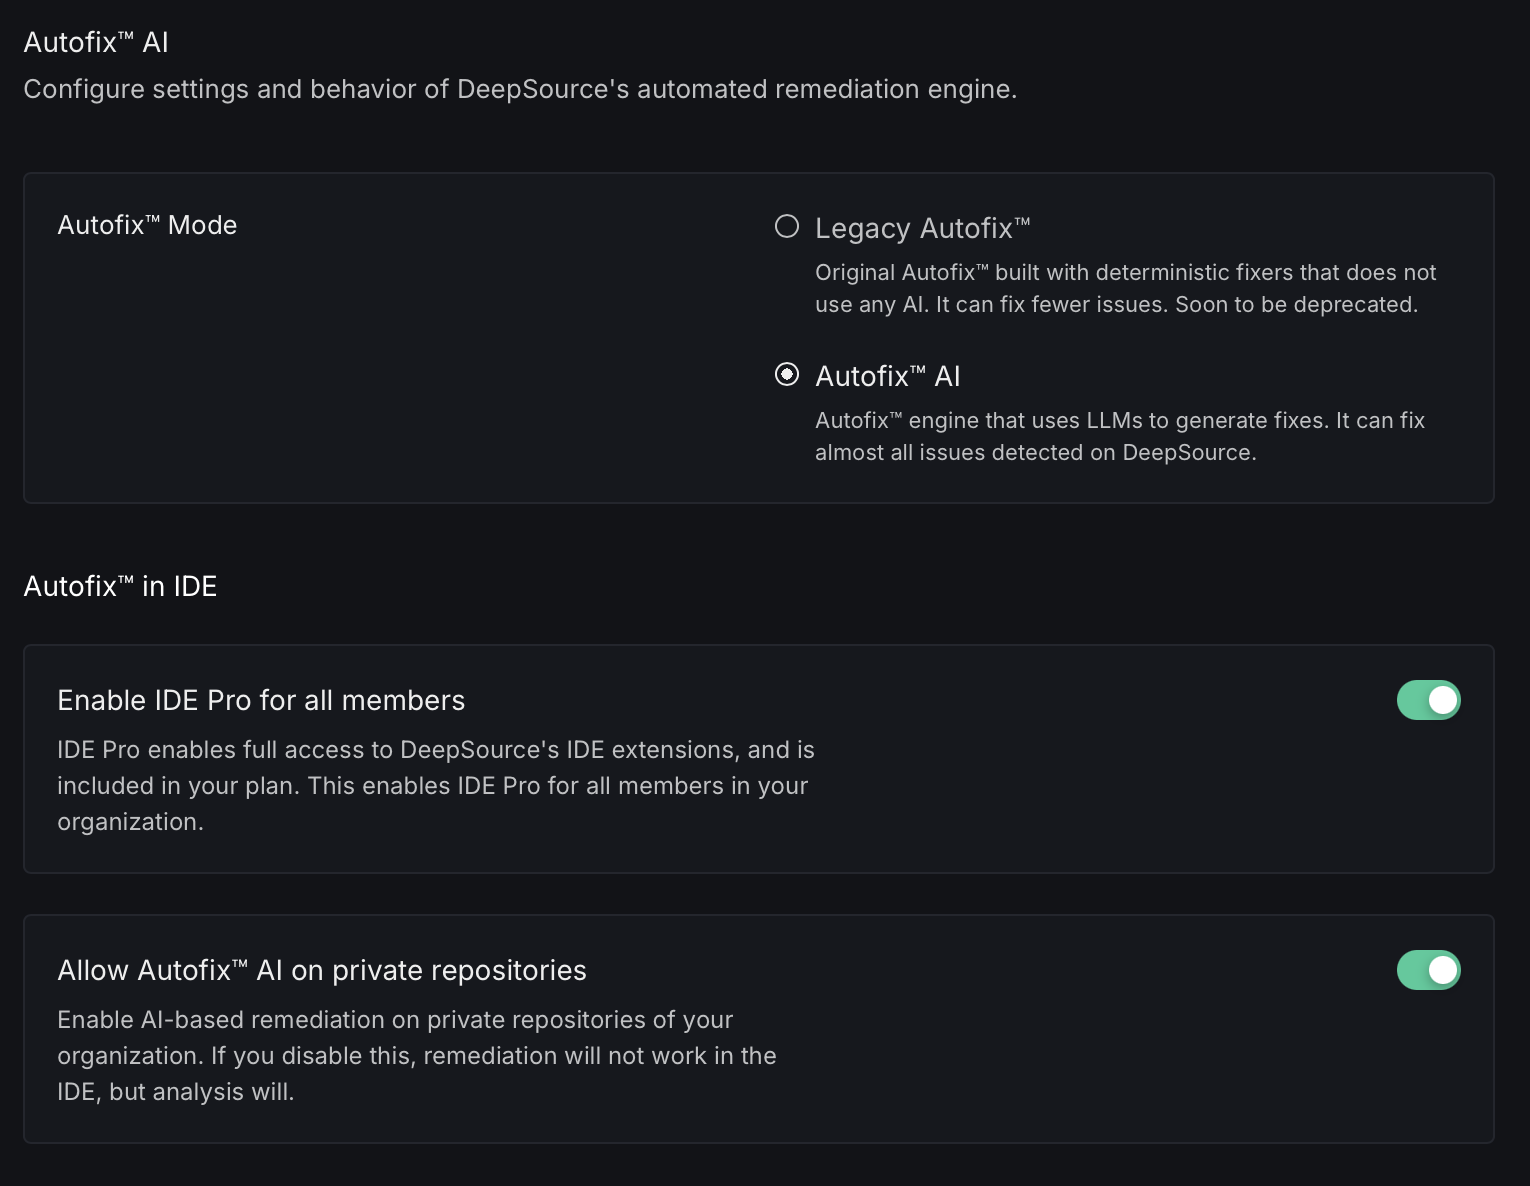
Autofix™ Mode: Choose between two engine options:
- Legacy Autofix™: Original deterministic fixers that don’t use AI capabilities. This mode can fix fewer issues but uses proven rule-based approaches. Note that this option will soon be deprecated.
- Autofix™ AI: The advanced remediation engine powered by LLMs (Large Language Models) that can generate fixes for almost all issues detected by DeepSource.
-
Autofix™ in IDE: Configure how Autofix works with our IDE extensions:
- Enable IDE Pro for all members: Toggle to provide full access to DeepSource’s IDE extensions for all organization members. This feature is included in your plan.
- Allow Autofix™ AI on private repositories: Enable or disable AI-based remediation for private repositories in your organization. If disabled, remediation won’t work in the IDE for private repositories, though analysis will continue to function.
Auto Onboard
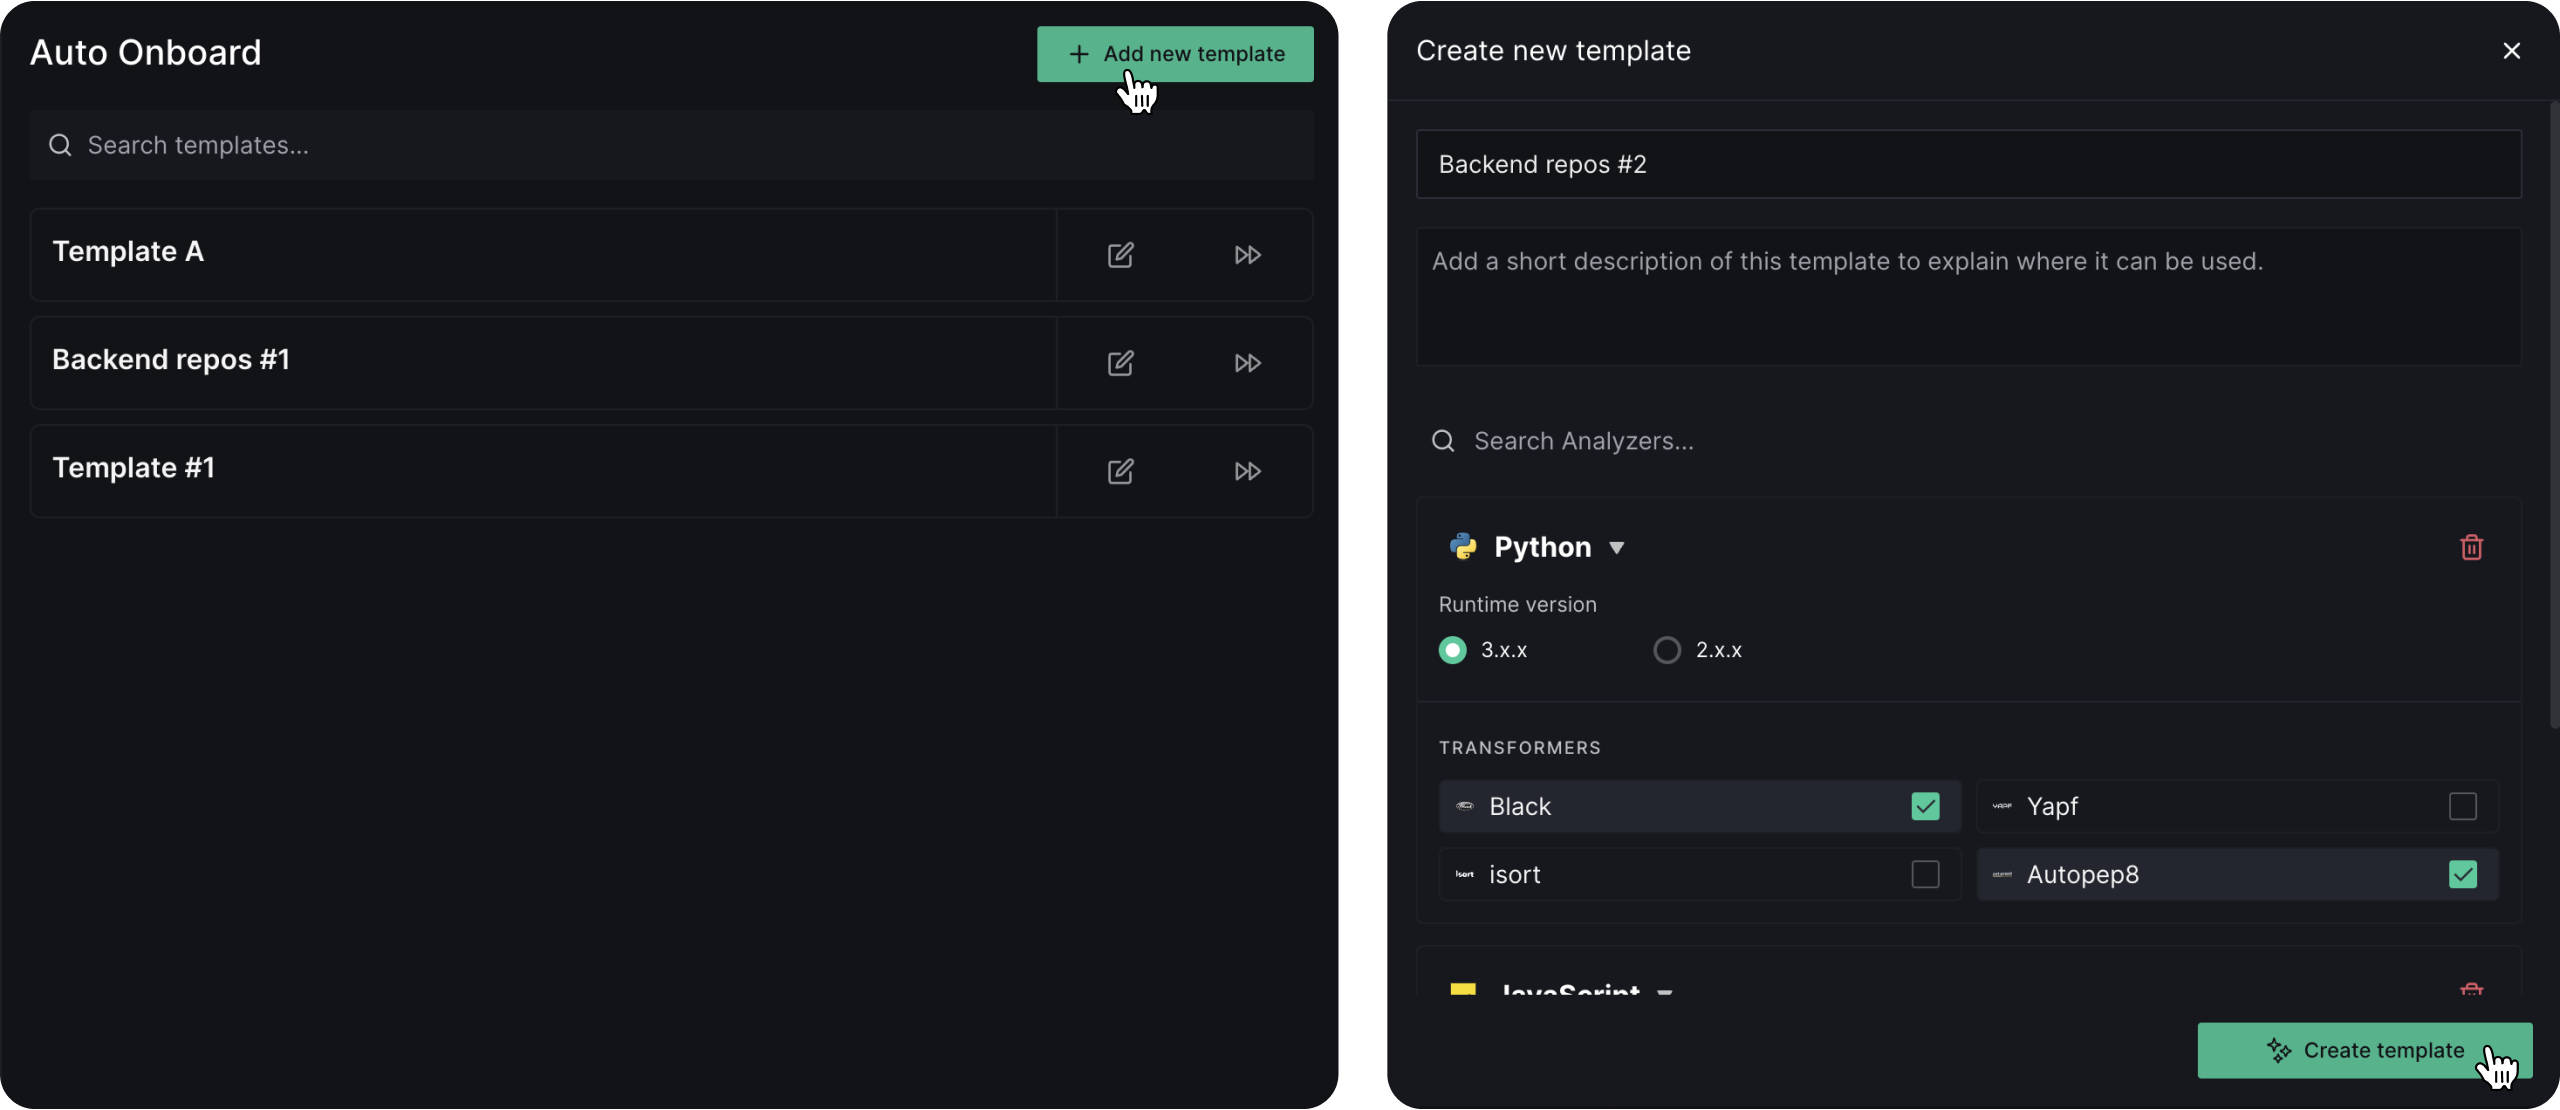
With Auto Onboard, you can create configuration templates to easily activate analysis on multiple repositories in one go. This is especially useful for large teams with multiple repositories as it eliminates the need to manually configure the .deepsource.toml file and activate DeepSource for each repository. To create a new template, simply click on “Add new template”, give it a name and description, and select which Analyzers you want to enable for analysis. Once the template is created, click ‘Use template’ button and select the repositories to onboard this template with. DeepSource will automatically create pull requests to all the selected repositories with a.deepsource.toml file. Once merged, analysis will be automatically activated on your repositories.
We recommend you notify the repository maintainers to expect the pull request from DeepSource and send link to the Auto Onboard guide.
Webhooks
DeepSource’s webhooks allow you to automatically trigger reactions in response to specific events that occur in your account. With webhooks, you can easily integrate DeepSource with your other tools and services, such as issue trackers, messaging platforms, and more. To get started, configure an endpoint URL that can receive a POST request from DeepSource whenever an event is triggered. You can also choose to enable API signing, which adds an extra layer of security by including an HMAC signature of the payload. To configure your webhooks, click on ‘Add new endpoint’ and provide the required details, including the endpoint URL, webhook secret, and one or more events to trigger the webhook. Note that webhooks are only available for organization accounts.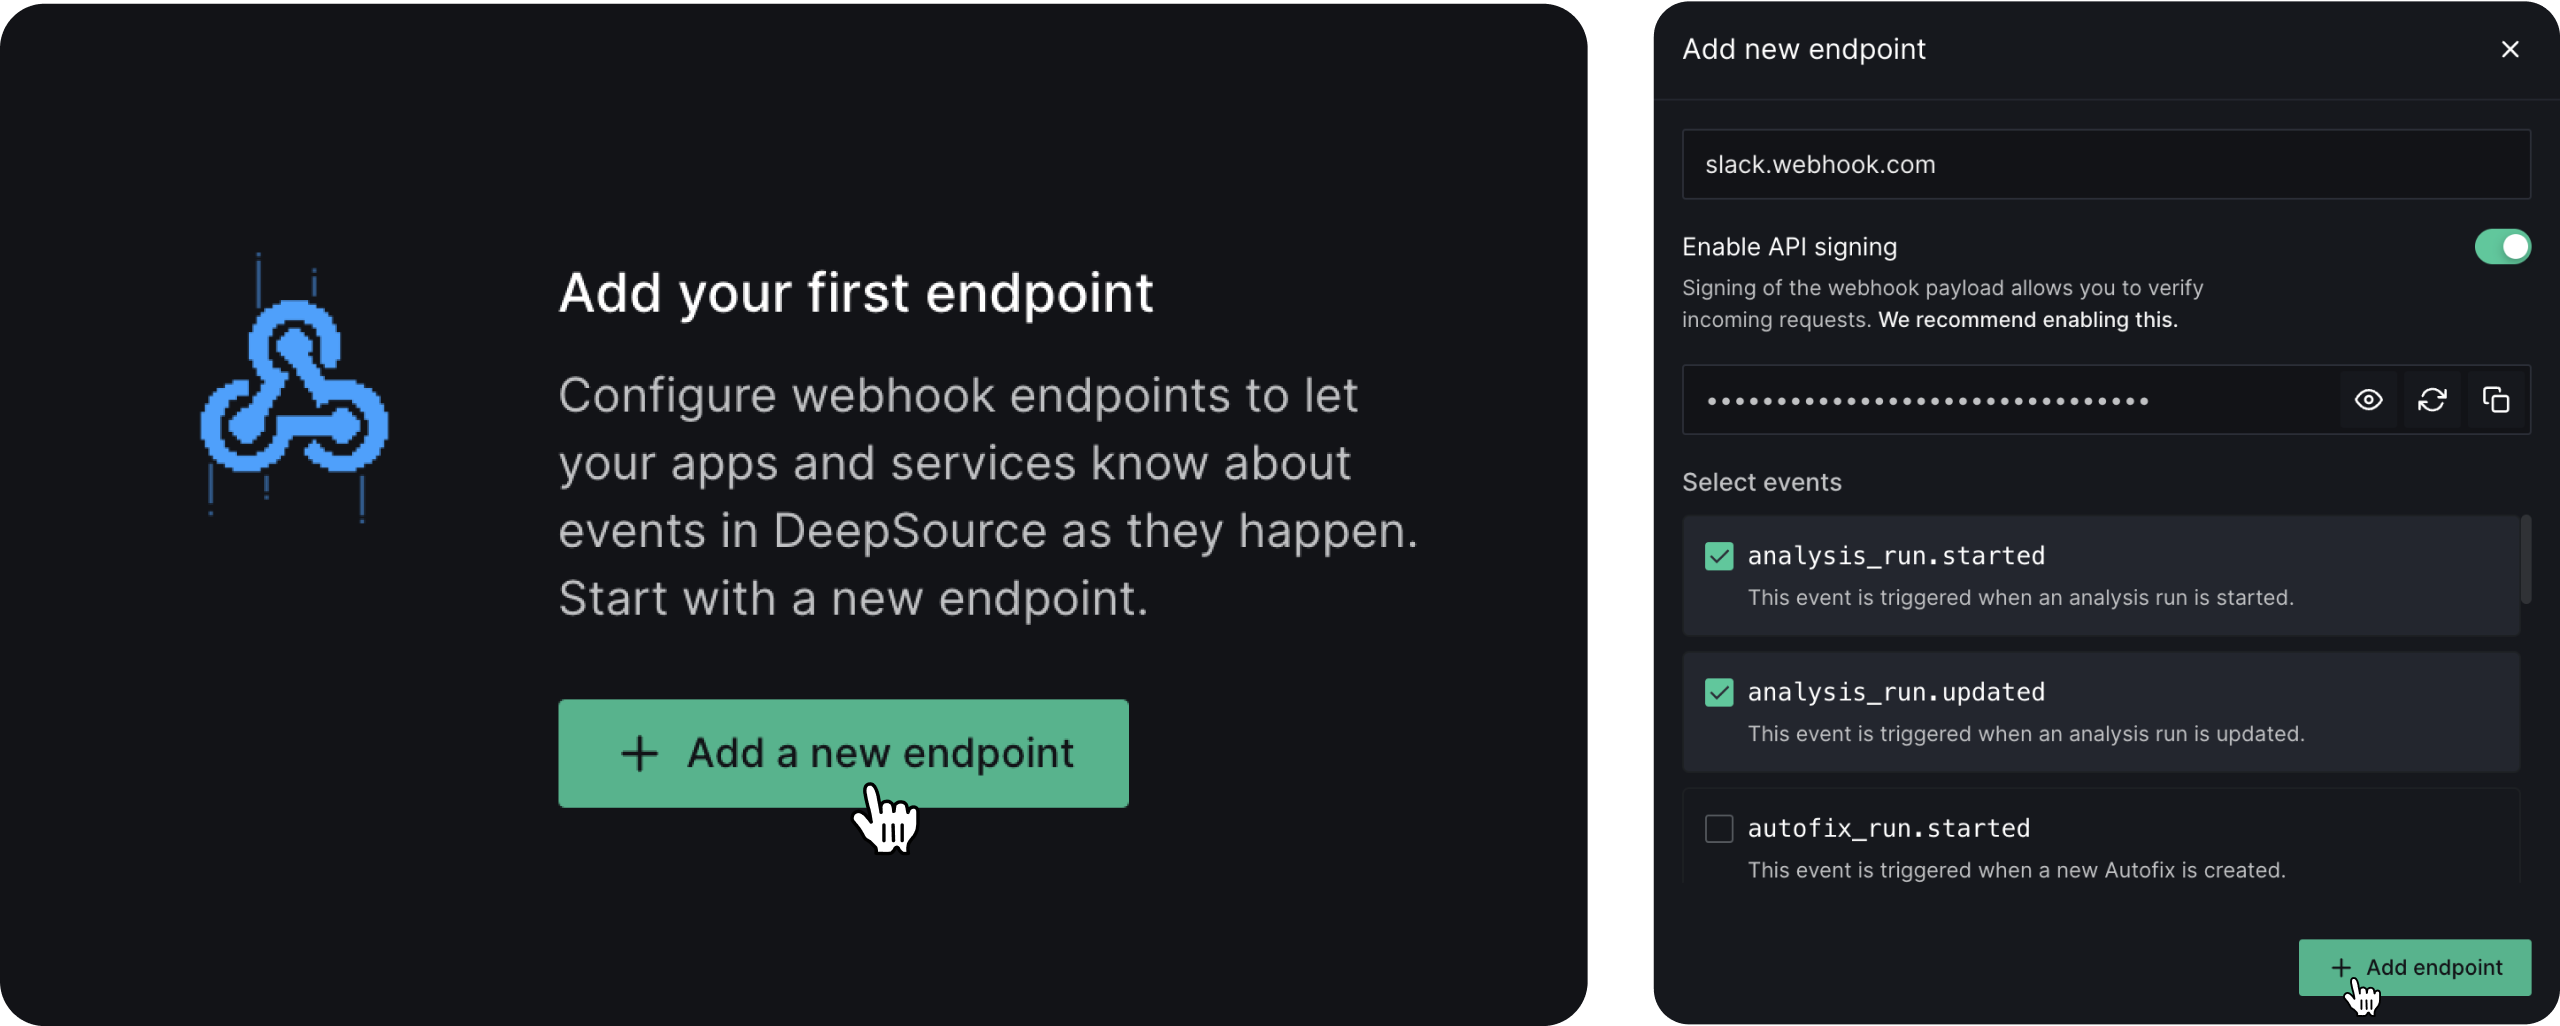
Integrations
Slack integration
With the Slack integration, you can receive DeepSource updates directly in your Slack workspace. By enabling this integration, you’ll be notified about the following events:- New issues introduced in the default branch
- Issues resolved in the default branch
- Issues fixed with Autofix™
- Repository activation status changes