Slack
To integrate DeepSource with Slack you need a Slack application. This document outlines the configuration, permission requirements and app configuration to get started with it.
Creating the Slack app
To create the app, you can run this quick setup script with a few additional steps. The script will create a Slack app manifest that can be used to easily create a Slack app.
python3 <(curl -s https://raw.githubusercontent.com/DeepSourceCorp/enterprise-assets/master/integrations/create_slack_app.py)-
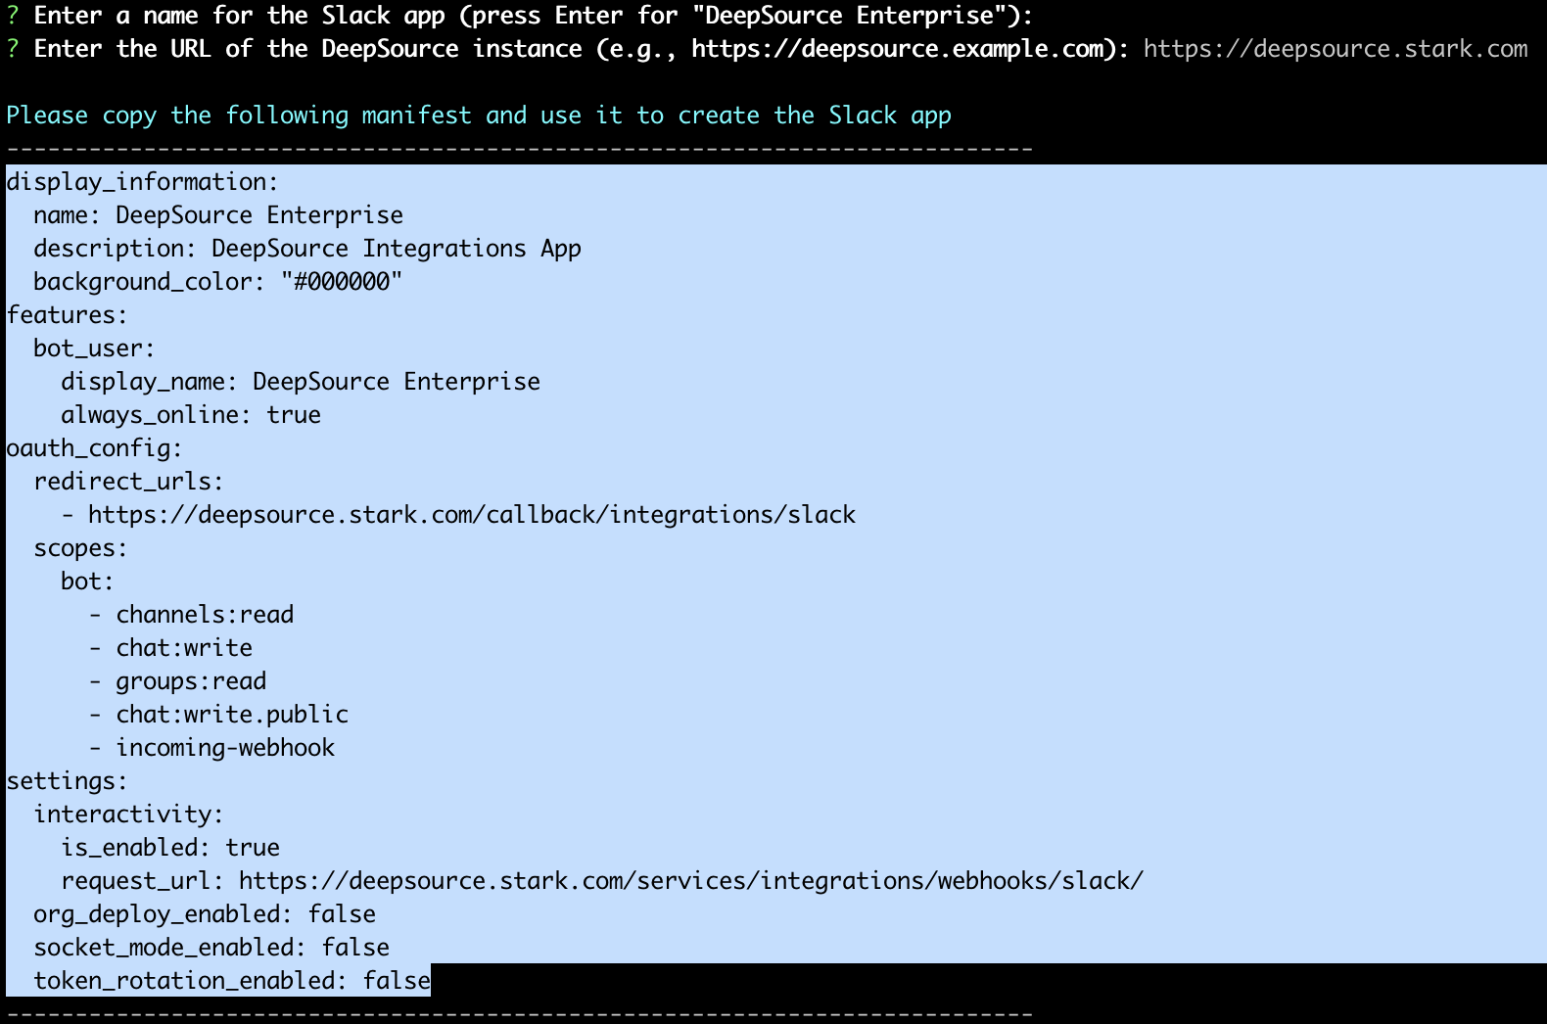
When you run the command in the CLI, a few details will have to filled in:
- Name for the Slack app: The name of the Slack app being created. Defaults to
DeepSource Enterprise. - The URL of your DeepSource installation: The URL of your DeepSource instance. For e.g., if your DeepSource instance is running on
https://deepsource.stark.com, then enterhttps://deepsource.stark.comhere.
- Name for the Slack app: The name of the Slack app being created. Defaults to
-
Copy the slack app manifest.
-
Goto https://api.slack.com/apps and log into the Slack Developer Console if required.
-
Click on Create New App.
-
Select From an app manifest.
-
Select the Slack workspace you'd like to create the app under and click on Next.
-
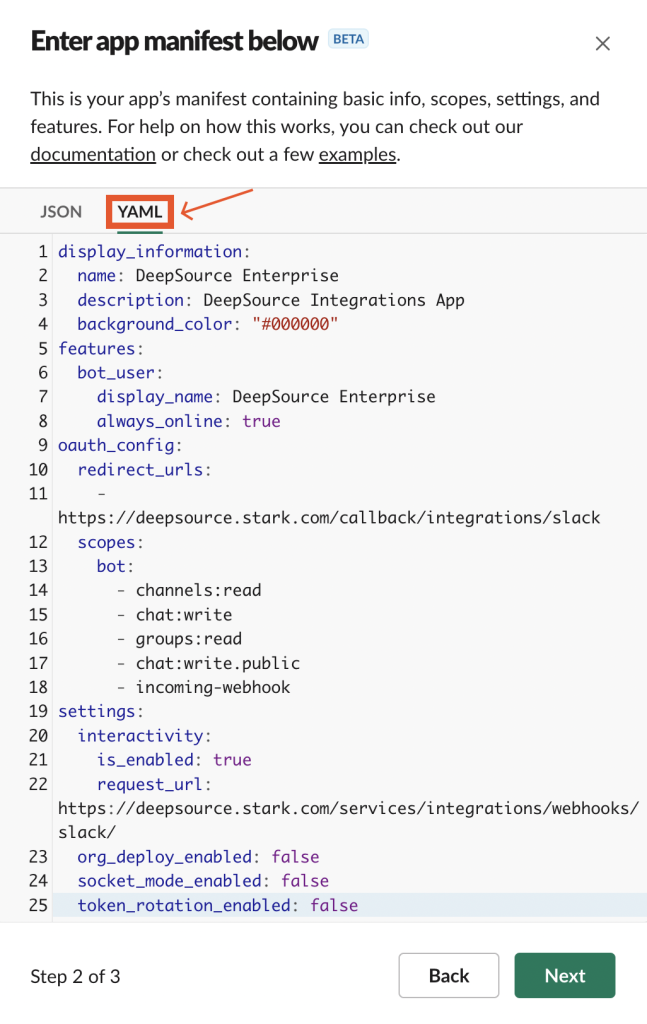
Select the YAML tab, paste the app manifest, and click Next.
-
Click on Create.
-
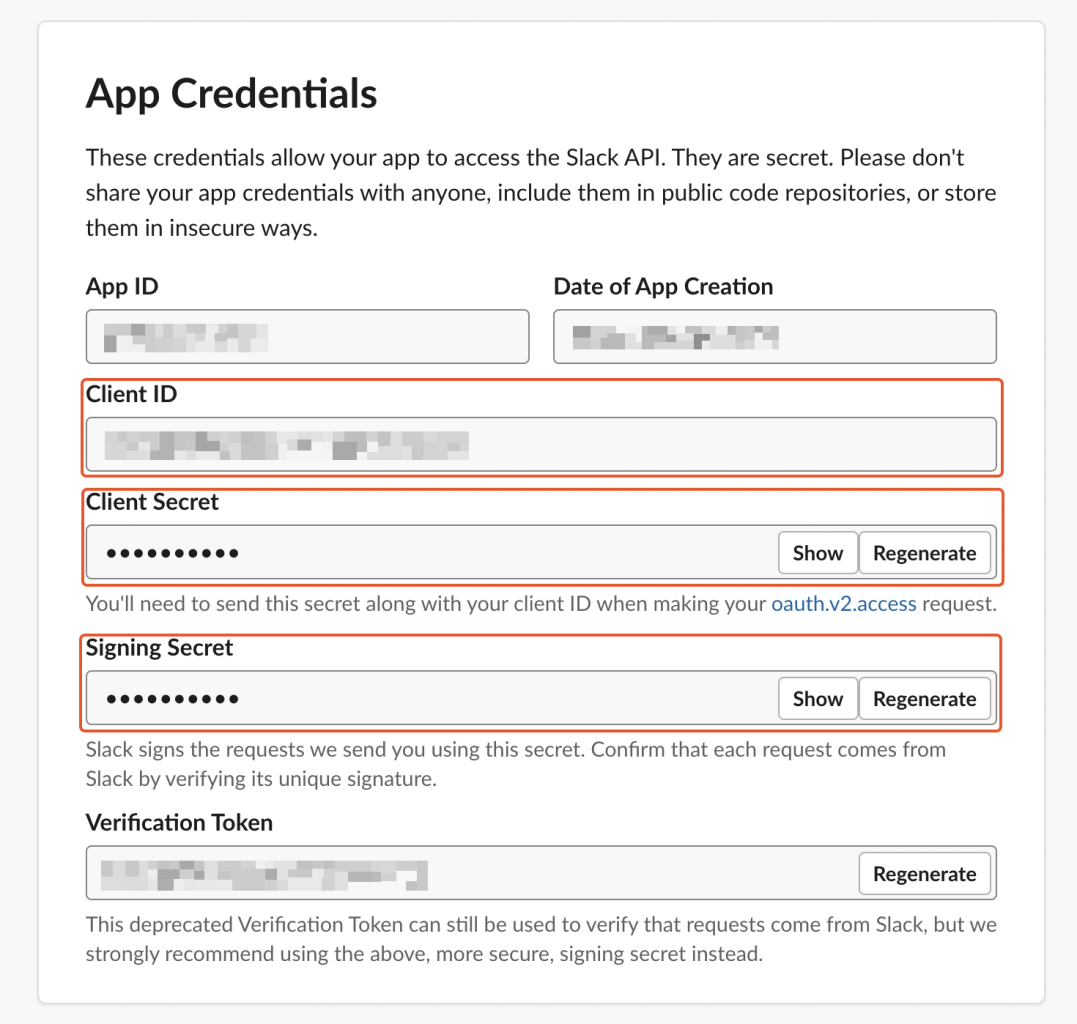
Scroll down and navigate to the "App Credentials" section and note down the following values:
- Client ID
- Client Secret
- Signing Secret
Configuring the Slack app in the Admin Console
After you create your Jira Cloud application, you need to configure Client ID & Secret in the Admin Console for the application to use it.
-
Visit the Admin Console
-
Navigate to Application -> Config.
-
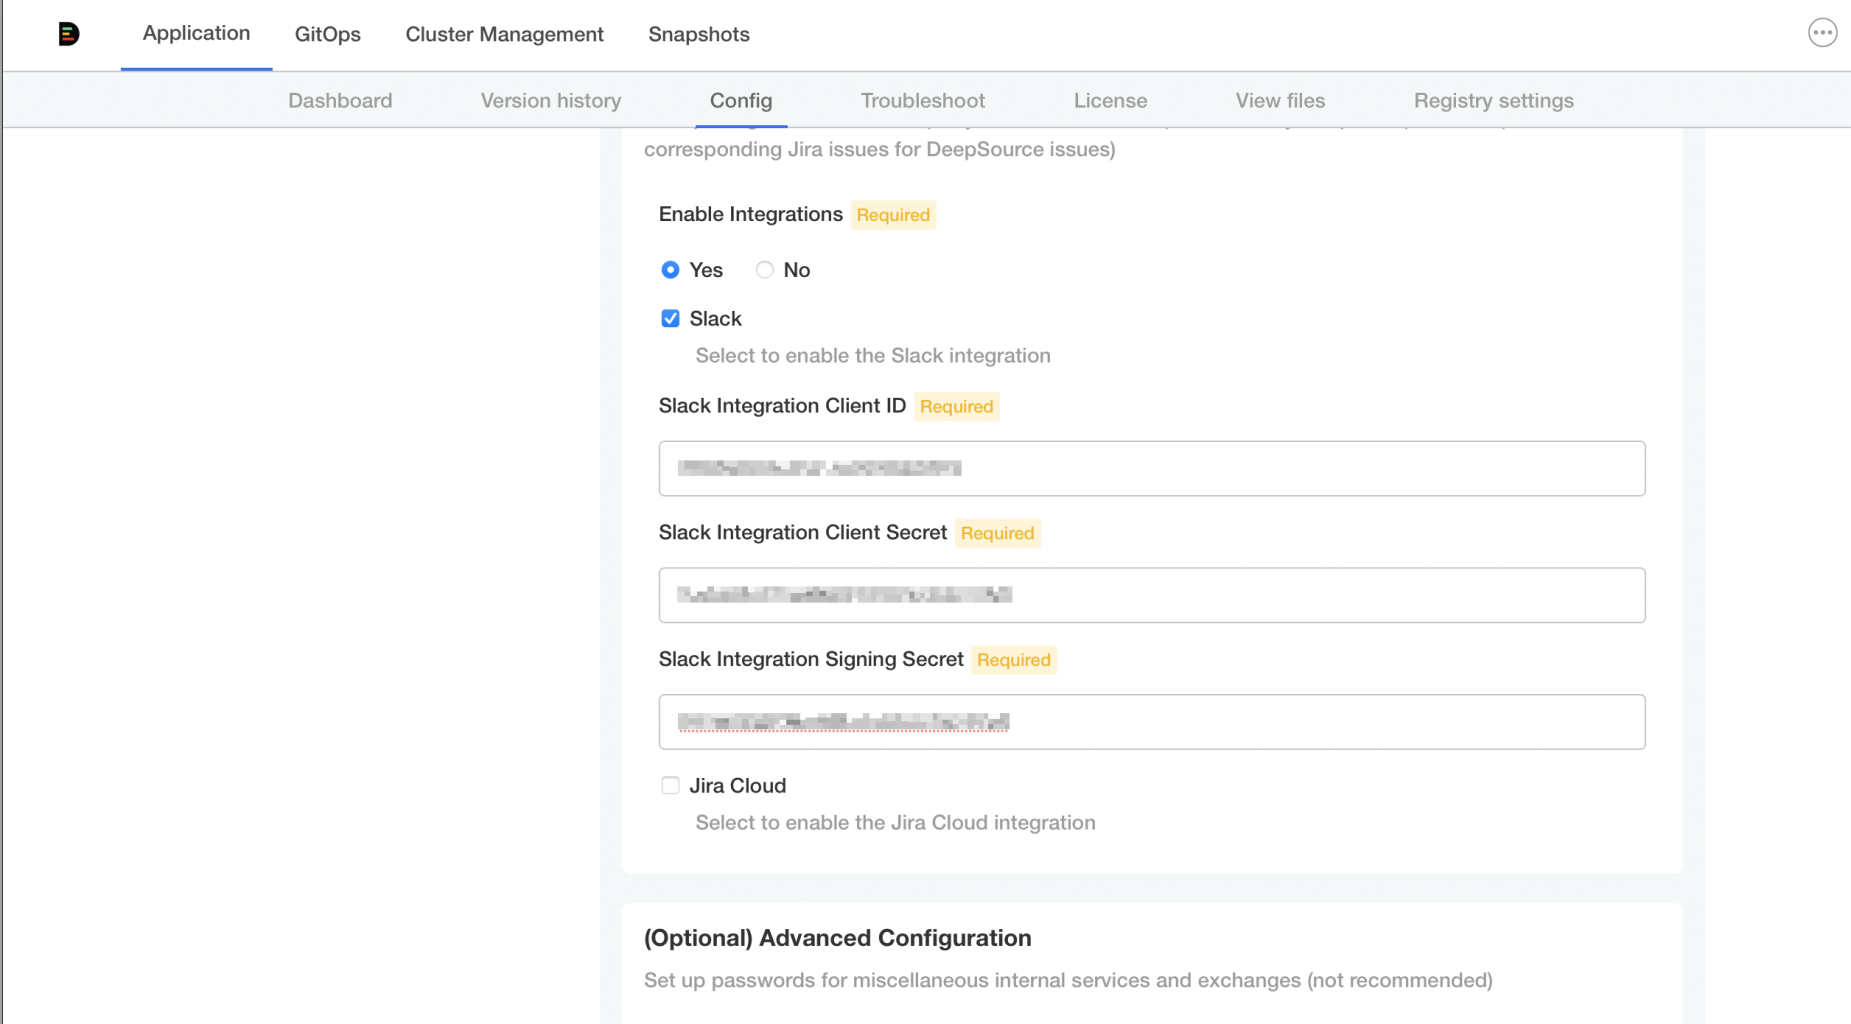
In the Integrations section, set "Enable Integrations" to "Yes" and select the "Slack" checkbox.
-
Fill up the values from the previous step for:
- Slack Integration Client ID
- Slack Integration Client Secret
- Slack Integration Signing Secret
-
Save.