Creating an Azure DevOps application
- With logged into Azure, visit https://aex.dev.azure.com/ (or the equivalent URL in your Azure DevOps Server instance).
- Scroll to the bottom. On the left-hand side, you will find a section titled “Applications and services”. Click on the “Create new application” under this section. You can also directly visit https://aex.dev.azure.com/app/register.
- You’d be prompted to fill out a form to create a new application. Enter the following details:
Replace
ORGANIZATION_NAME with the name of your organization, and HOSTNAME with the actual hostname on which you plan to deploy DeepSource to.| Field | Value | Example |
|---|---|---|
| Company name | DeepSource Enterprise Server | DeepSource Enterprise Server |
| Application name | DeepSource ORGANIZATION_NAME | DeepSource Stark International |
| Application website | https://HOSTNAME | https://deepsource.stark.com/ |
| Authorization callback URL | https://HOSTNAME/accounts/ads/login/callback/bifrost | https://deepsource.stark.com/accounts/ads/login/callback/bifrost/ |
| Authorized scopes | Check the following boxes: - Code (read and write) - Code (status) - Project and team (read) |
- Click on “Save changes”.
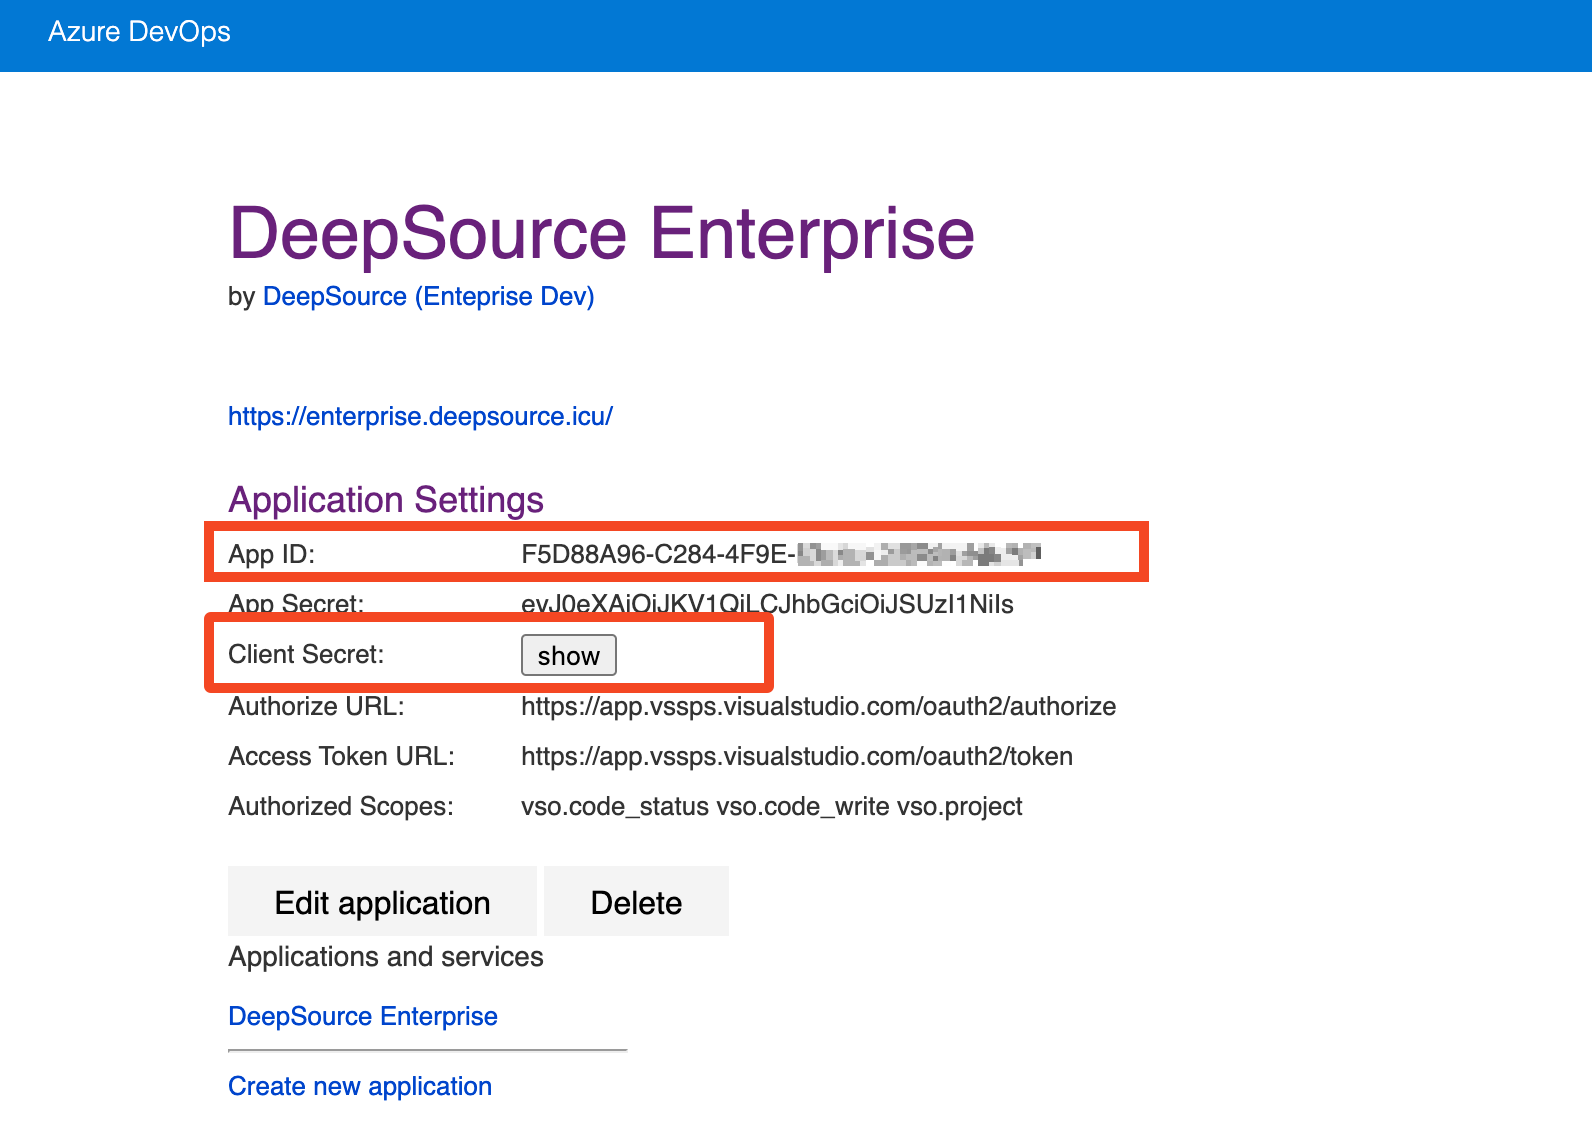
- On the next page, You will get the
App ID,Client SecretandAuthorize URL. Enter these values in the DeepSource Enterprise admin console.

Configuring the Azure DevOps application in the Admin Console
After you have created your Azure DevOps application, you need to configure it in the DeepSource Admin Console.- Visit the Admin Console
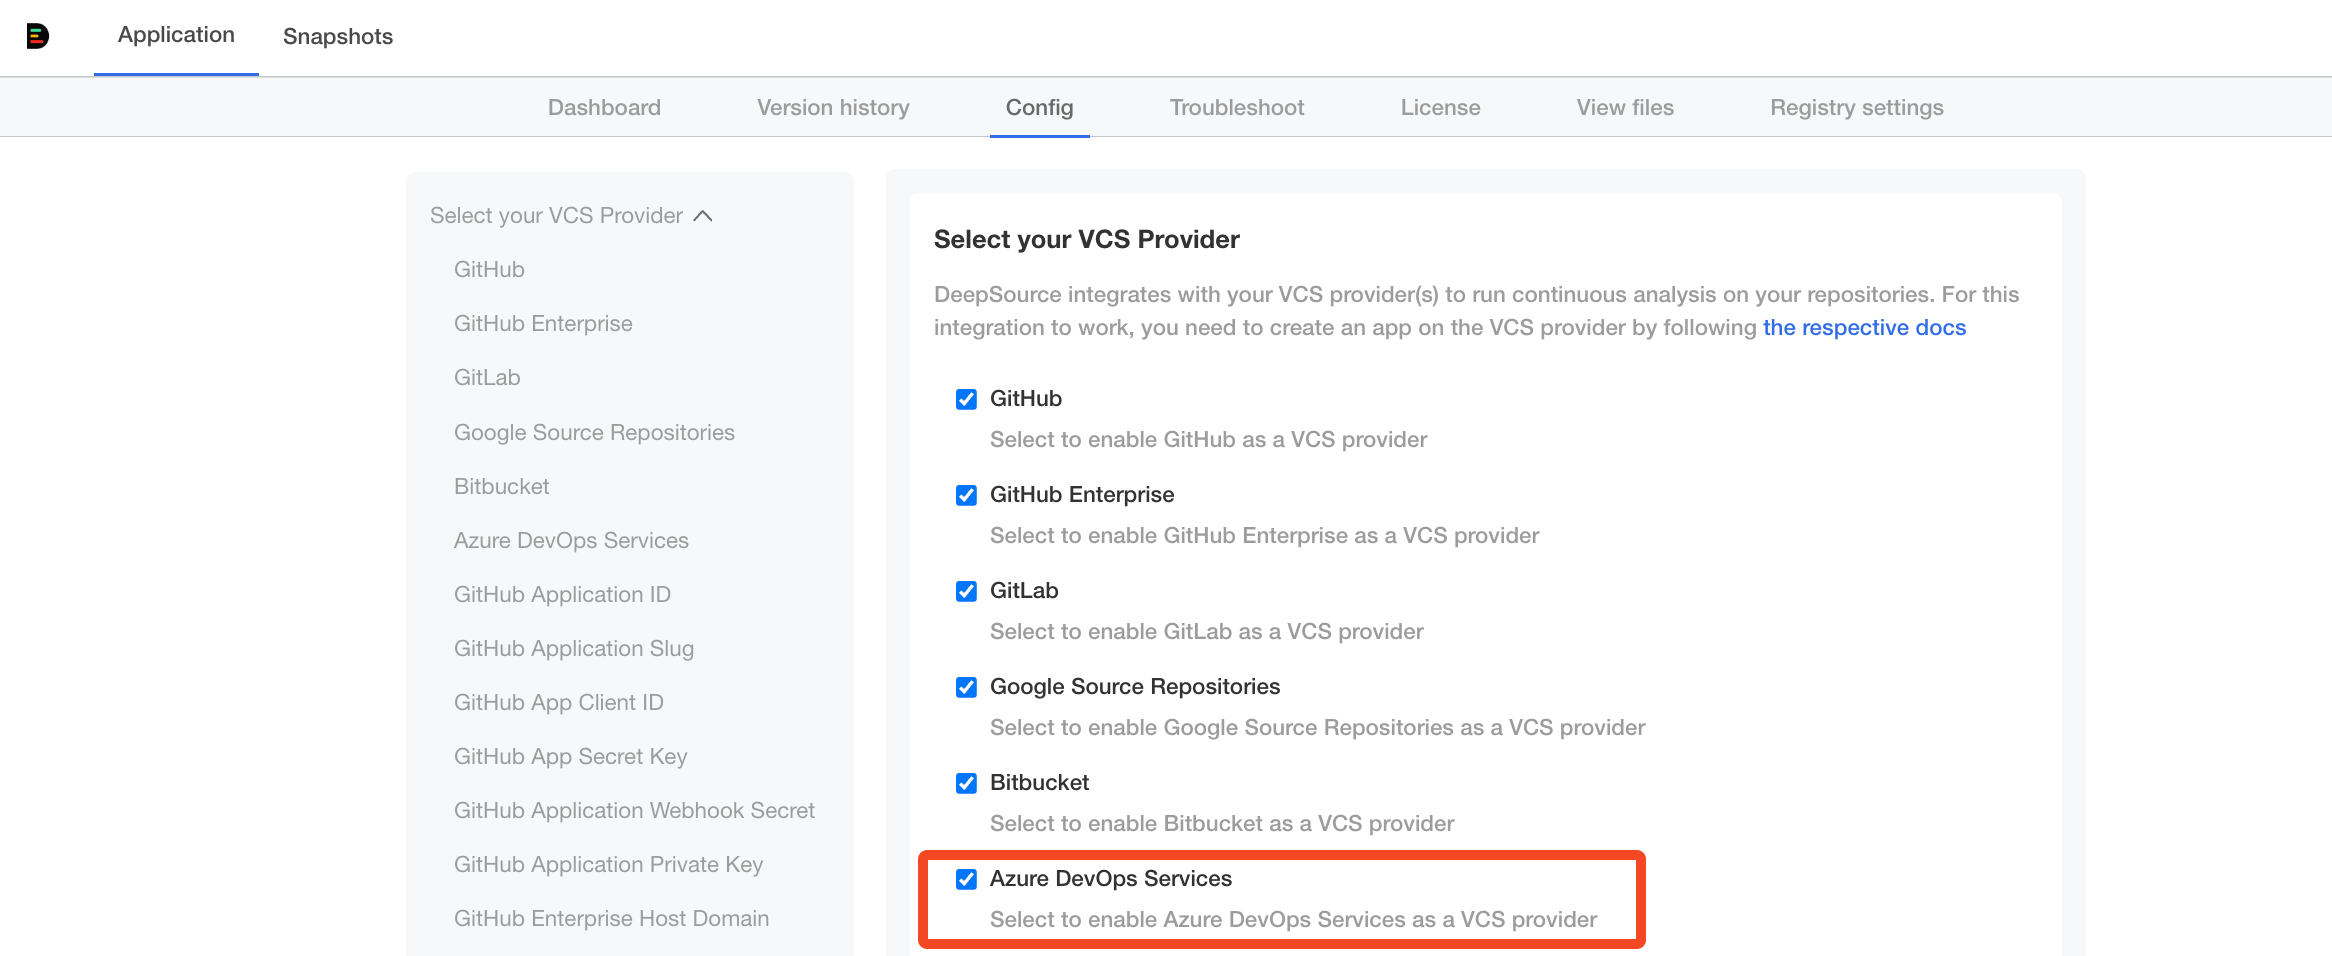
- Navigate to Application -> Config.
- Select the checkbox for Azure DevOps Services.

-
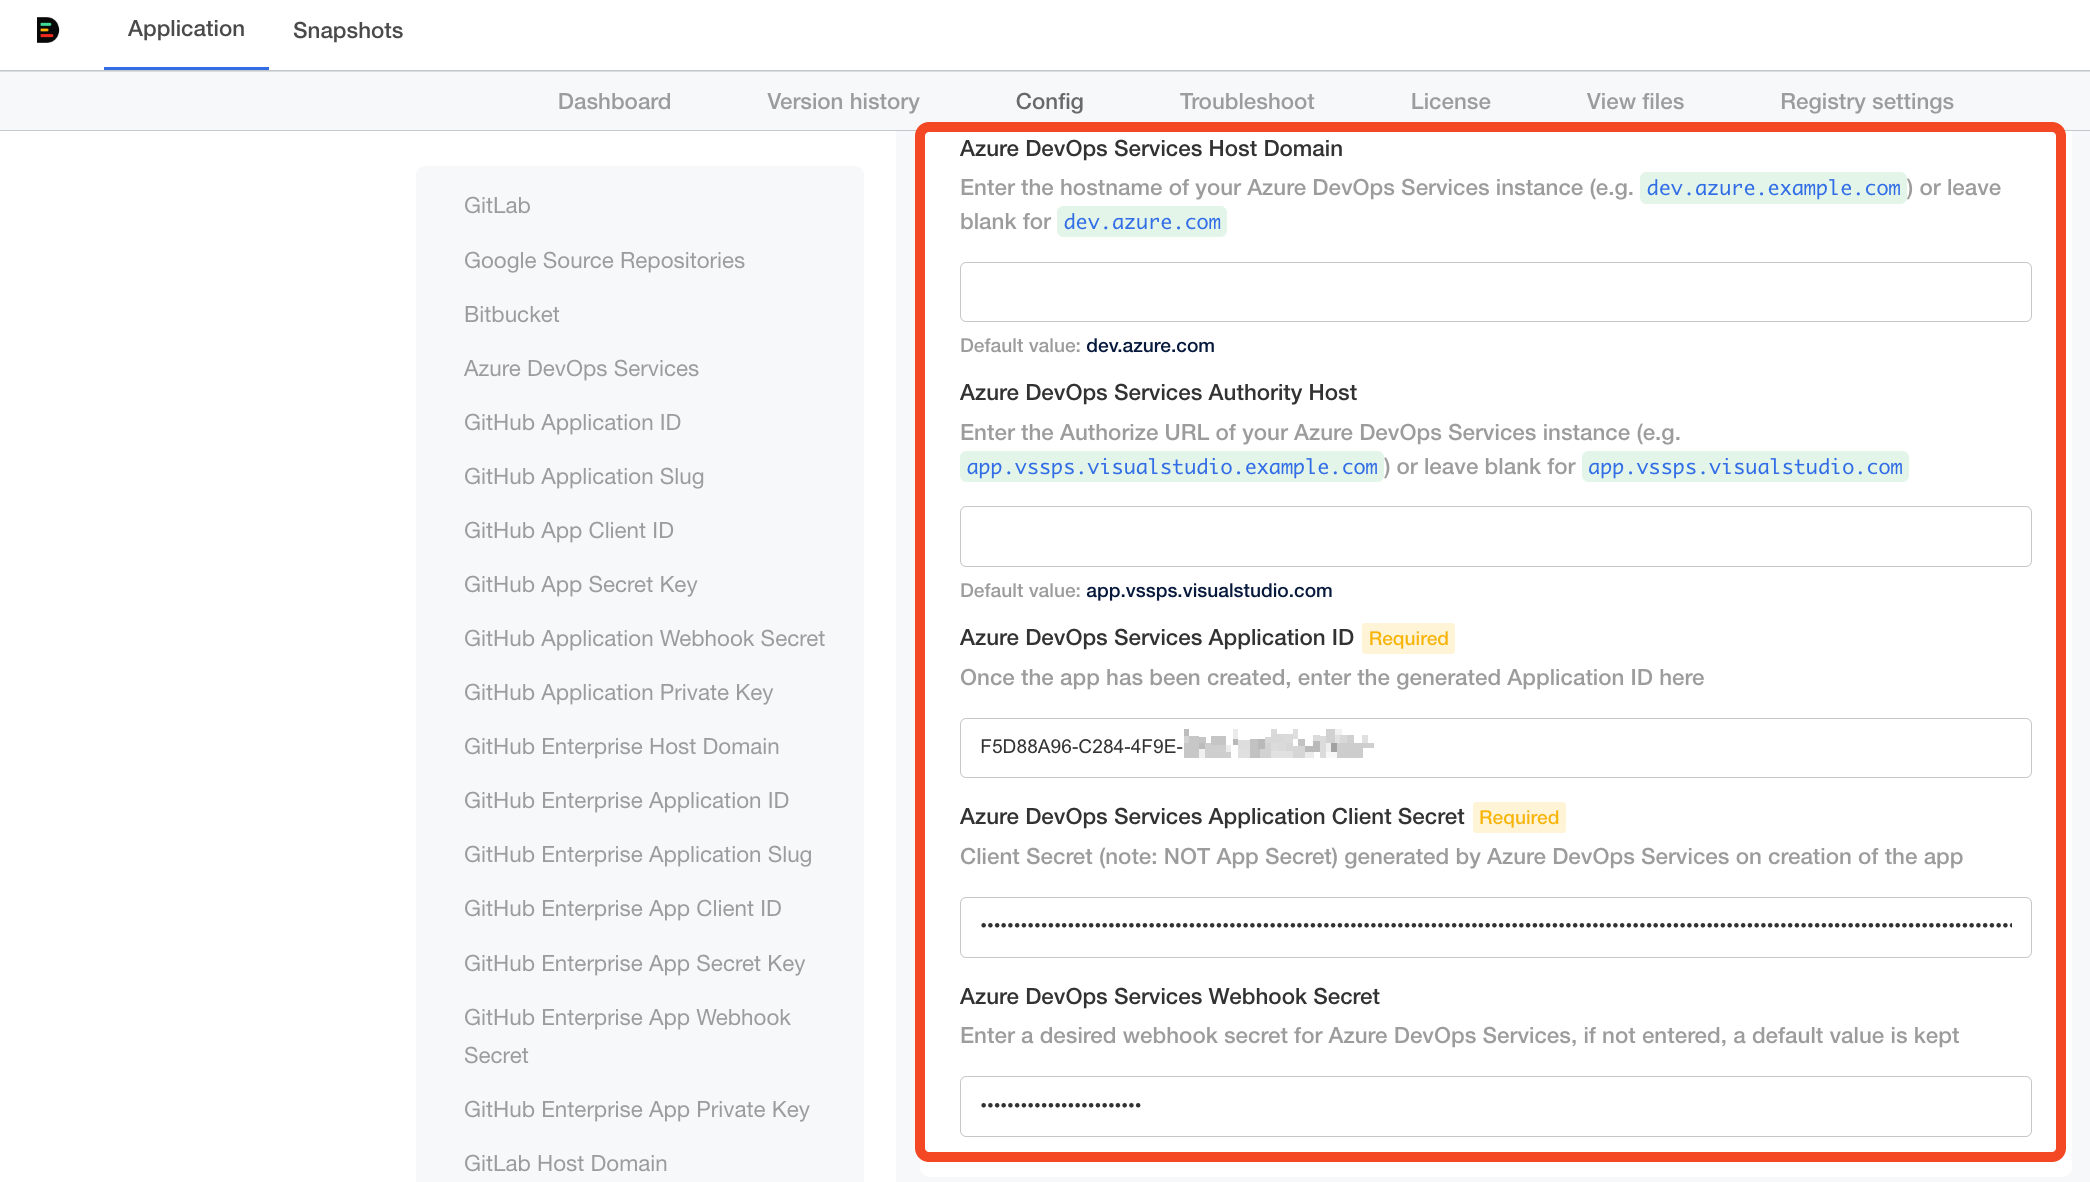
Fill in the values for the following fields as explained in each field’s subtext:
- Azure DevOps Services Host Domain
- Azure DevOps Services Authority Host
- Azure DevOps Services Application ID
- Azure DevOps Services Application Client Secret
- Azure DevOps Services Webhook Secret

- Click “Save config”.
- Deploy the new release with the updated config using the “Version history” tab.