
Jira Cloud
Create DeepSource issues on Jira Cloud

The Jira Cloud integration requires the Team or Enterprise plan.
The Jira Cloud integration allows users to create new Jira issues for issues detected by DeepSource on your codebase.
Installation
To install the Jira Cloud integration follow these steps:
- From the sidebar, navigate to your team's Home, click on the Settings tab, and select Integrations.
- Select the Jira Cloud card.
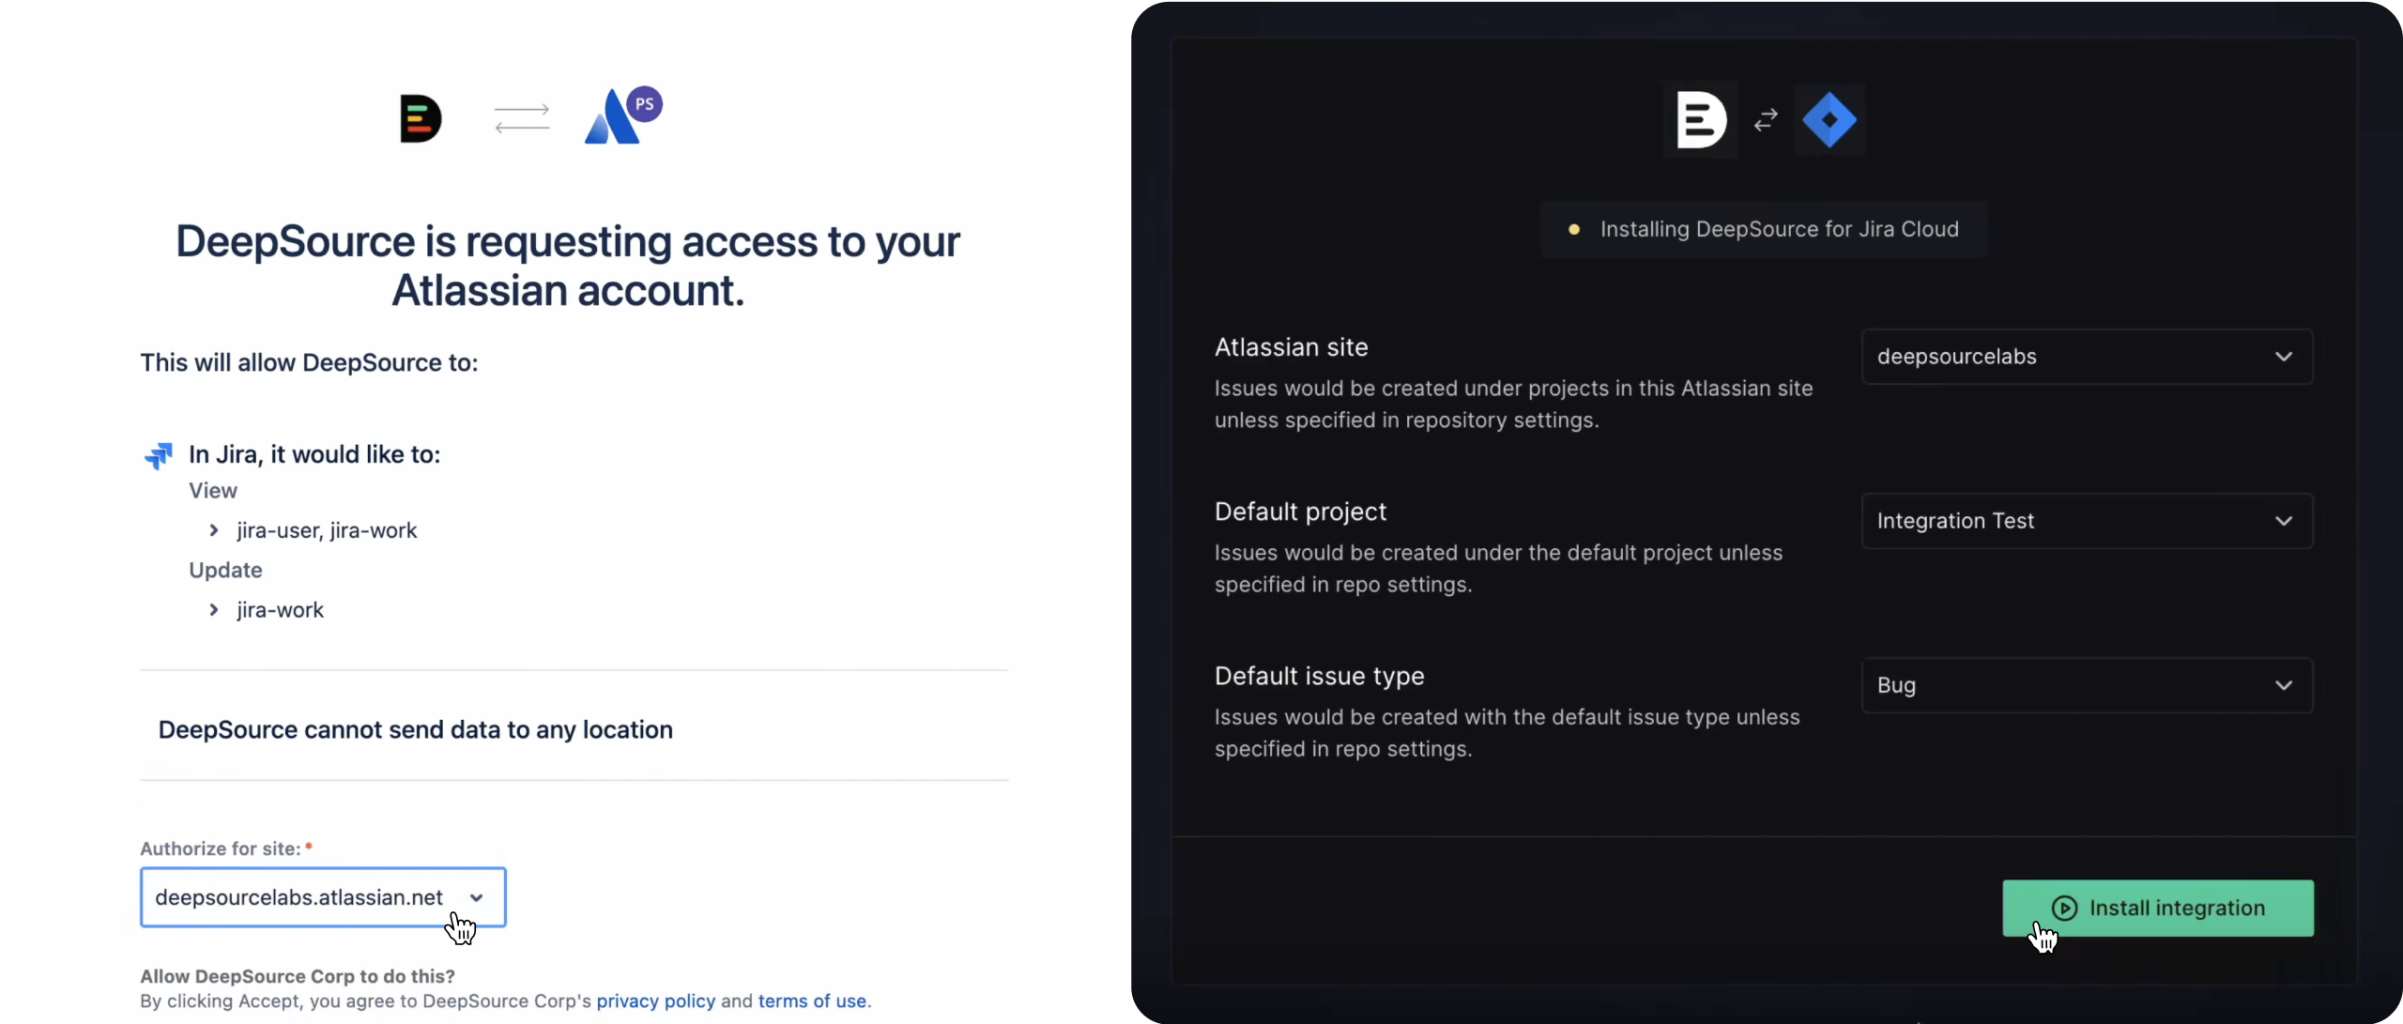
- Click Install integration to open Jira's authorization page.
- On the authorization page, select the Atlassian Jira site to which you want to install the app, then click "Accept."
- Choose the Atlassian site, Default project, and Default issue type, and click on "Install integration."
Creating an issue on Jira
To create an issue on Jira:
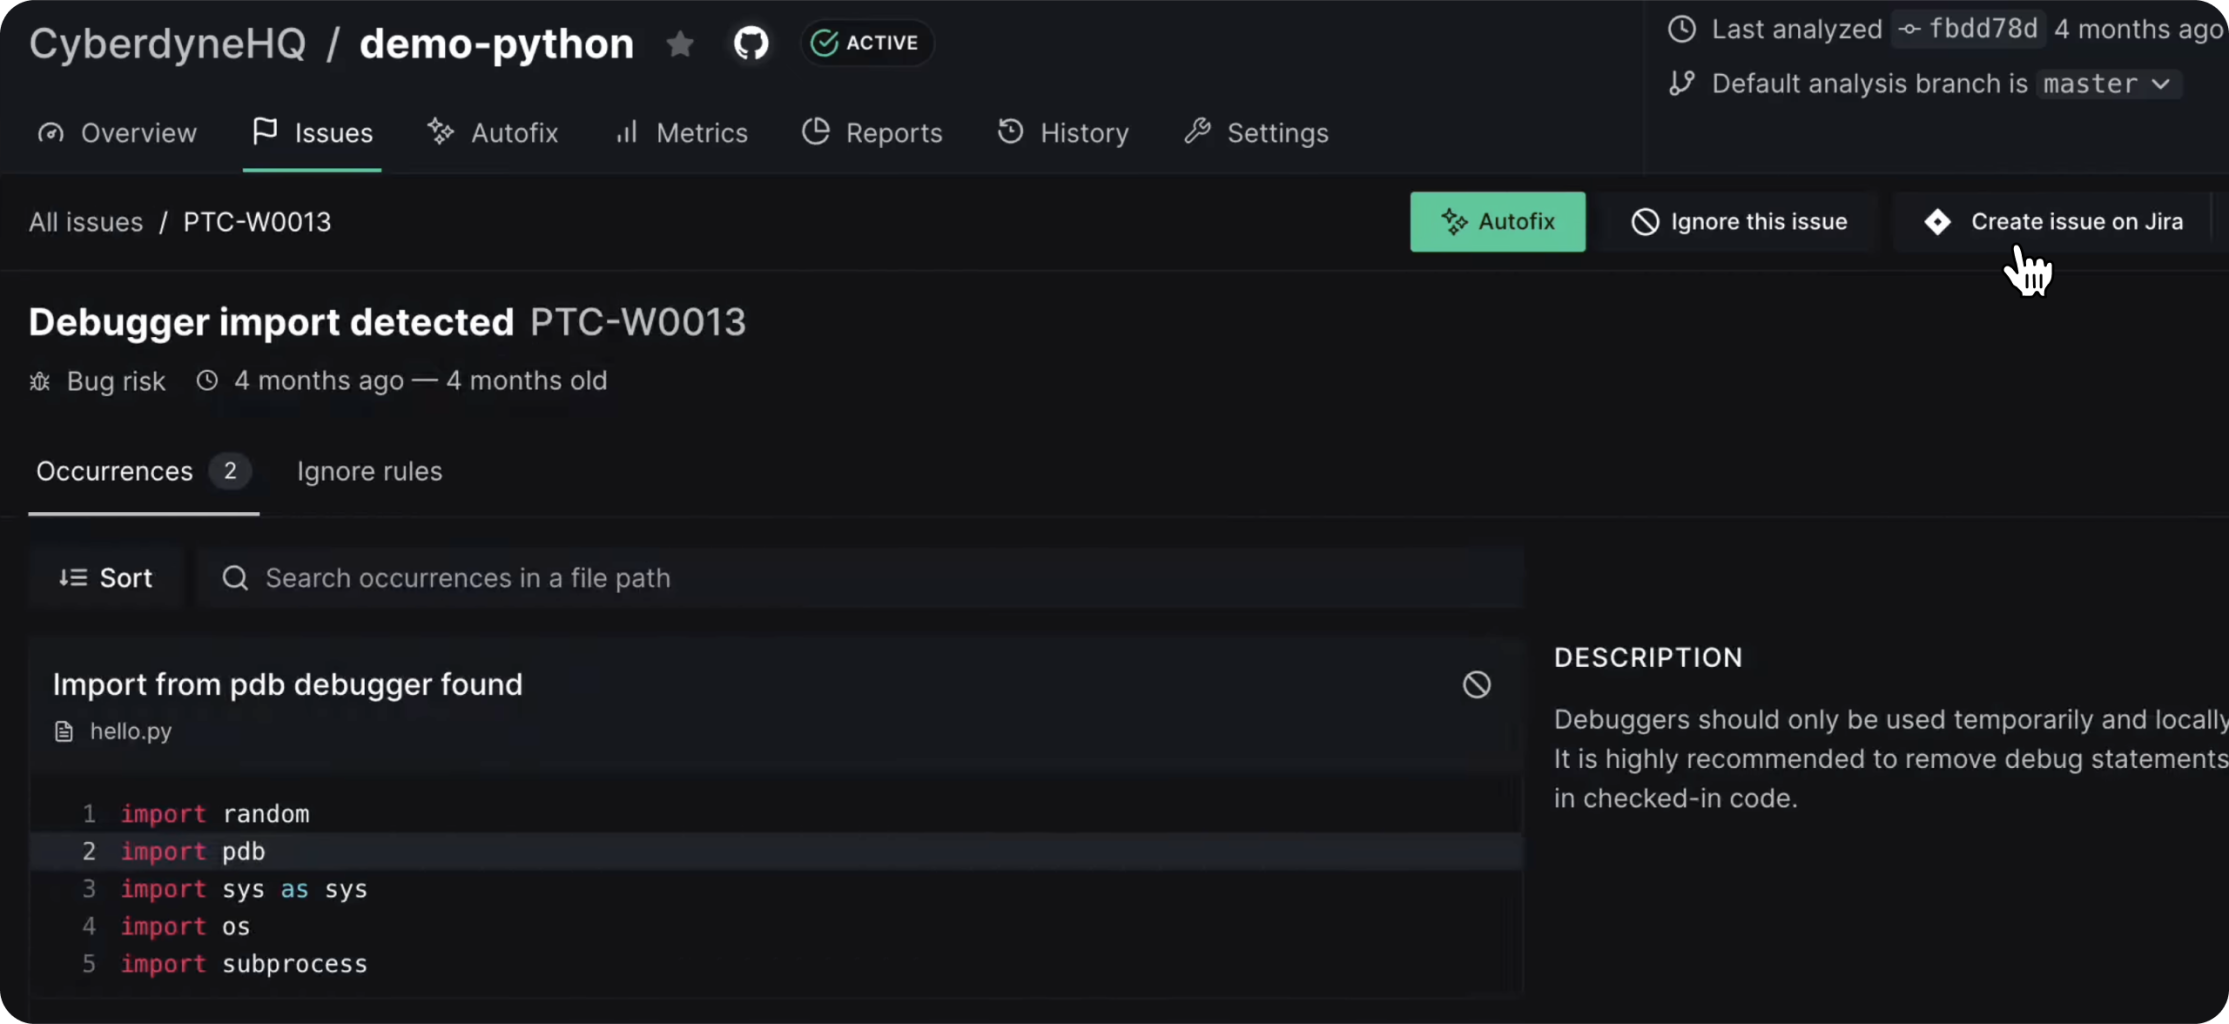
- Navigate to the Issues tab on the repository page and select an issue.
- Click the Create issue dropdown and select Create issue on Jira.
Setting different issue config for specific Repositories
To change the Jira issue config for a specific Repository:
- Navigate to your repository's settings and select Integrations in the settings sidebar.
- Select the Jira Cloud card.
- Adjust the issue configuration for this repository as needed.
Uninstalling
To remove the Jira integration, please follow these steps:
- From your sidebar, go to Settings and navigate to the Integrations tab.
- Select the Jira Cloud card.
- Click "Uninstall Jira Cloud" and confirm.
Privacy policy
To learn more about how we collect, keep, and process your private information, please view our privacy policy.