
Installation
- Open Visual Studio Code (VS Code).
- Go to the VS Code Marketplace by clicking on the Extensions icon in the Activity Bar on the side of the window or using the keyboard shortcut
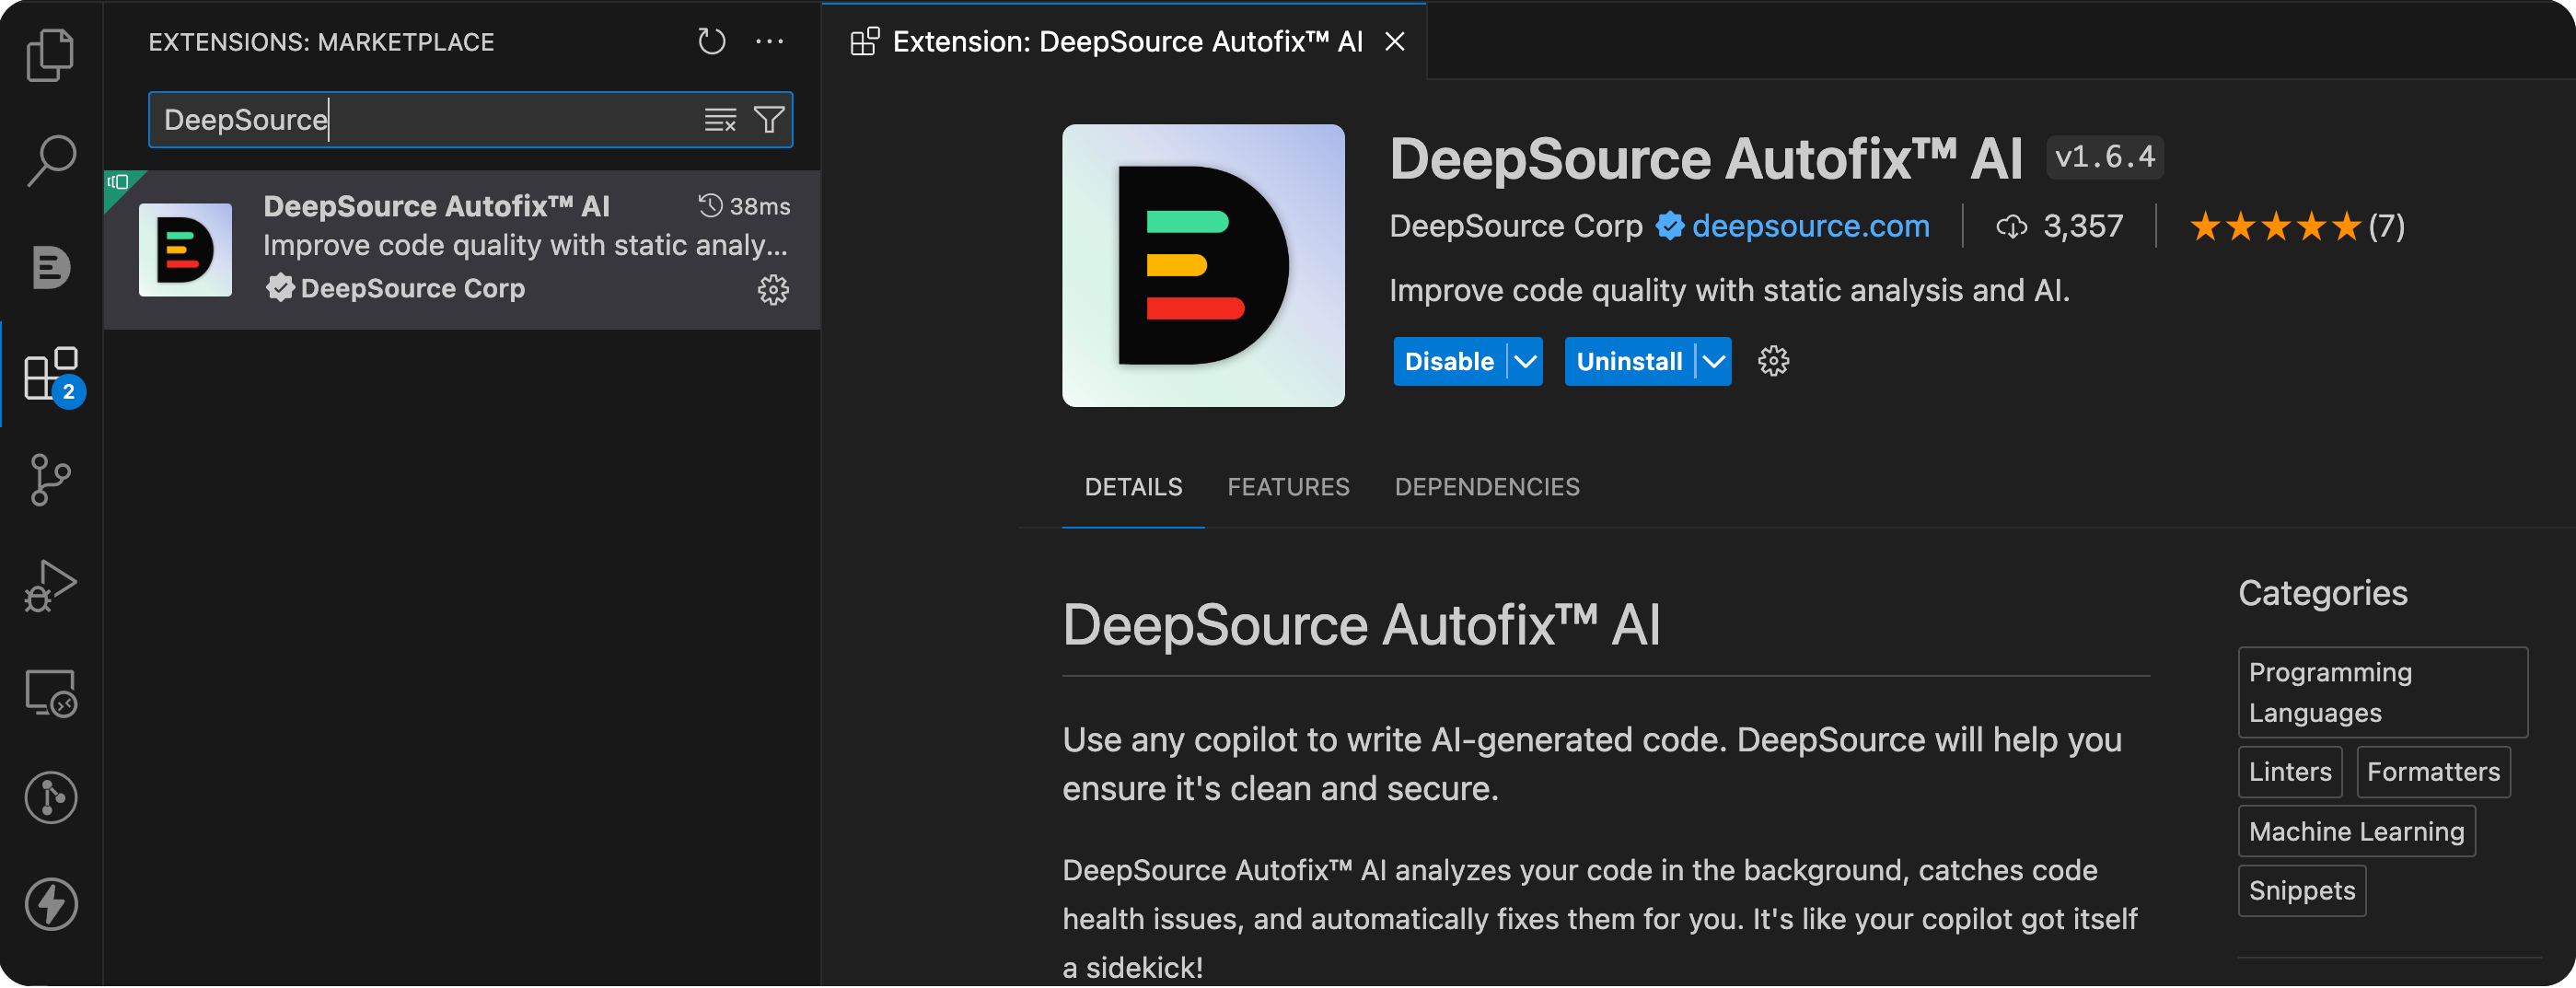
Ctrl+Shift+X(Windows/Linux) orCmd+Shift+X(Mac). - In the Extensions view, search for “DeepSource” in the search bar.
- Click on the “Install” button next to the “DeepSource Autofix™ AI” extension in the search results.
- Wait for the installation to complete. You should see a notification confirming successful installation.
Activation
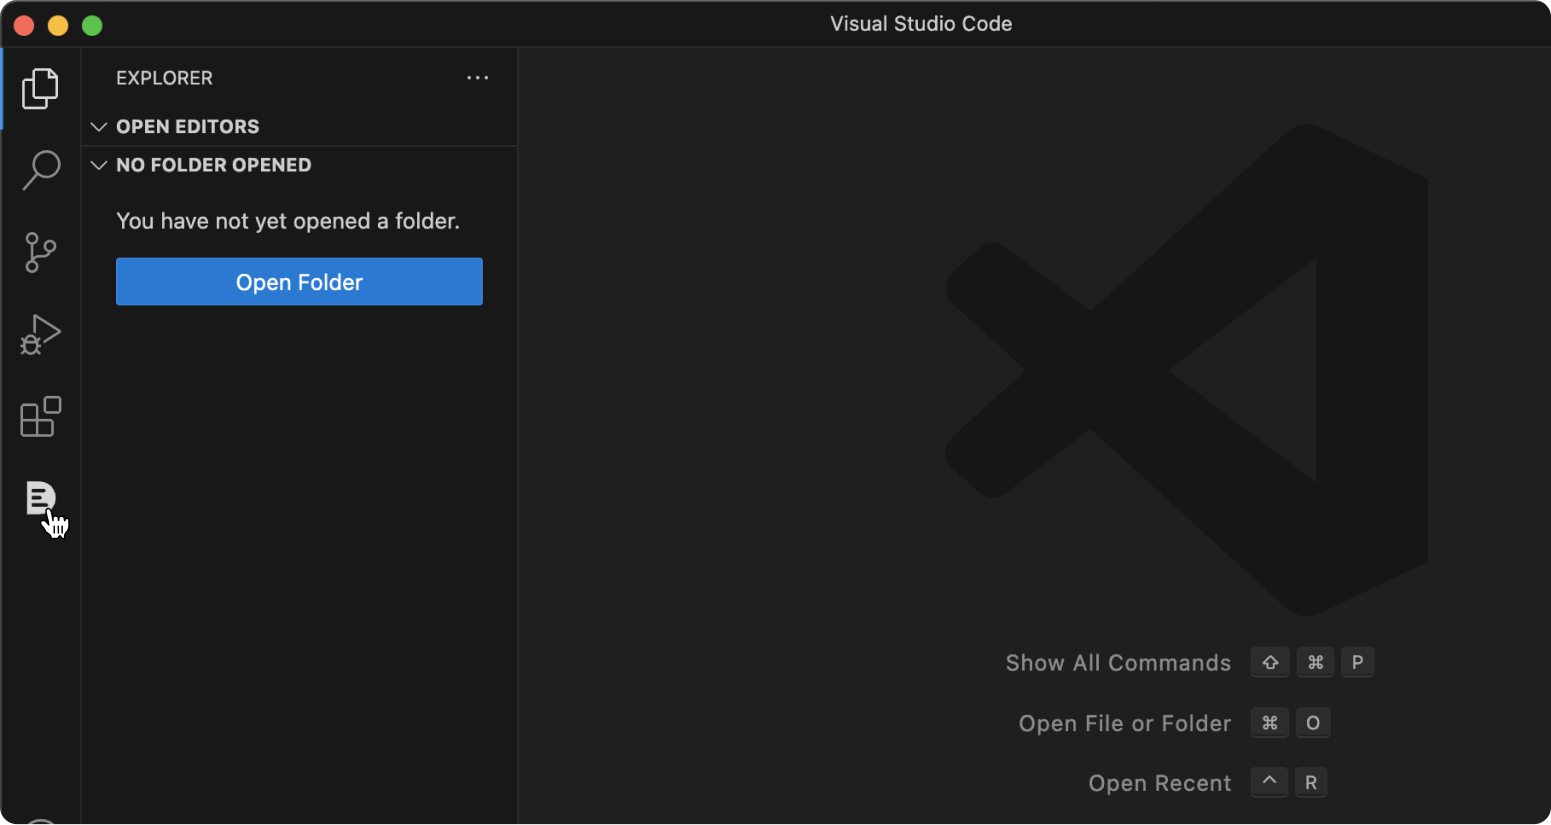
- Once the extension is installed, you should see the DeepSource icon in VS Code’s sidebar (usually located on the left-hand side).
- Click on the DeepSource icon to open the DeepSource panel.
Log-in
- Upon opening the DeepSource panel for the first time, you’ll be prompted to log in.
- For cloud users, click the “Login to DeepSource Cloud” button. This will redirect you to the DeepSource website for authentication.
- For enterprise users, click “Login to Enterprise Server”, and you’ll be asked to enter the URL for your DeepSource installation in the prompt. After entering the URL, hit “Enter” to proceed.
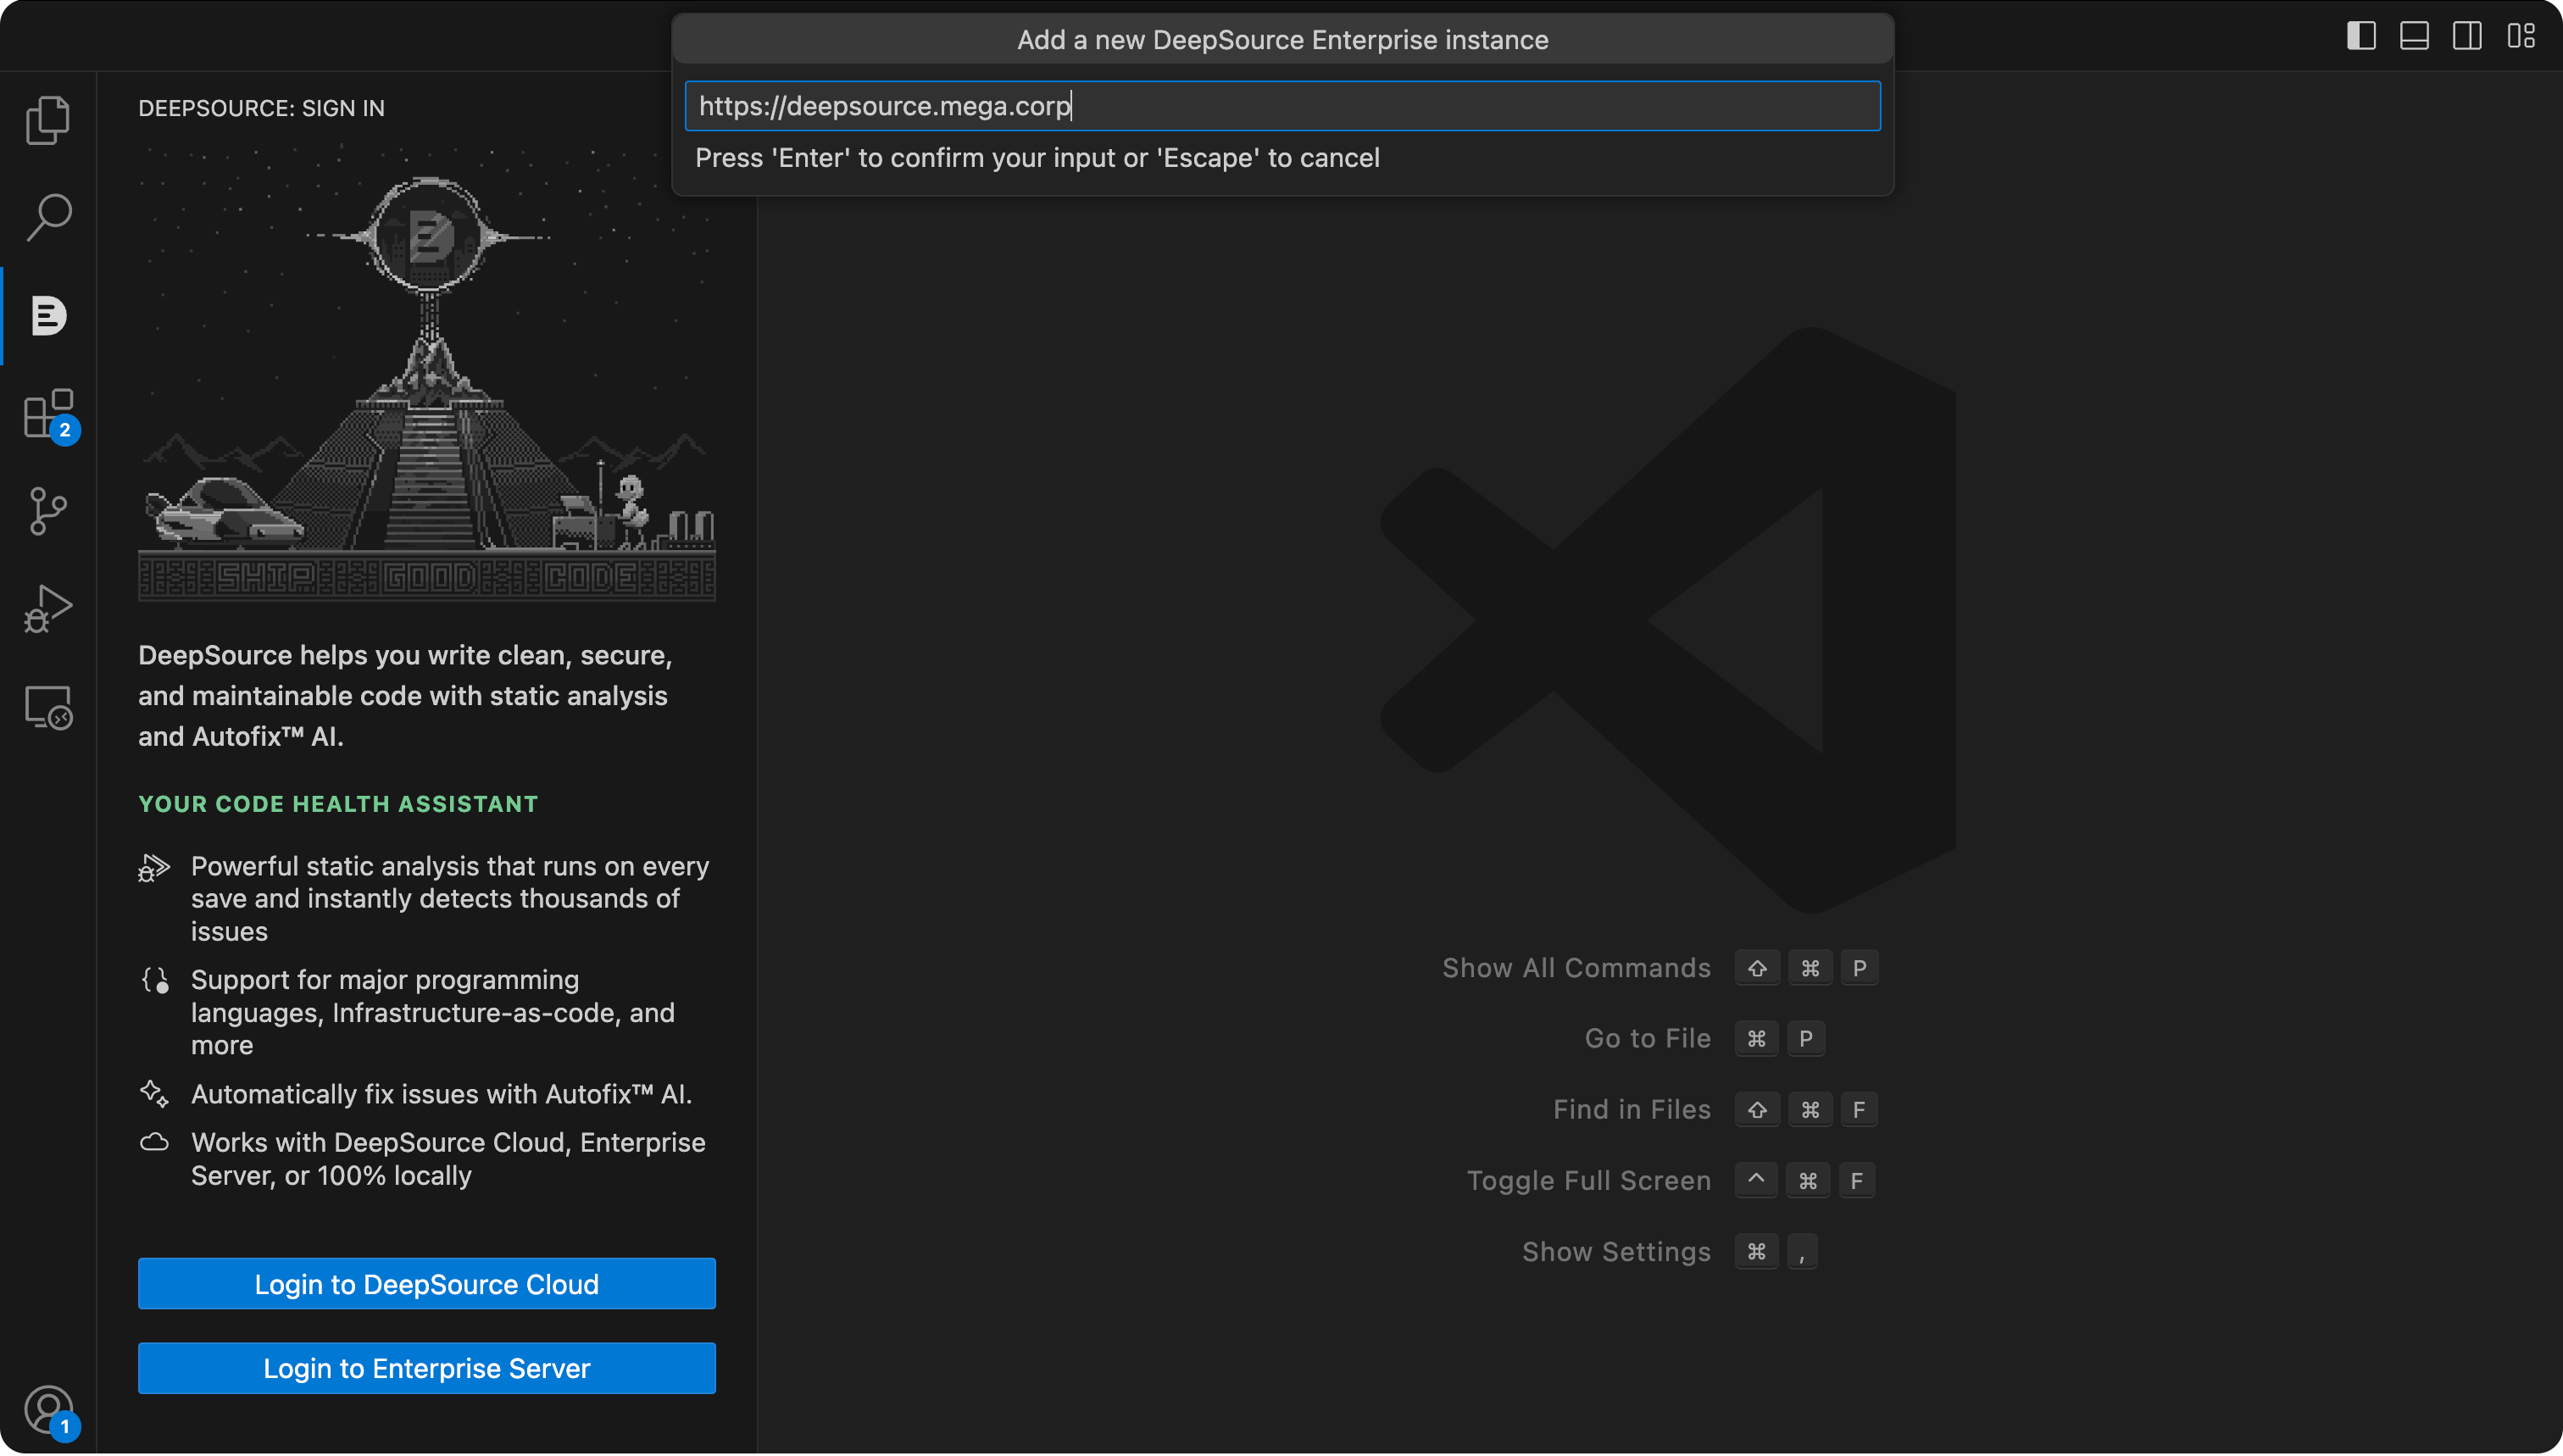
- A browser window will be launched, taking you to the DeepSource login page.
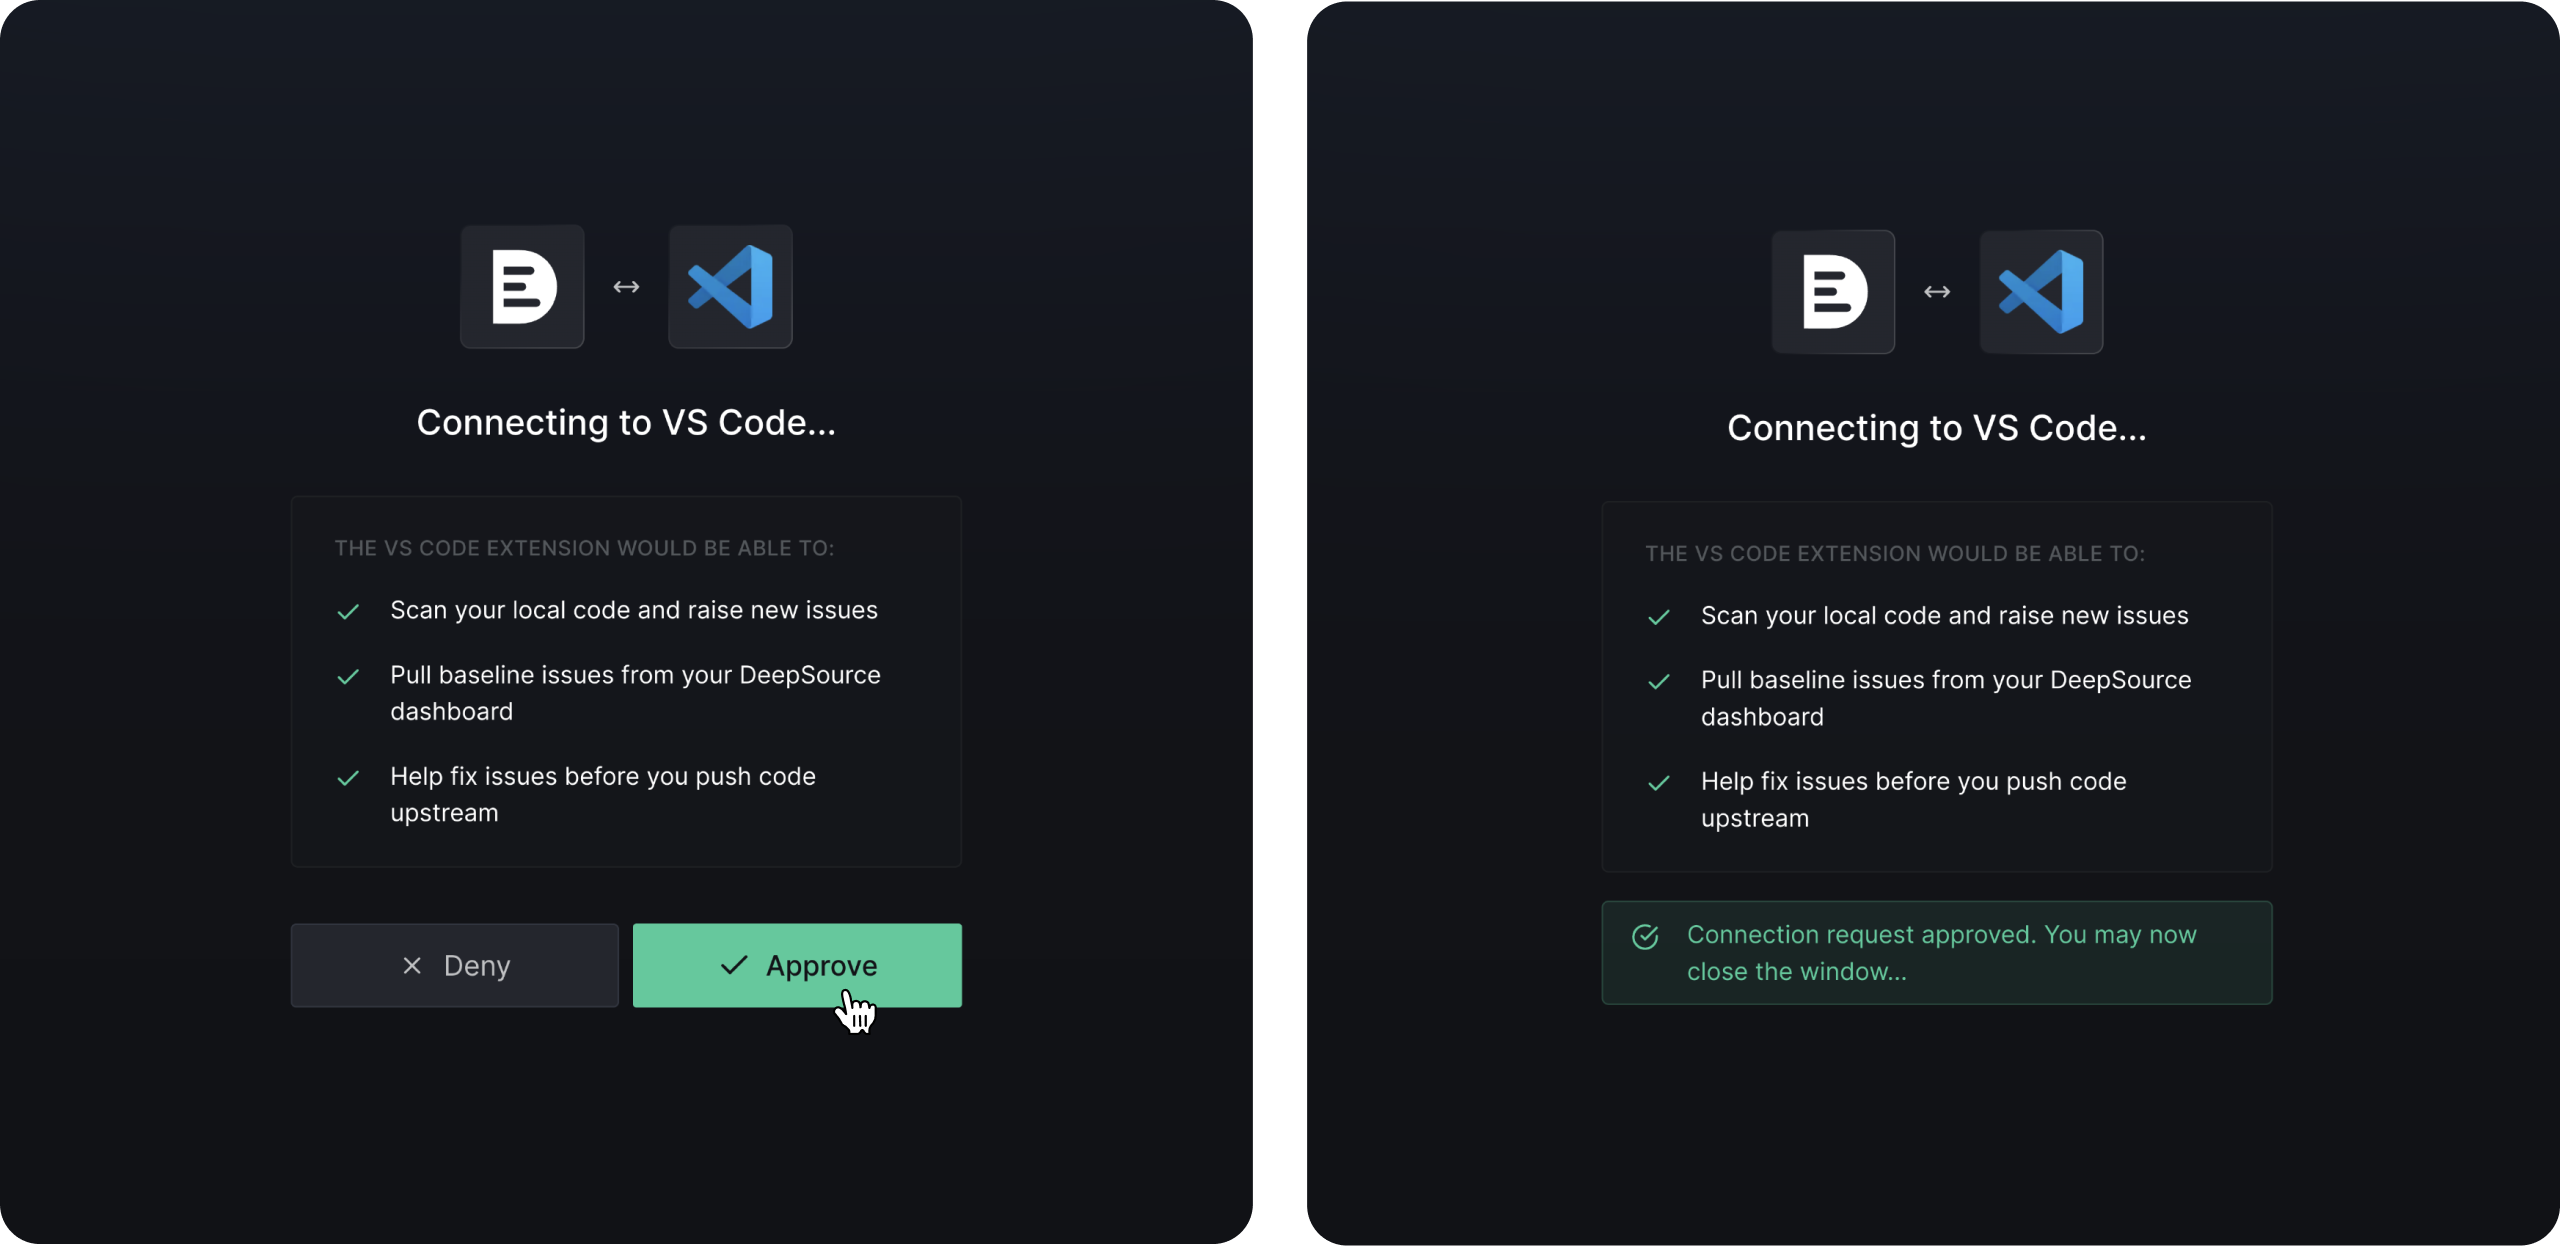
Authentication
- In the browser window, enter your DeepSource credentials (username and password) to log in.
- If it’s your first time logging in, you might need to follow some additional setup steps, such as configuring repositories or setting up analysis preferences. Follow the on-screen instructions to complete the setup.
Extension activation
- After successful authentication, the VS Code extension should now be fully activated.
- The DeepSource panel in VS Code will display information about your currently open project, and any existing code health issues.
Run analysis in VS Code
Prerequisites
- Make sure you have the DeepSource extension installed and activated in your VS Code, as outlined in the previous installation steps.
-
Ensure that you have a project open in VS Code that meets the following criteria:
- It should be a git repository.
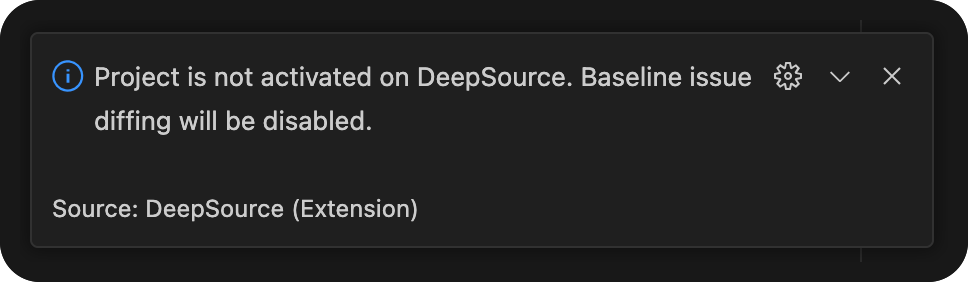
- The project should be activated on DeepSource. If it’s not already activated, it will run in the Single Player Mode, where no existing issues from DeepSource cloud would be shown. The IDE won’t do any baseline issue diffing too, which means you would see all issues present in your file at all time.
Single Player Mode
The extension automatically switches to the Single Player mode in the following cases:- When the current directory opened isn’t a git repository.
- When the project you’re working on is not activated on DeepSource account you are logged in with.
Accessing Commands
To see all available commands provided by the DeepSource extension, pressCmd + Shift + P (Windows/Linux: Ctrl + Shift + P) to open the VS Code command palette. Type “DeepSource” in the command palette search bar, and you’ll see a list of DeepSource-specific commands.
Starting Analysis
DeepSource automatically analyses your currently opened file on every save. You can also trigger an analysis by selecting the “DeepSource: Start analysis” command from the command palette, or click on theAnalyze button on VSCode’s status bar.
Viewing Results
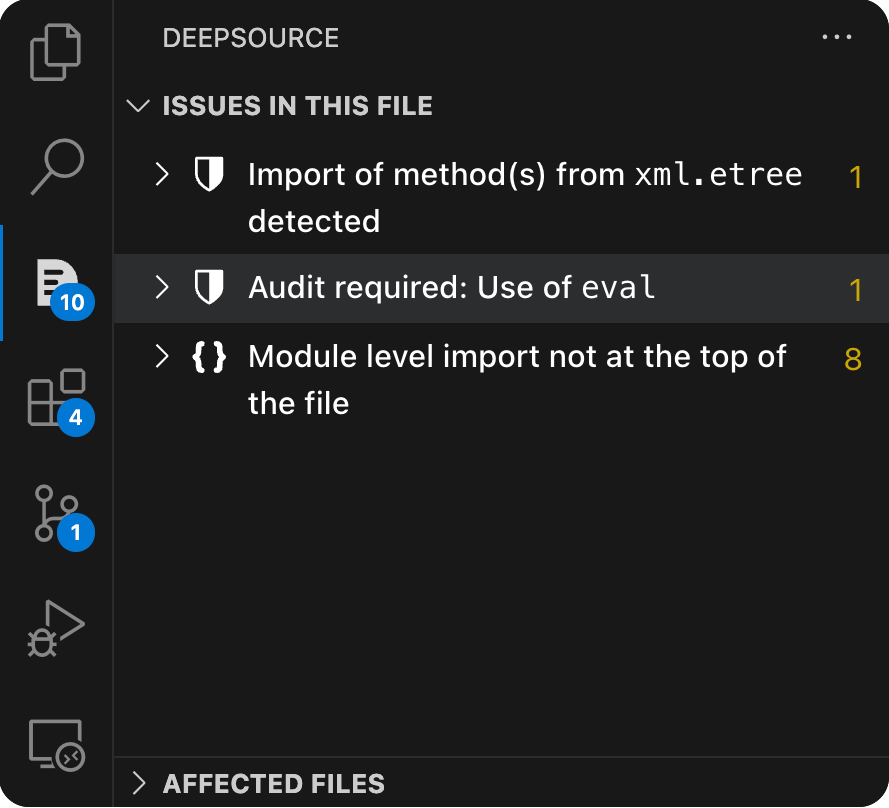
Once the analysis is complete and the results are available, you should be able to see the results in the DeepSource side pane within VS Code. The sidebar has two relevant panels for analysis results:- ISSUES IN THIS FILE: Shows all issues detected in the file that is currently open.
- AFFECTED FILES: Shows all files where DeepSource has detected issues.
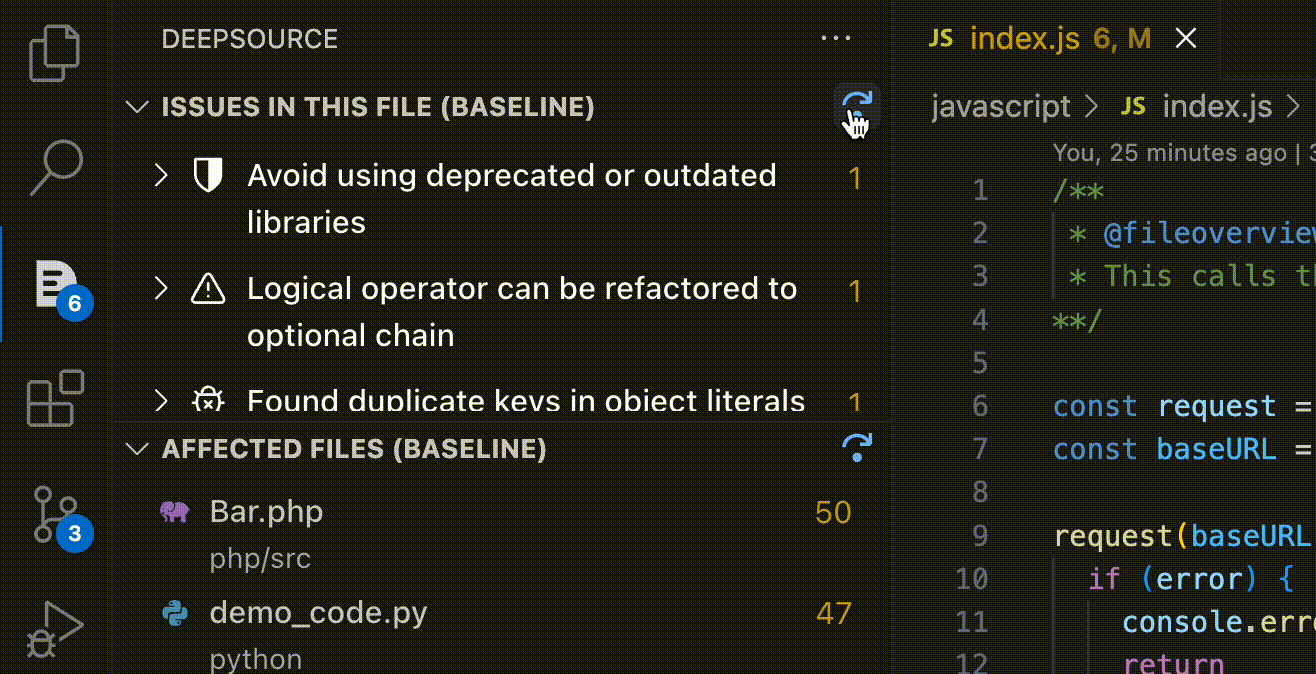
- Baseline issues: Shows all issues in the currently open file that were already present in your file. If you’re on your repository’s baseline branch that’s set on DeepSource, these issues would be identical to those shown on your DeepSource dashboard. In other cases, the existing issues would be the ones detected till the last commit pushed on that branch.
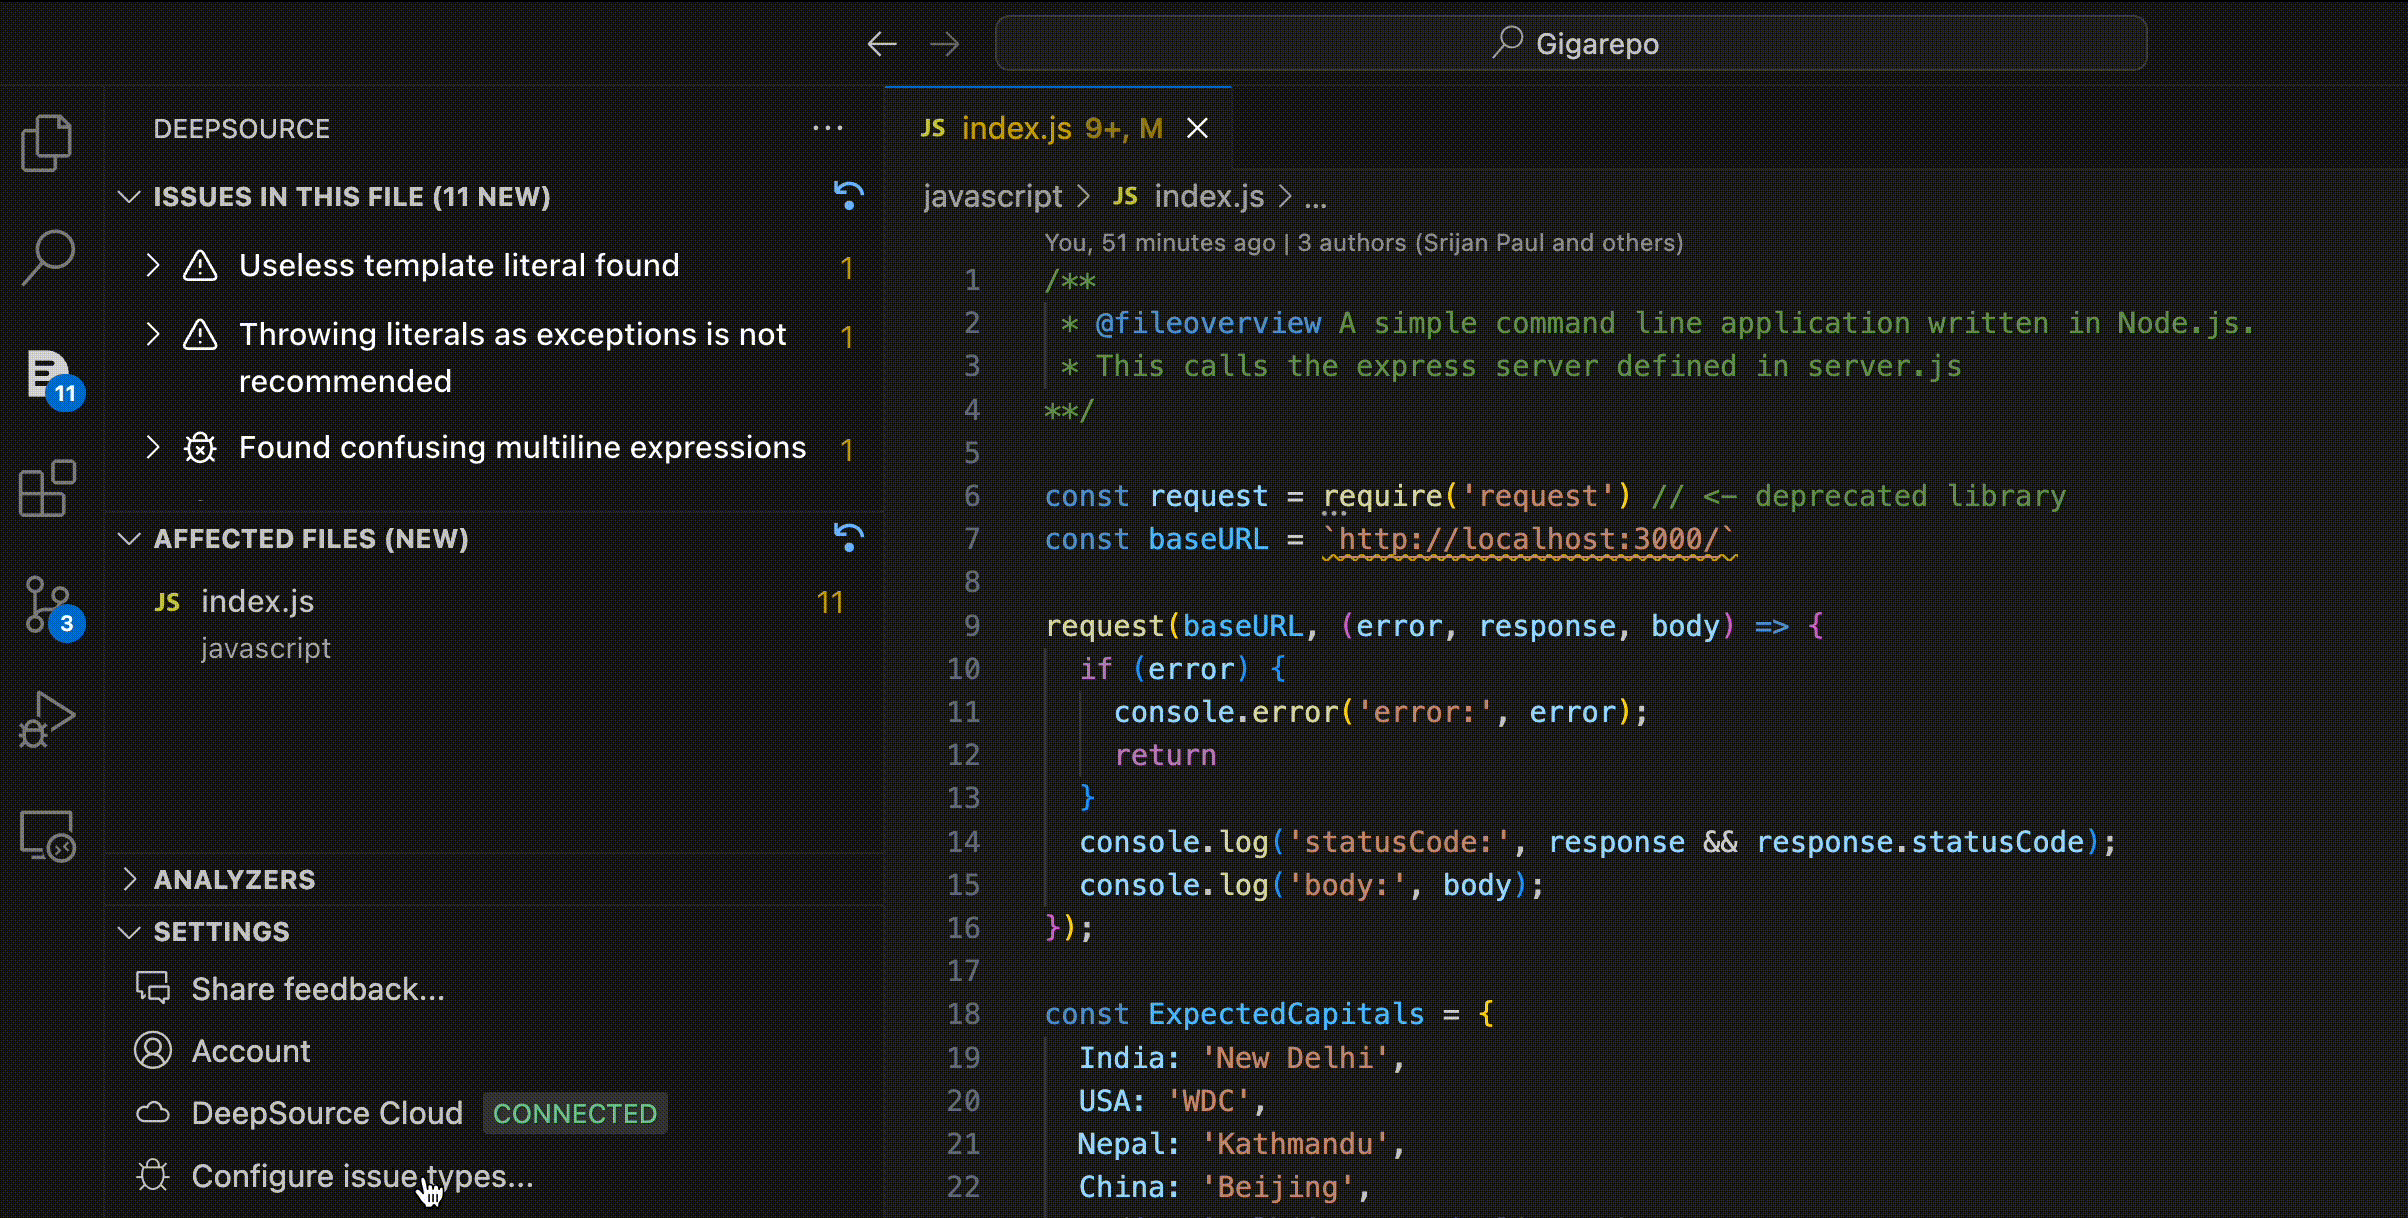
- New issues: Shows all issues that were newly introduced by the programmer in the current branch. You should probably take care of these before pushing your code!
Explain code lens. You can also do this using VSCode’s Quick Fix menu while the cursor is on the line where issue is raised.
Pull Request and Cloud Analysis
- When you open a pull request or commit your code to a branch on an existing pull request, DeepSource will automatically schedule a cloud analysis run.
- After your pull request is merged, all “New issues” found in the branch will transfer to “Existing issues” in DeepSource cloud and your IDE.
Extension Settings
Configuring issue types to raise issues on
You can configure the issue categories for which you want DeepSource to raise issues on in your IDE.- Click on
Configure issue types...in the settings panel - Select the issue categories you want to see issues for and click
OK
Supported Analyzers
The IDE Extension only supports analysis for the following analyzers at the moment:- Java
- JavaScript
- Python
- C#
- PHP
- Ruby
- Kotlin
- Swift
- Scala
IDE access for Enterprise Server
Since IDE Extension is in beta right now, it needs additional configuration for it to be used. Follow the following steps to enable IDE extension for your team:- Go to your installation’s Admin Console
- Click on config → Manage Access to DeepSource → Enable beta features
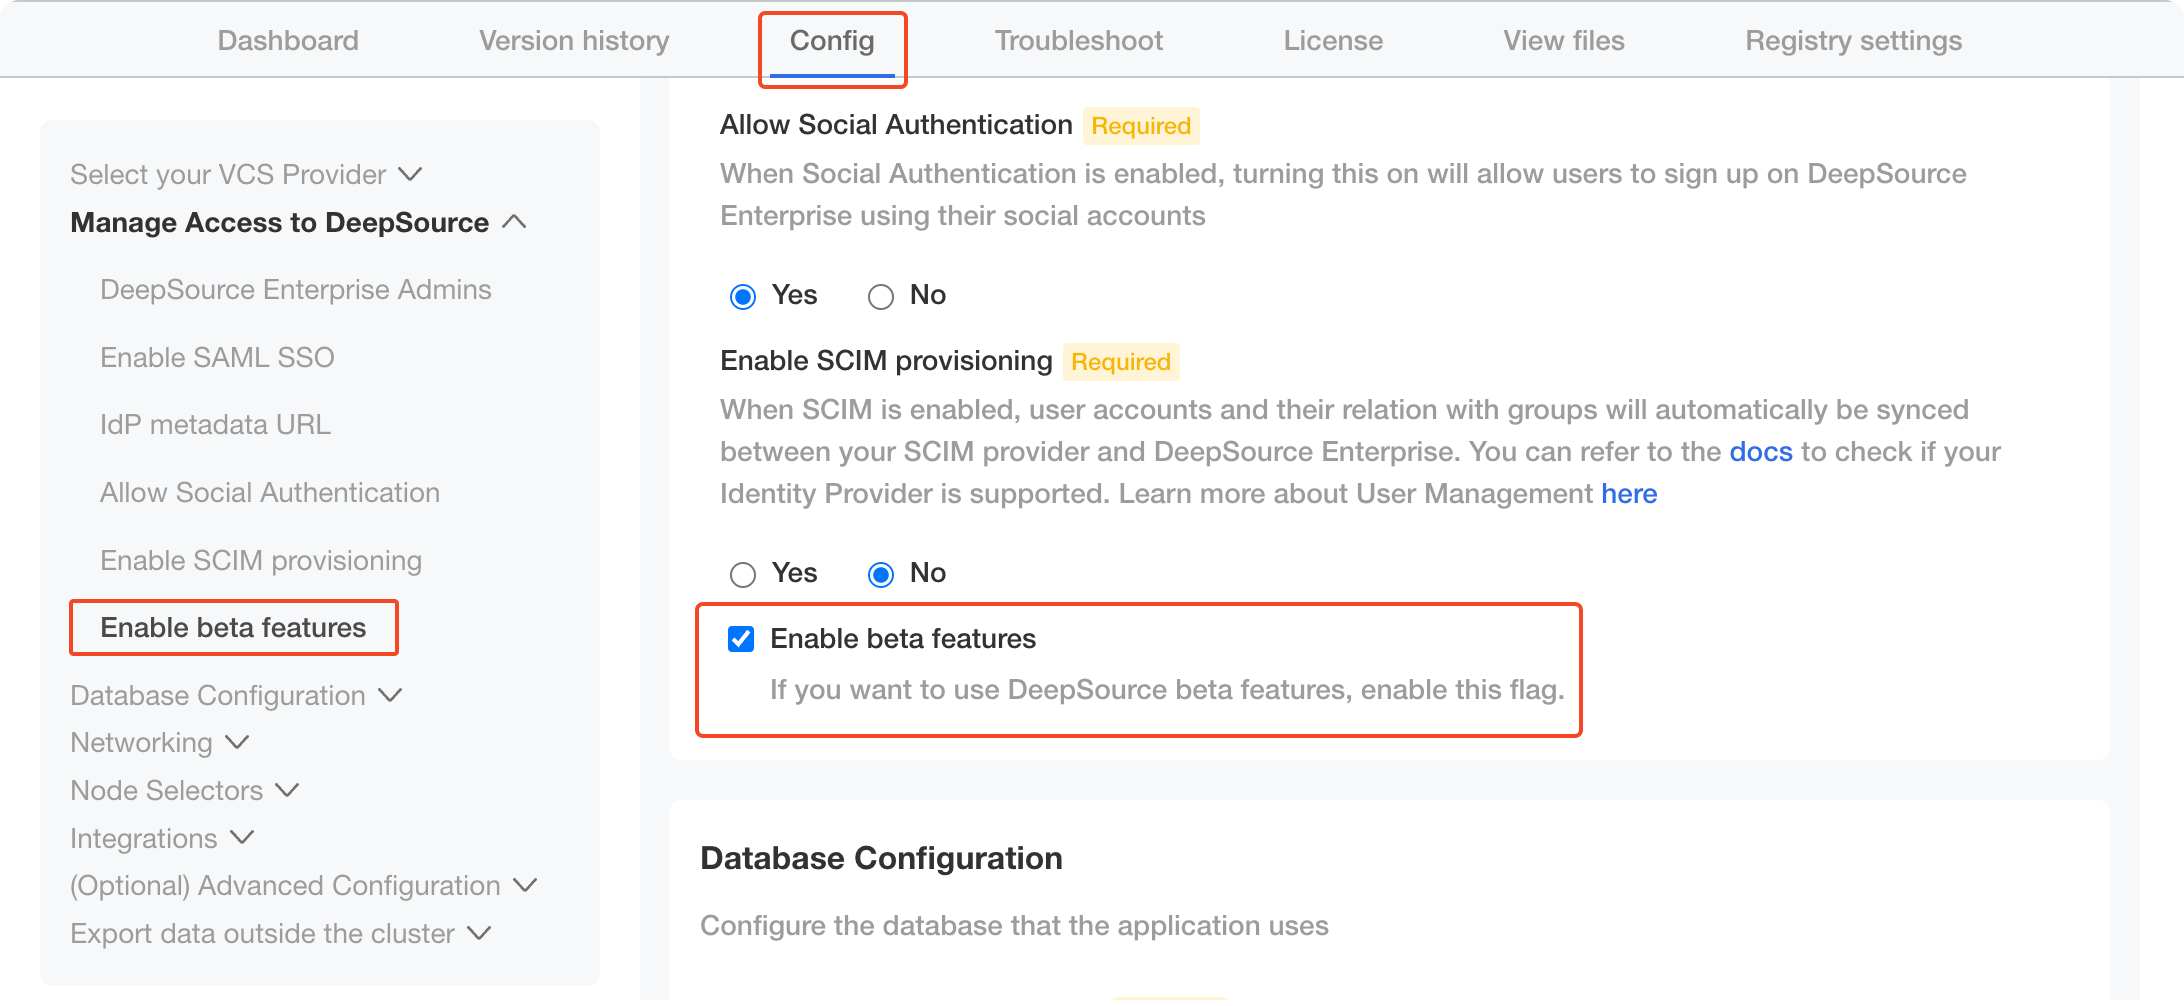
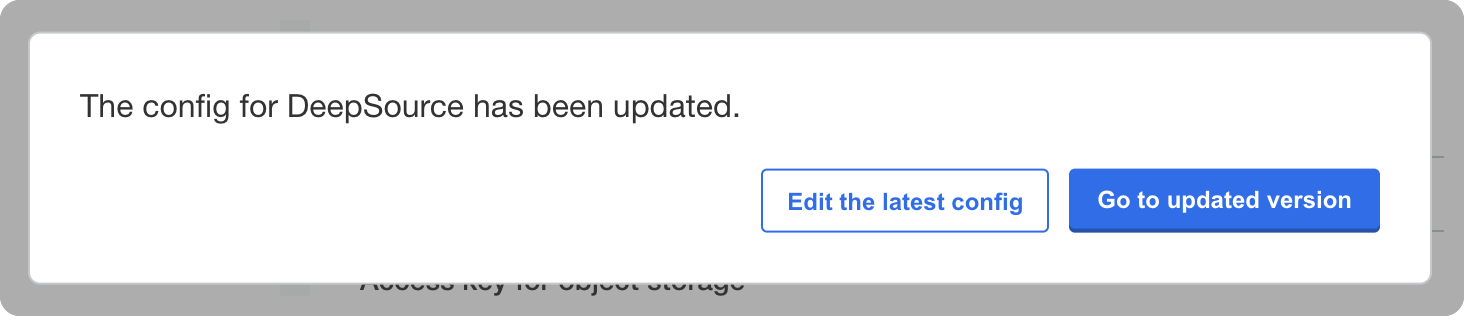
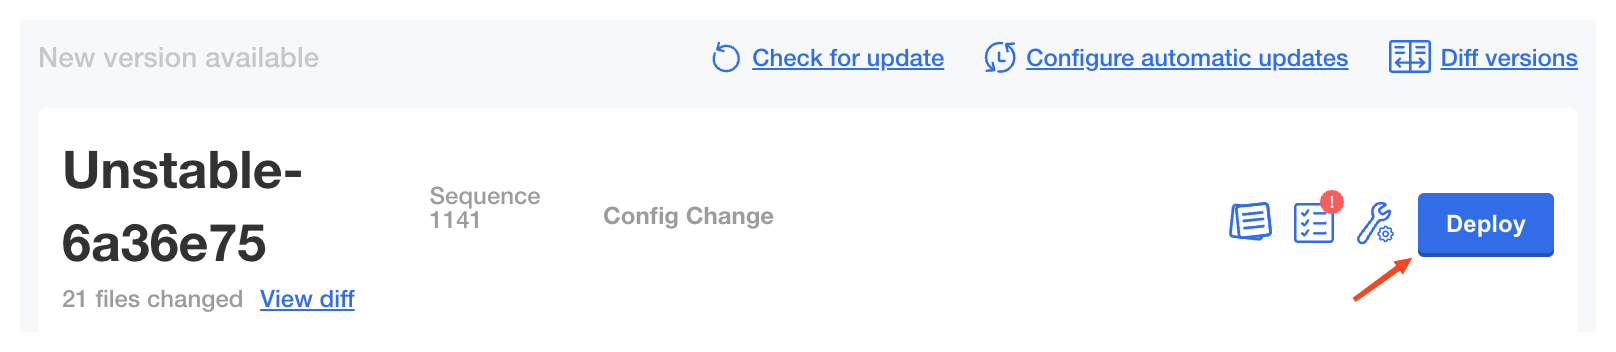
- Enable/Disable the beta features and save the configuration. Once the configuration is saved, you’d need to redeploy with the updated config. Click on “Go to updated version” to find the version with updated config.
- Deploy the newly available version to apply the new configuration.
AI-based Autofix
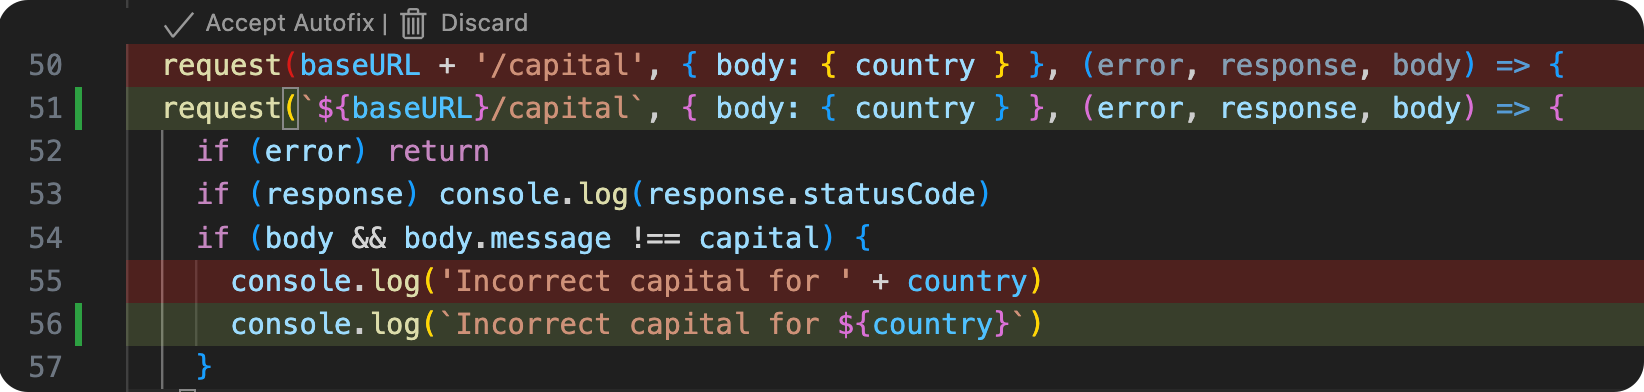
The VS Code extension offers Autofix, a powerful feature that provides automatic suggestions for fixing code issues. This feature utilizes artificial intelligence to intelligently propose code changes — enabling you to review and select the best-fit options that align with your coding style and preferences.How to Use Autofix AI
To fix an issue raised by DeepSource, take your cursor to the span where the issue is raised. Click onAutofix with DeepSource code lens, on top of the line.
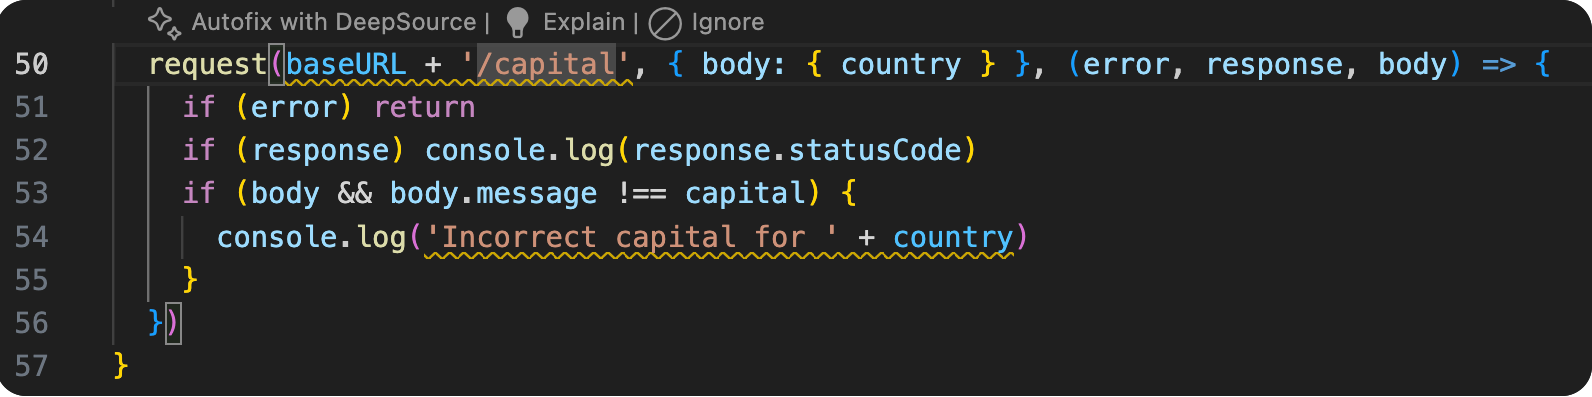

You can also trigger Autofix using VSCode’s Quick Fix menu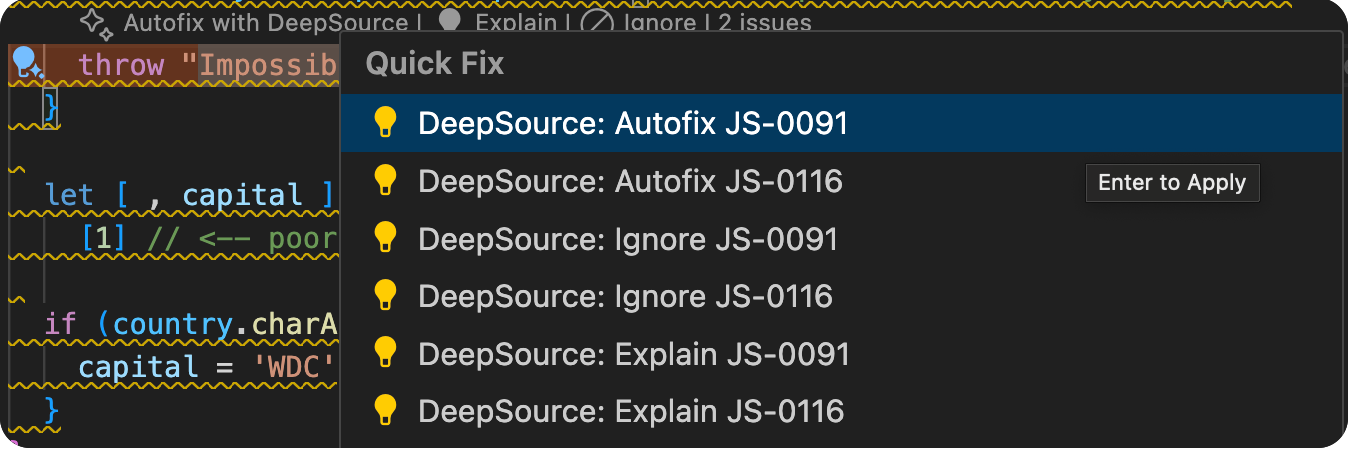
Autofix AI is disabled for all Enterprise plans at the moment.
Support
Your feedback is invaluable in helping us refine and improve the extension further. If you encounter any bugs, hiccups, or have any questions while using the extension, we are here to assist you.Generate Support Bundle
To help us diagnose issues more effectively, you can generate a support bundle that contains diagnostic information:- Open the VS Code command palette with
Cmd + Shift + P(Mac) orCtrl + Shift + P(Windows/Linux) - Type “DeepSource: Generate Support Bundle” and select the command
- Share the generated file with us when contacting support