
Azure AD
This document explains the process to enable SAML SSO and SCIM on DeepSource using Azure Active Directory (AD) as the Identity Provider (IdP).
Requires Enterprise Plans
Enabling SAML SSO and SCIM requires the team to be on Enterprise Cloud or Server plans. Please reachout to your account manager (or) sales@deepsource.io for a demo.
SAML SSO
Configuring SAML SSO on Azure AD
For now, an admin (on Azure) needs to create a custom SAML connector for DeepSource Enterprise. The steps for which are as follows:
- Visit https://portal.azure.com/ and log in to your Microsoft account.
- From your home screen, click the hamburger menu in the top left and then “Azure Active Directory” → "Enterprise applications".
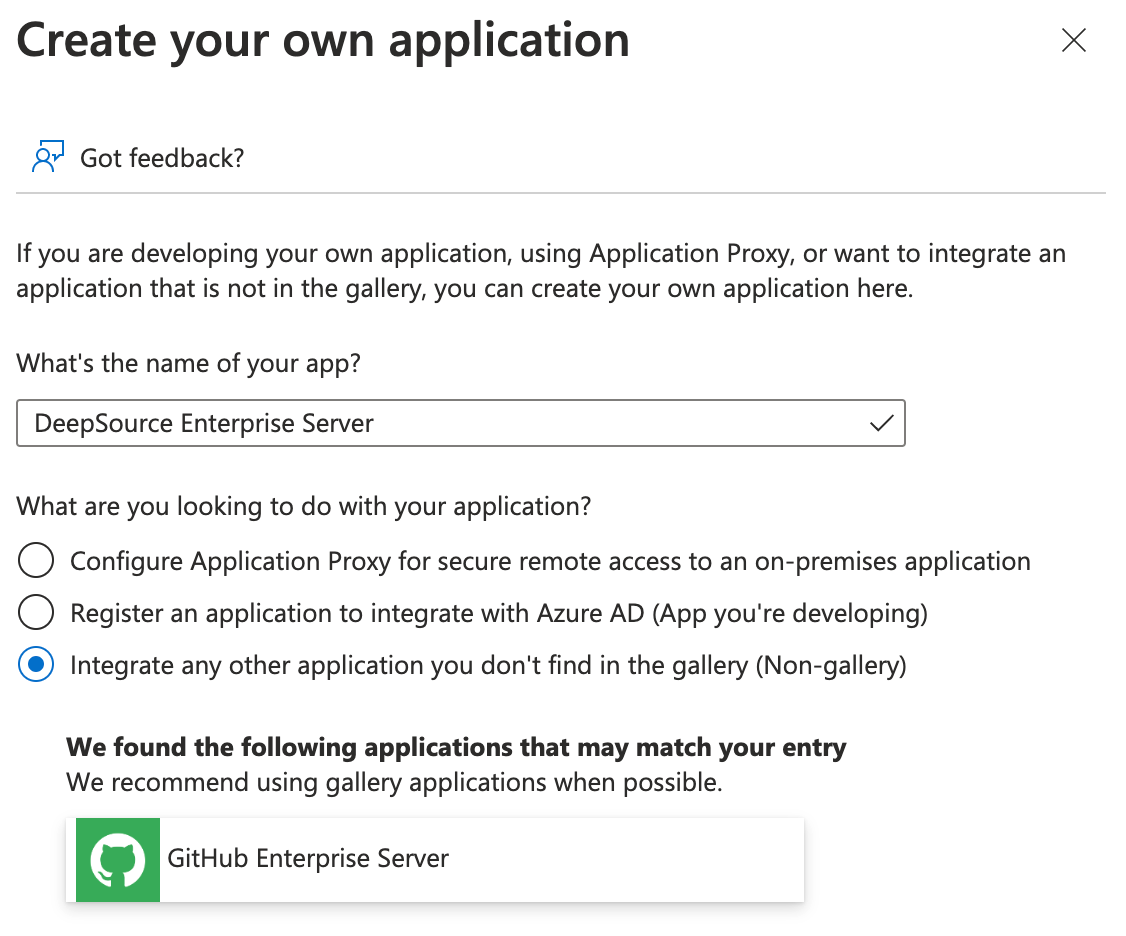
- Then, click on "New application" and then click on “Create your own application”.
- Fill in the following details and click “Create”:
| Field | Value |
|---|---|
| What's the name of your app? | DeepSource Enterprise Server |
| What are you looking to do with your application? | Integrate any other application you don't find in the gallery (Non-gallery) |
- From the home screen of this new application, click on “Set up single sign on” and then “SAML”.
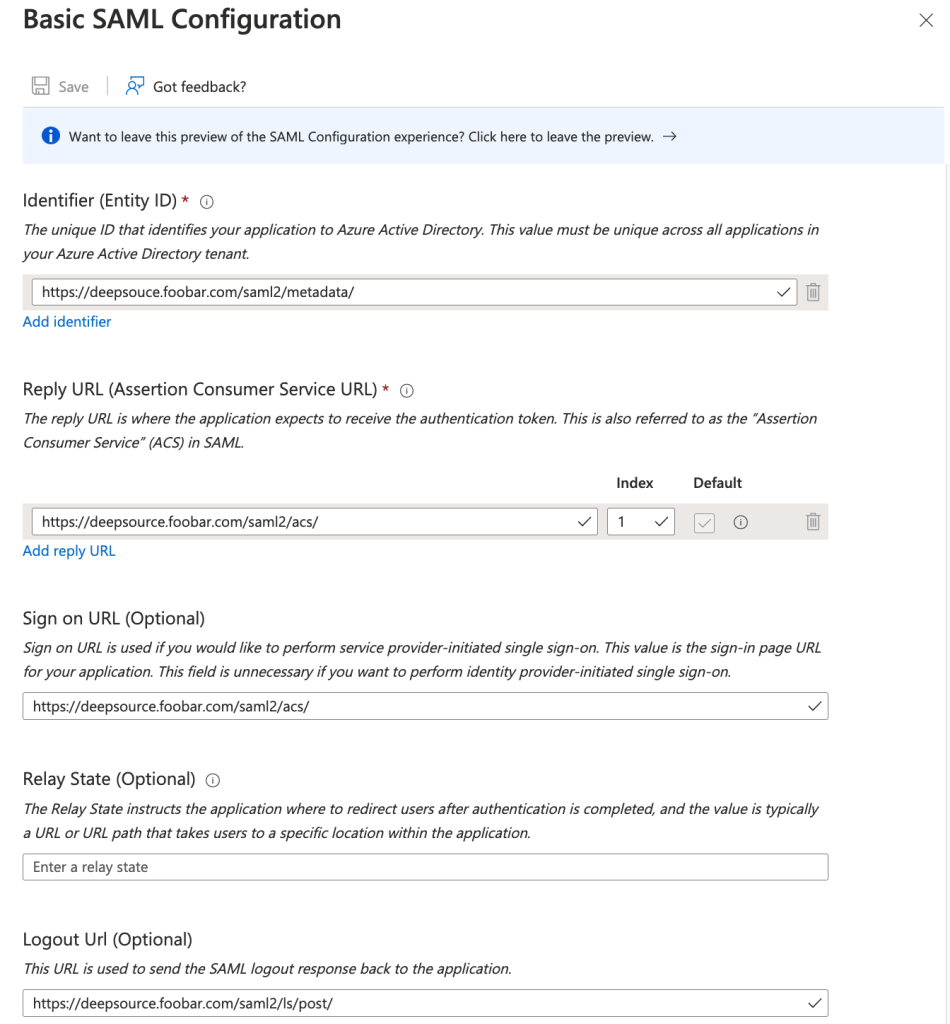
- Click on “Edit” against the “Basic SAML Configuration” heading.
- Assuming that DeepSource is hosted on
https://deepsource.foobar.comfill in the following details accordingly leaving the rest of the fields with defaults and click “Save”:
| Field | Value |
|---|---|
| Identifier (Entity ID) | https://deepsource.foobar.com/saml2/metadata/ |
| Reply URL (Assertion Consumer Service URL) | https://deepsource.foobar.com/saml2/acs/ |
| Sign on URL | https://deepsource.foobar.com/saml2/acs/ |
| Logout URL | https://deepsource.foobar.com/saml2/ls/post/ |
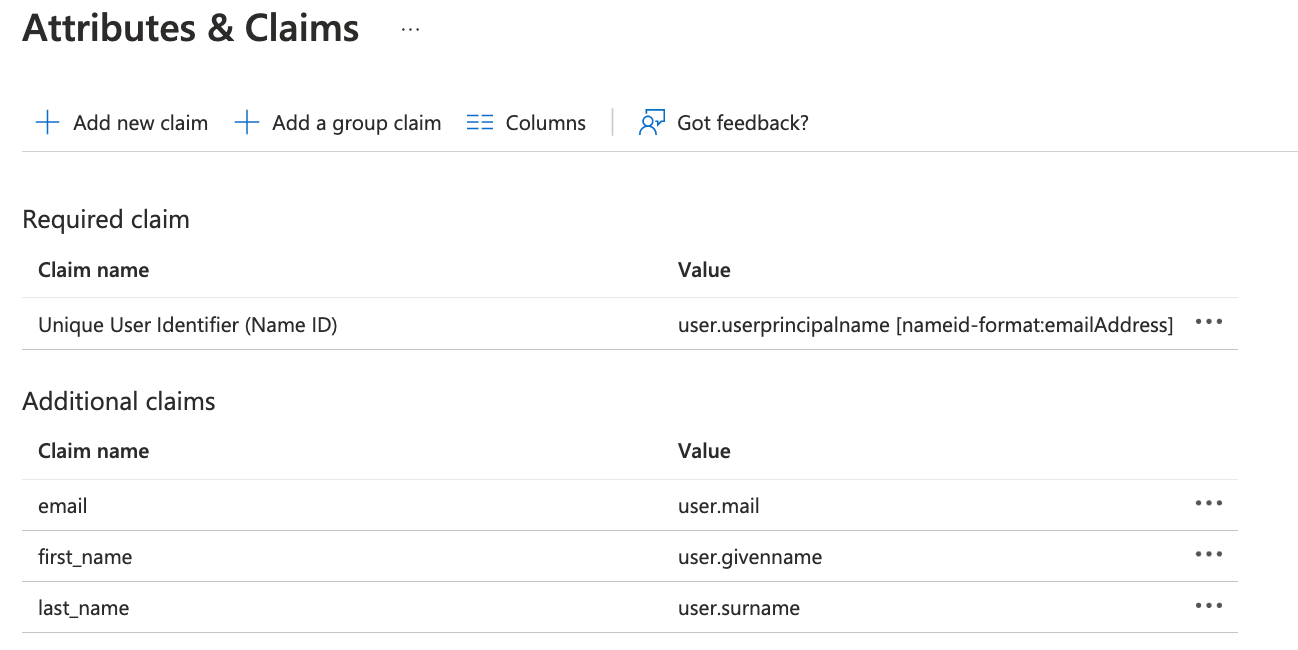
- Click on “Edit” against the “Attributes & Claims” heading.
- Fill in the following details and click “Save”:
| Name | Source | Namespace | Source attribute |
|---|---|---|---|
| Unique User Identifier (Name ID) | Attribute | user.userprincipalname (from dropdown) | |
| Attribute | user.mail (from dropdown) | ||
| first_name | Attribute | user.givenname (from dropdown) | |
| last_name | Attribute | user.surname (from dropdown) |
-
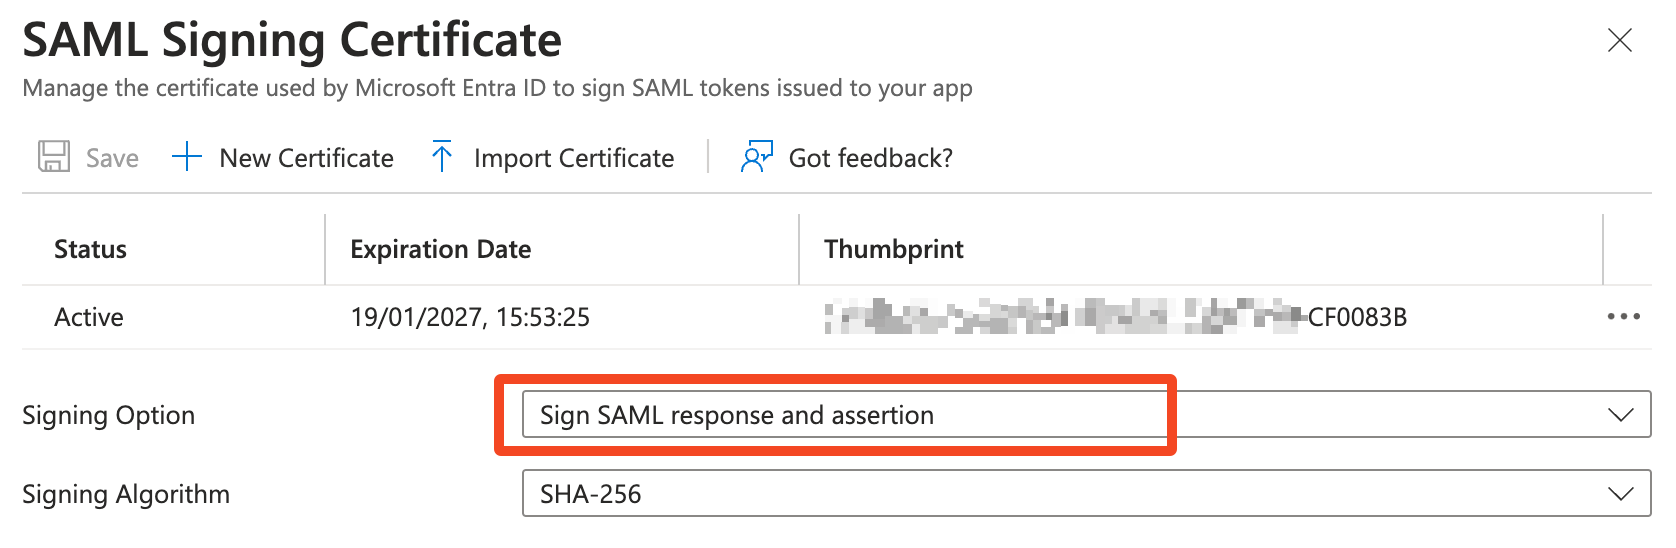
Click on “Edit” against the “SAML Certificates” heading.
-
Make sure the "Signing Option" is set to "Sign SAML response and assertion".
-
Now we need to select which users can access this application for sign-in into DeepSource. You can either choose to disable assignment to grant access to all users in your AD (follow steps in option i) or you can selectively grant access to specific users (follow steps in option ii).
- Navigate to “Properties” using the menu on the left. Turn “Assignment Required?” to “No” and click “Save”.
- Navigate to “Users and Groups” using the menu on the left then click “Add user/group” → “None Selected” then select the users from the list on the right and click “Select” → “Assign”.
-
Navigate to “Single sign-on” again using the menu on the left and copy the “App Federation Metadata Url” under the “SAML Signing Certificate” section. Make sure the URL starts with
https://login.microsoftonline.com/. -
At this point, SAML-based Sign-on has been configured successfully. You can also choose to test to verify the connection by clicking the “Test” → “Test sign in” buttons on the “Single sign-on” page.
- In step 4, name of the app should be changed to
DeepSource Enterprise Cloud. - In step 7, DeepSource's URL should be changed to https://app.deepsource.com.
Configuring SAML SSO on DeepSource
Refer to:
- Setup SAML SSO -> Configuration on DeepSource Enterprise Cloud, or,
- Setup SAML SSO -> Configuration on DeepSource Enterprise Server.
SCIM Provisioning
Configuring SCIM on Azure AD
- To Enable SCIM Provisioning, go to the DeepSource application you created on Azure in the previous section.
- Navigate to “Provisioning” using the menu on the left and click on “Get started”.
- Set Provisioning Mode to Advanced and fill in the following under Admin Credentials:
| Field | Value |
|---|---|
| Tenant URL | https://deepsource.foobar.com/scim/v2/ |
| Secret Token | SCIM Authentication token which you have put in Admin Panel |
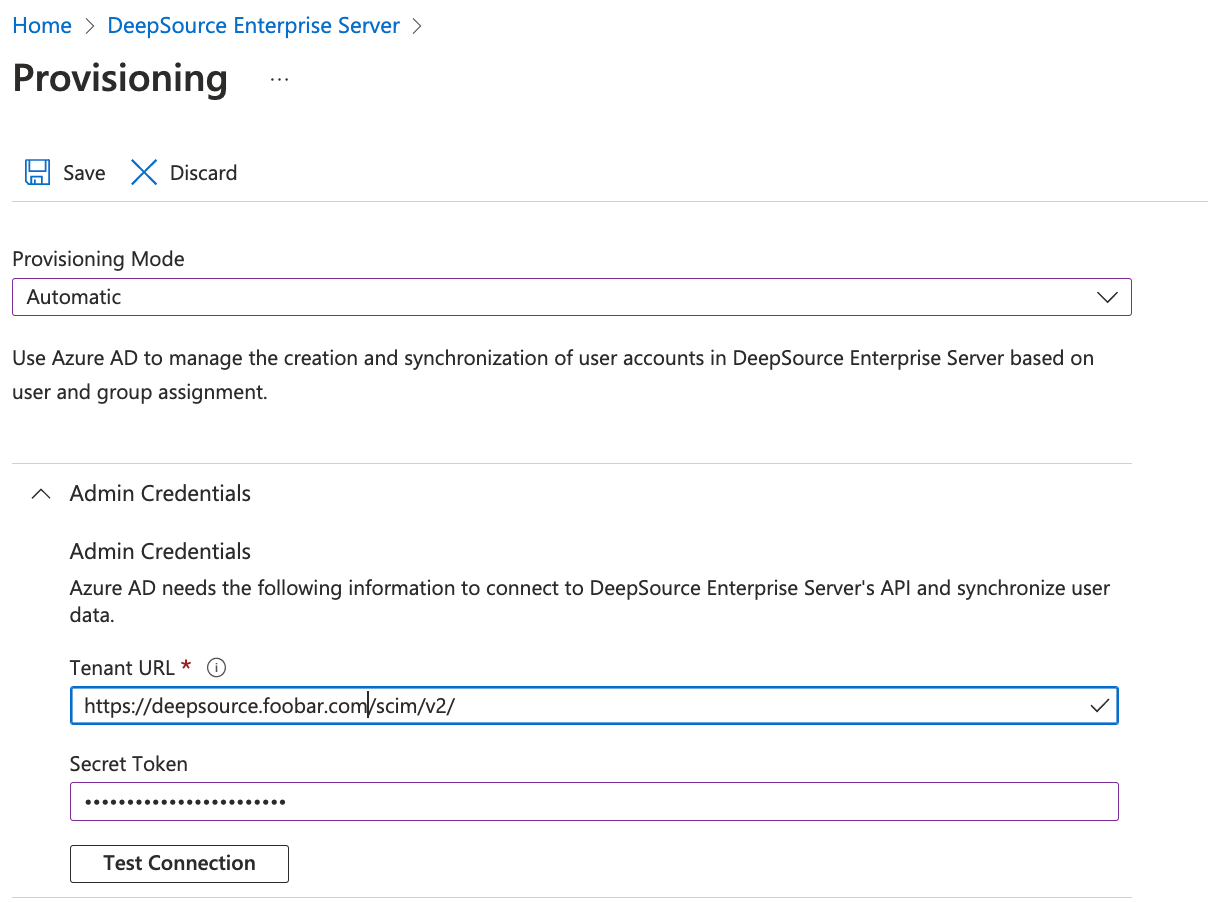
- Click on “Test Connection” to verify the SCIM connection.
- Click on ”Save” to apply the settings.
- Finally, navigate back to the “Provisioning” tab and click on “Start provisioning” to enable the sync.
In step 3, the following values should be used instead:
| Field | Values | |
|---|---|---|
| Tenant URL | https://app.deepsource.com/scim/v2/ | |
| Secret Token | SCIM Authentication token generated from DeepSource |
Configuring SCIM on DeepSource
Refer to: