
OneLogin
This document explains the process to enable SAML SSO and SCIM on DeepSource using OneLogin as the Identity Provider (IdP).
Enabling SAML SSO and SCIM requires the team to be on Enterprise Cloud or Server plans. Please reachout to your account manager (or)sales@deepsource.io for a demo.
SAML SSO
Configuring SAML SSO on OneLogin
For now, an admin (on OneLogin) needs to create a custom SAML connector for DeepSource Enterprise. The steps for which are as given:
- On the top menu, go to
Applications → Applications, and click on "Add App". - Search for and choose “SCIM Provisioner with SAML (SCIM v2 Enterprise, full SAML)”.
- Fill in the following details and click “Save”:
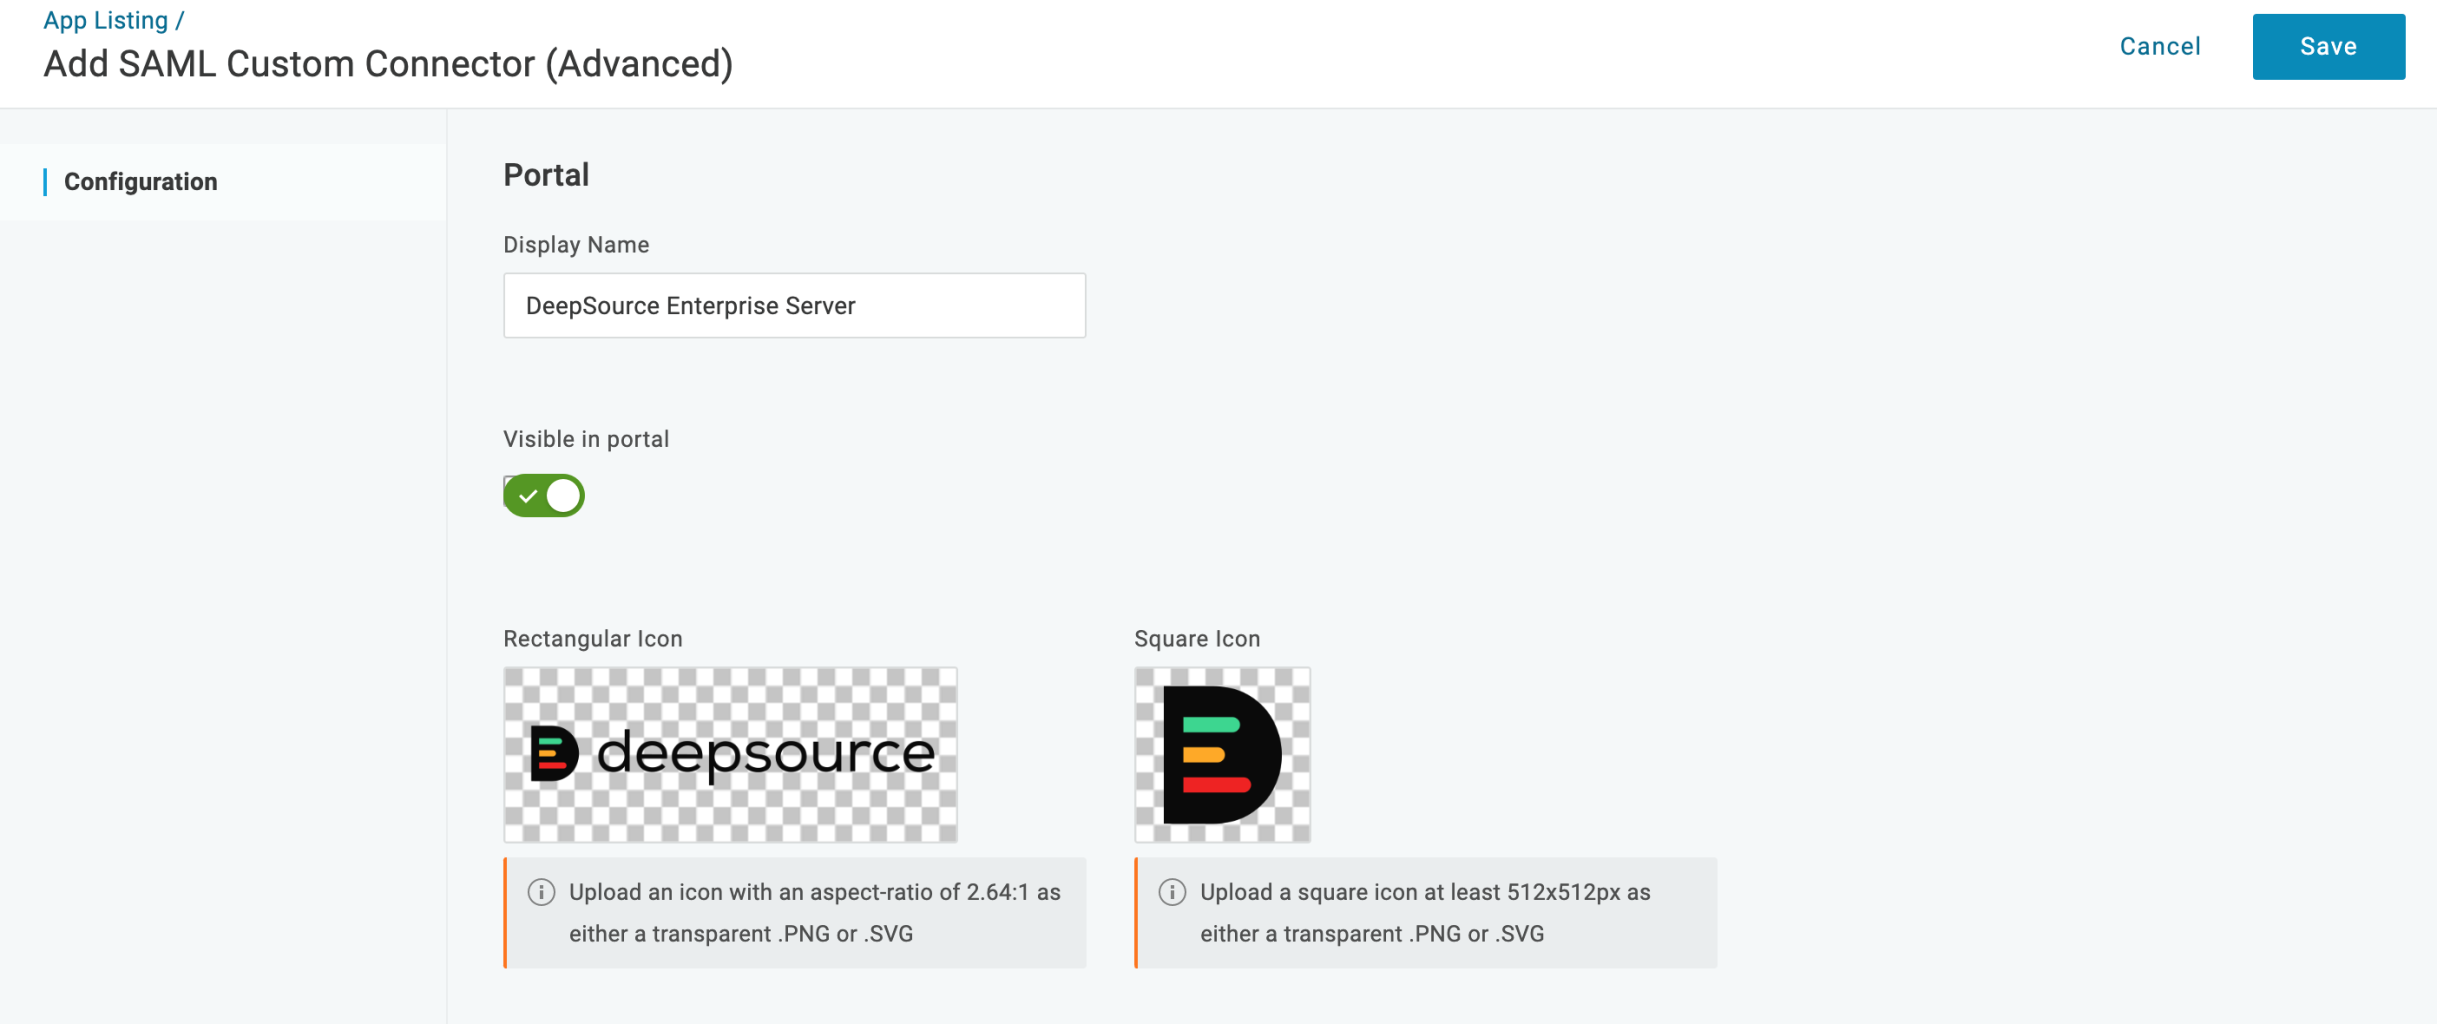
| Field | Value |
|---|---|
| Display Name | DeepSource Enterprise Server |
- Navigate to the “Configuration” tab using the sidebar on the left.
- Assuming that DeepSource is hosted on
https://deepsource.foobar.com, fill in the following details accordingly leaving the rest of the fields with defaults and click “Save”:
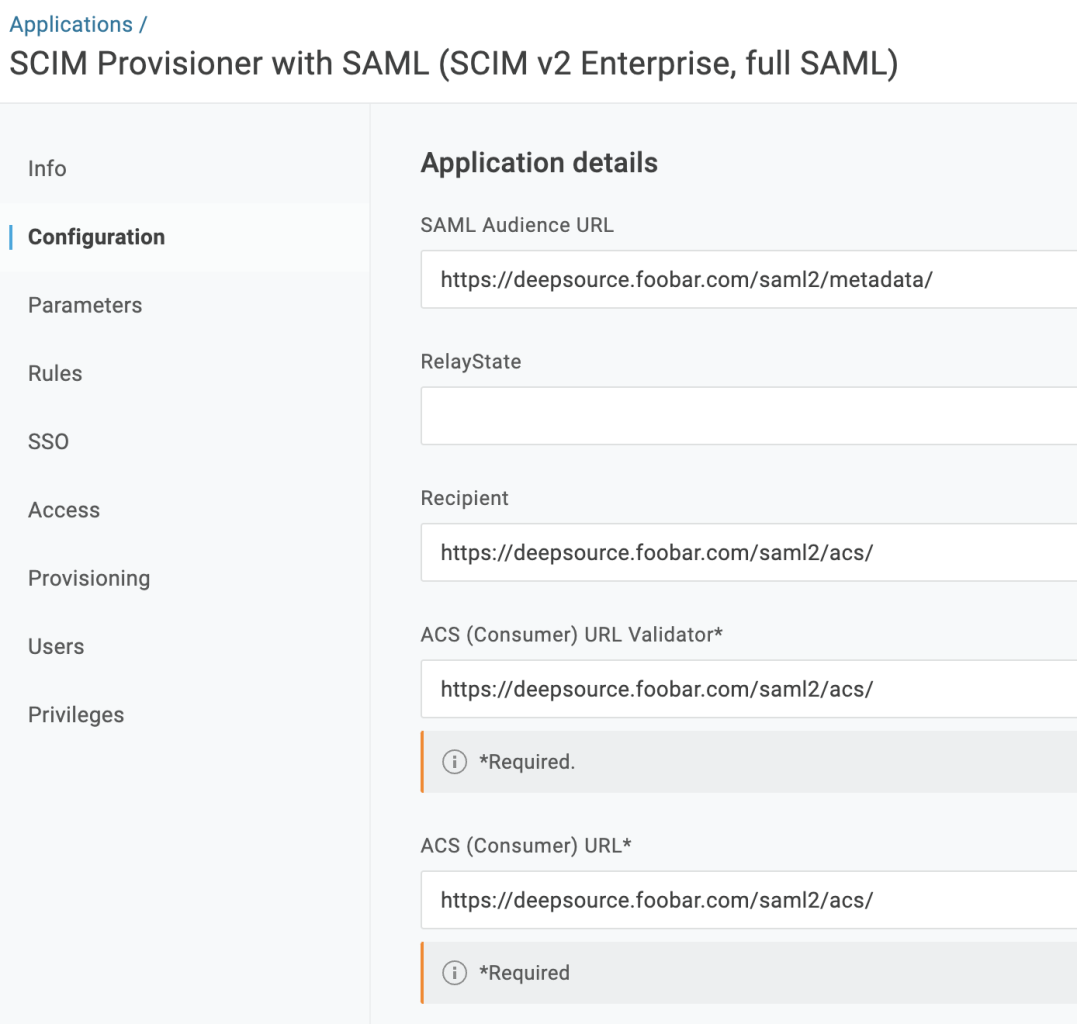
| Field | Value |
|---|---|
| SAML Audience URL | https://deepsource.foobar.com/saml2/metadata/ |
| SAML Audience URL | https://deepsource.foobar.com/saml2/acs/ |
| ACS (Consumer) URL Validator | https://deepsource.foobar.com/saml2/acs/ |
| ACS (Consumer) URL | https://deepsource.foobar.com/saml2/acs/ |
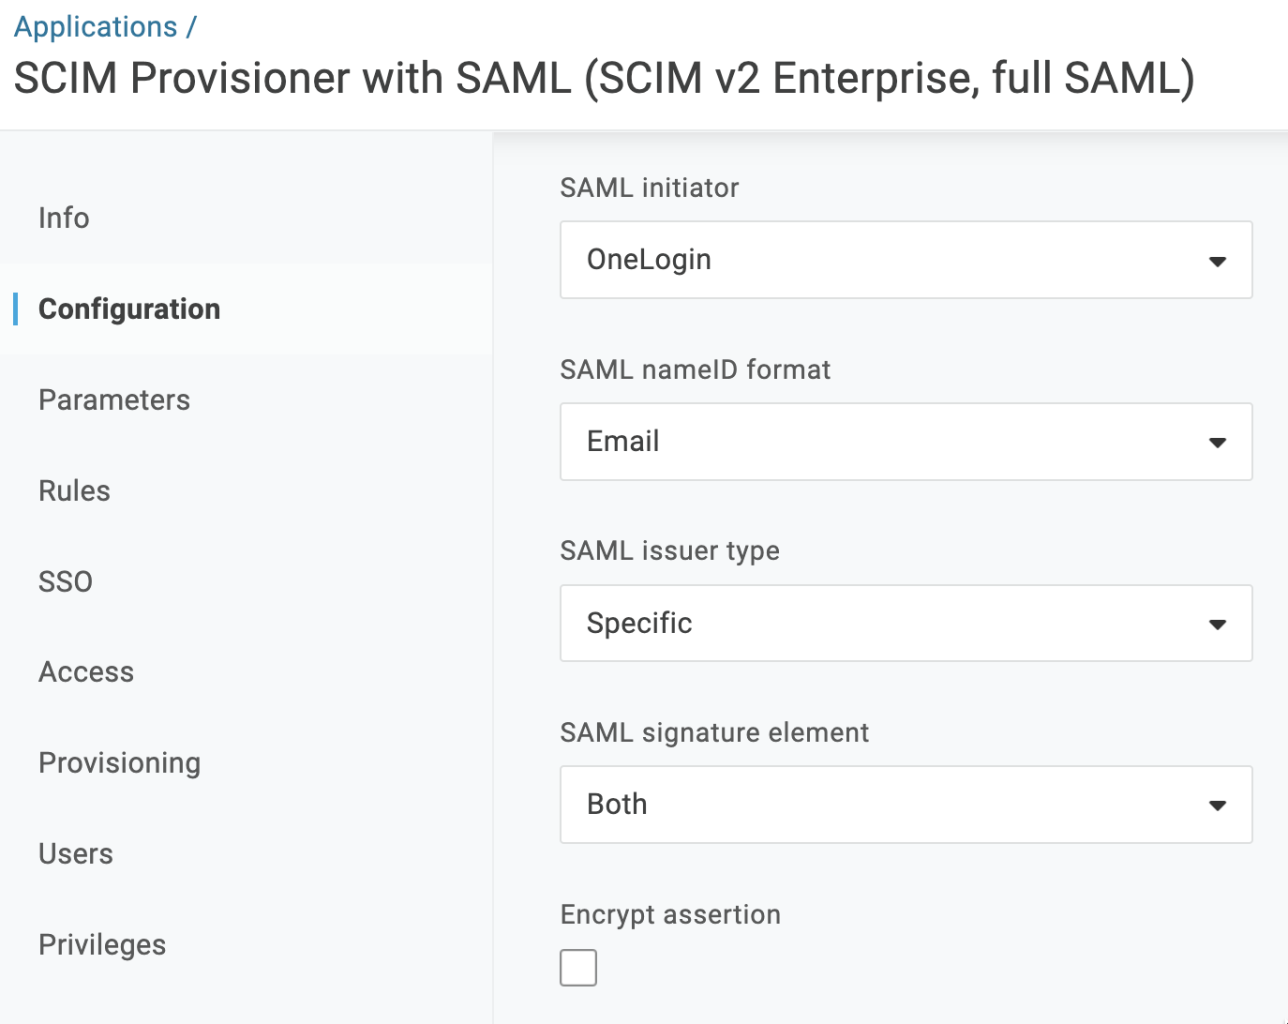
| SAML signature element | Both (from dropdown) |
- Navigate to the “SSO” using the sidebar on the left.
- Change the “SAML Signature Algorithm” field to use a stronger algorithm such as “SHA-512” (from dropdown) and click on “Save”.
- On the same screen, copy the “Issuer URL”. It should be in the format
https://app.onelogin.com/saml/metadata/<app-uuid>.
- In step 3, name of the app should be changed to DeepSource Enterprise Cloud.
- In step 5, DeepSource's URL should be changed to https://app.deepsource.com.
Configuring SAML SSO on DeepSource
Refer to:
- Setup SAML SSO -> Configuration on DeepSource Enterprise Cloud, or,
- Setup SAML SSO -> Configuration on DeepSource Enterprise Server.
SCIM Provisioning
Configuring SCIM on OneLogin
- To Enable SCIM Provisioning, go to your "DeepSource Enterprise Server" application on OneLogin.
- Go to the Configuration tab, under API Connection, click on Enable and configure the given parameters.
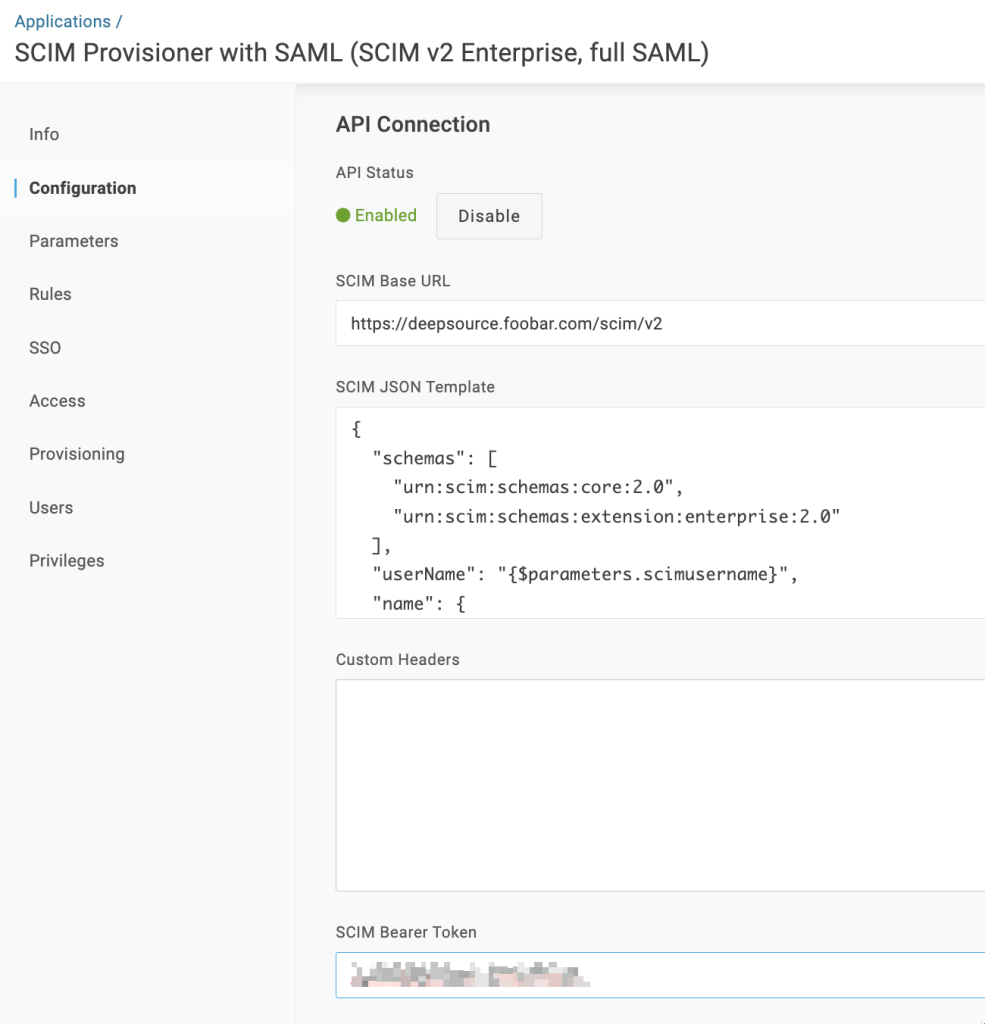
| Field | Value |
|---|---|
| SCIM Base URL | https://deepsource.foobar.com/scim/v2 (no trailing slash) |
| SCIM Bearer Token | SCIM Authentication token which you have put in Admin Panel in the previous step |
- Click on Save to apply the settings.
- Go to the Provisioning tab, and configure the given parameters.
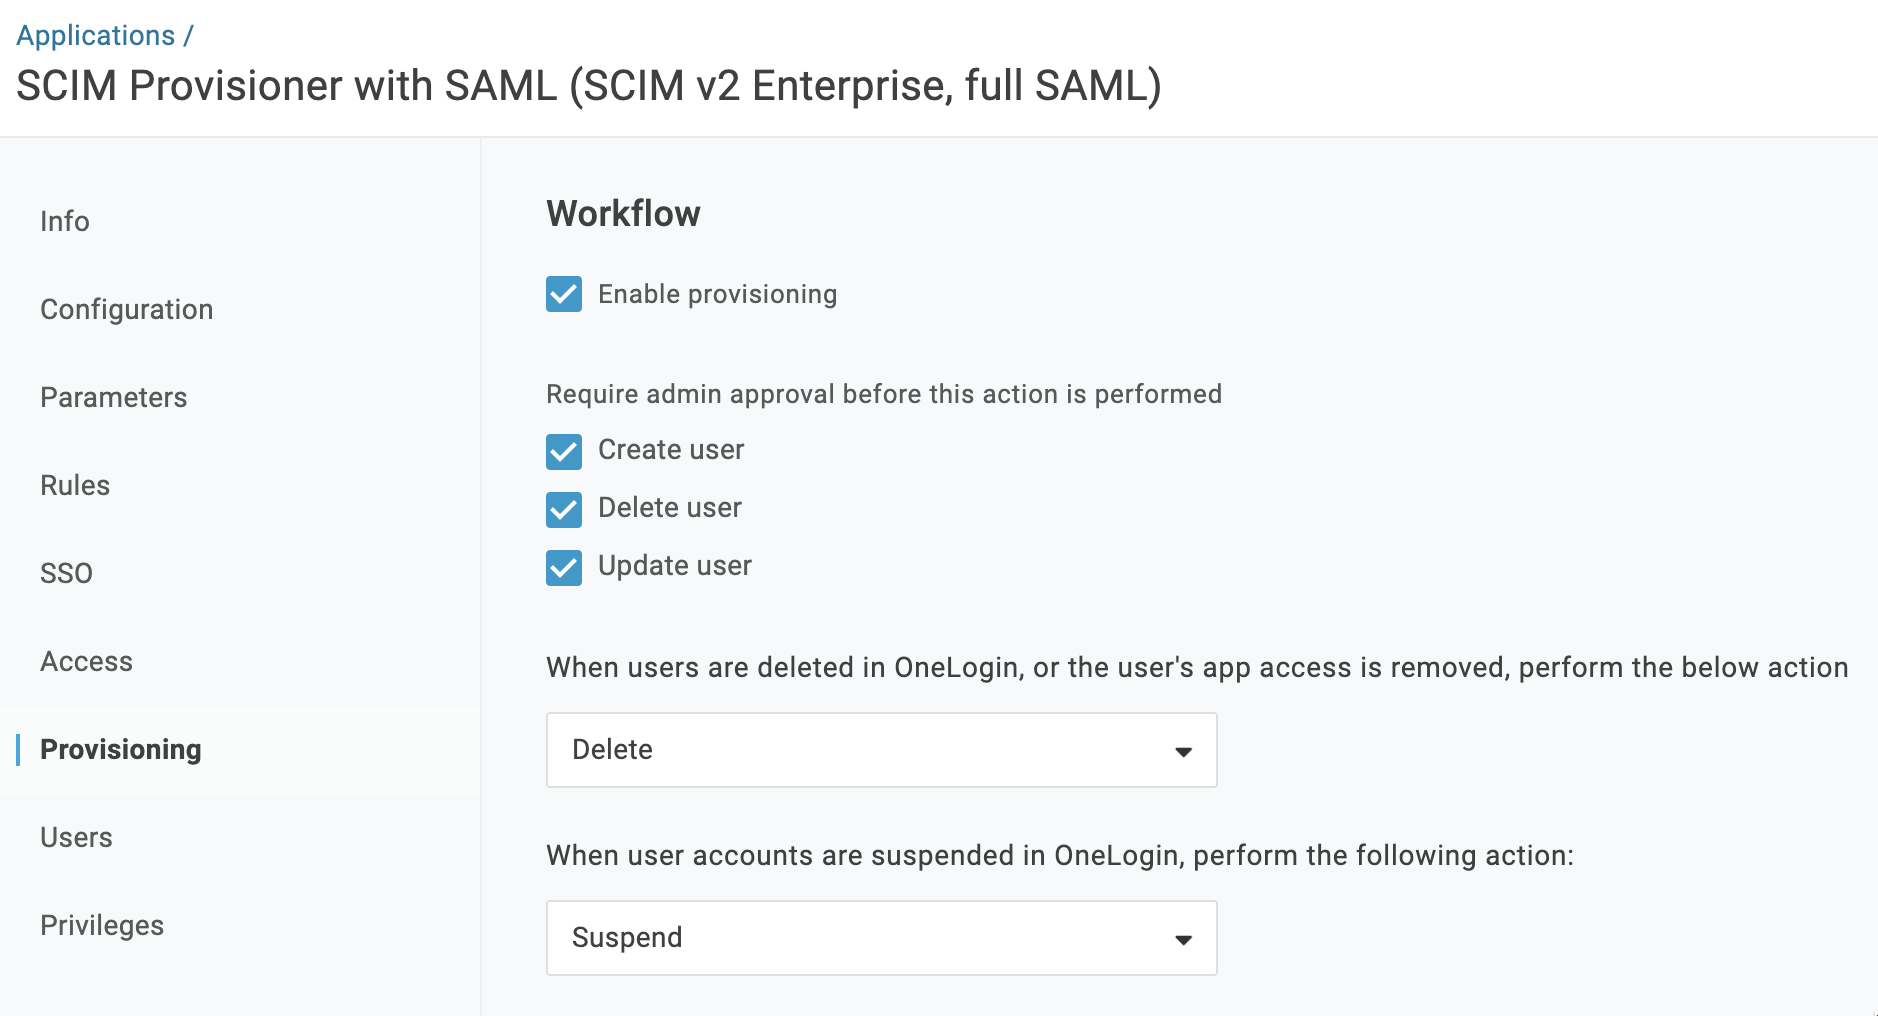
| Field | Value |
|---|---|
| Enable provisioning | |
| Create user | |
| Delete user | |
| Update user |
- Click on Save to apply the settings
In step 2, the following values should be used instead:
| Field | Values | |
|---|---|---|
| SCIM Base URL | https://app.deepsource.com/scim/v2 (no trailing slash) | |
| SCIM Bearer Token | SCIM Authentication token generated from DeepSource |
Configuring SCIM on DeepSource
Refer to: