
Okta
This document explains the process to enable SAML SSO and SCIM on DeepSource using Okta as the Identity Provider (IdP).
Requires Enterprise Plans
Enabling SAML SSO and SCIM requires the team to be on Enterprise Cloud or Server plans. Please reachout to your account manager (or) sales@deepsource.io for a demo.
SAML SSO
Configuring SAML SSO on Okta
For now, an admin (on Okta) needs to create a custom SAML integration for DeepSource Enterprise. The steps for which are as given:
- On the left sidebar, choose "Applications" → "Applications", and click on "Create App Integration".
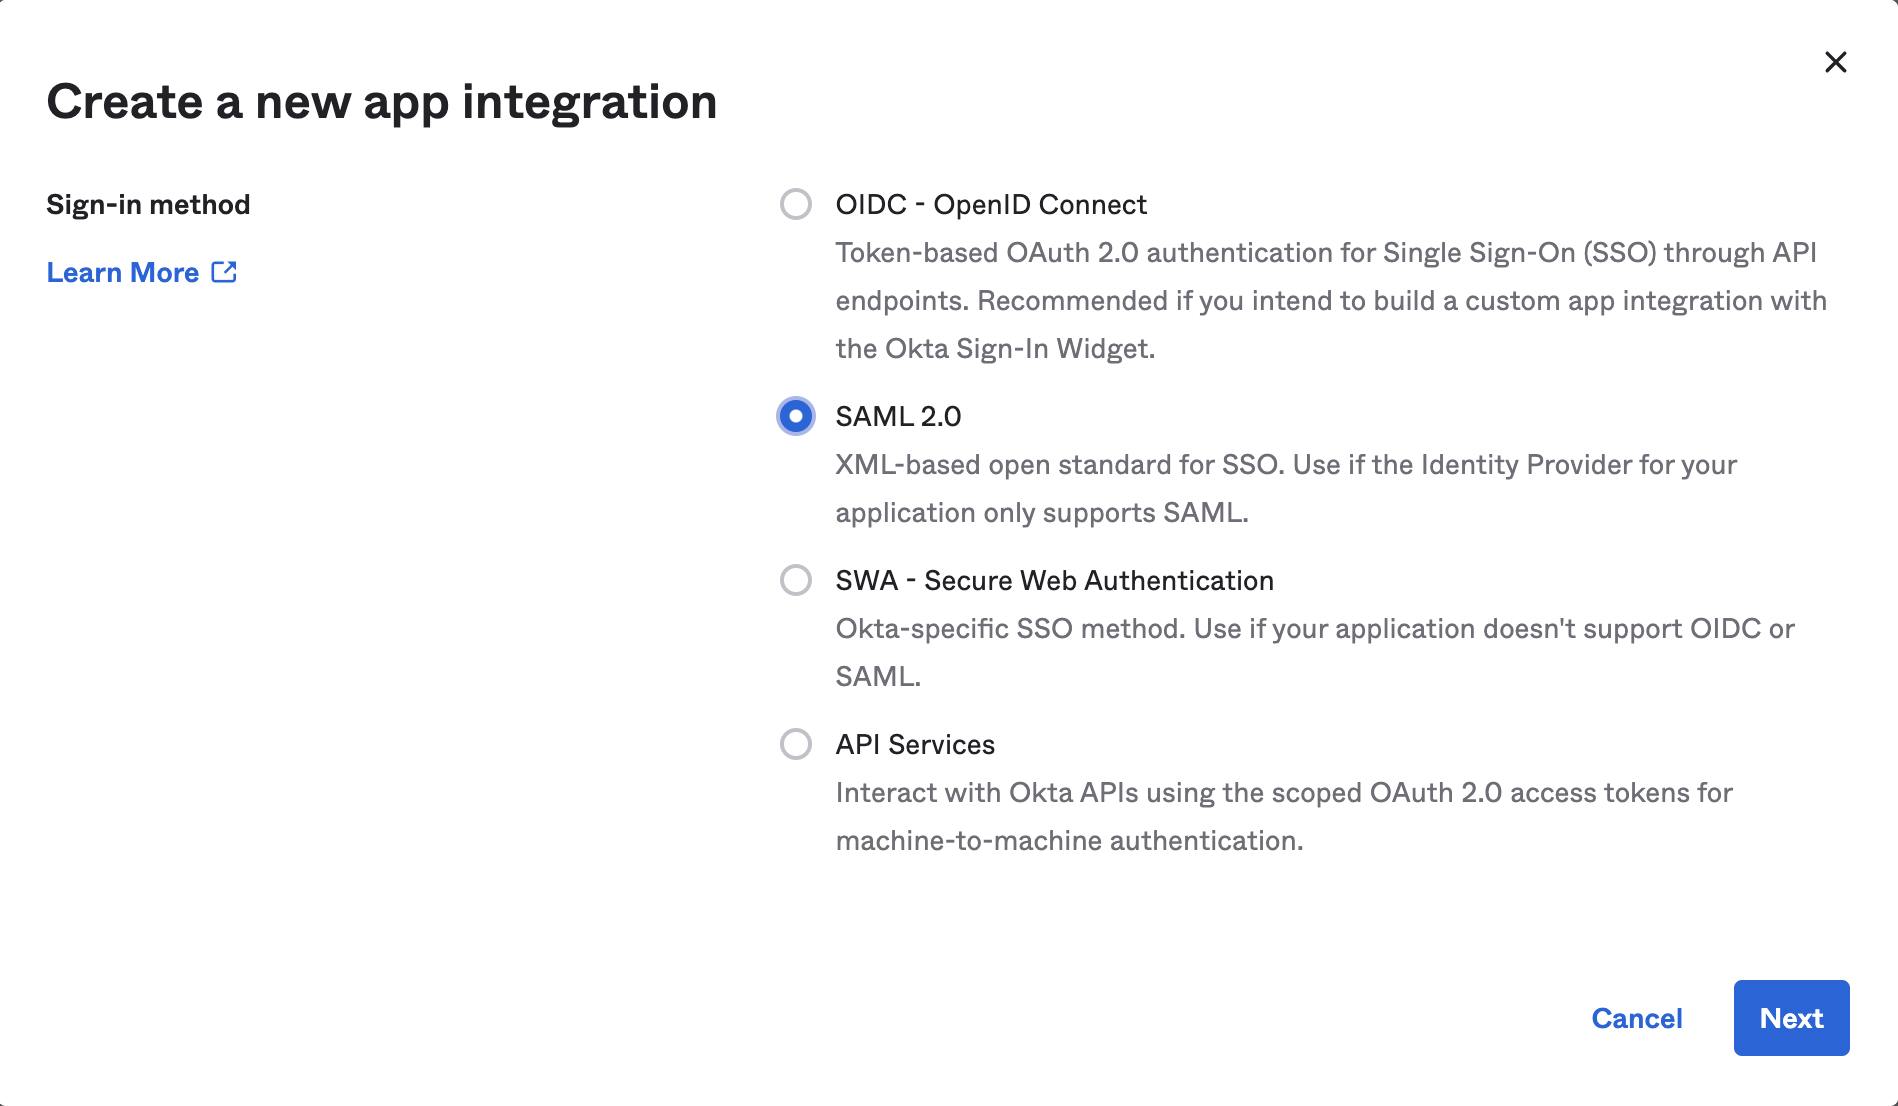
- Choose "SAML 2.0" and click "Next".
- Fill in the following details:
| Field | Value |
|---|---|
| App Name | DeepSource |
- Assuming that DeepSource is hosted on-premise at
https://deepsource.foobar.com, fill in the following details accordingly:
If you're on DeepSource Enterprise Cloud, replace https://deepsource.foobar.com with https://app.deepsource.com
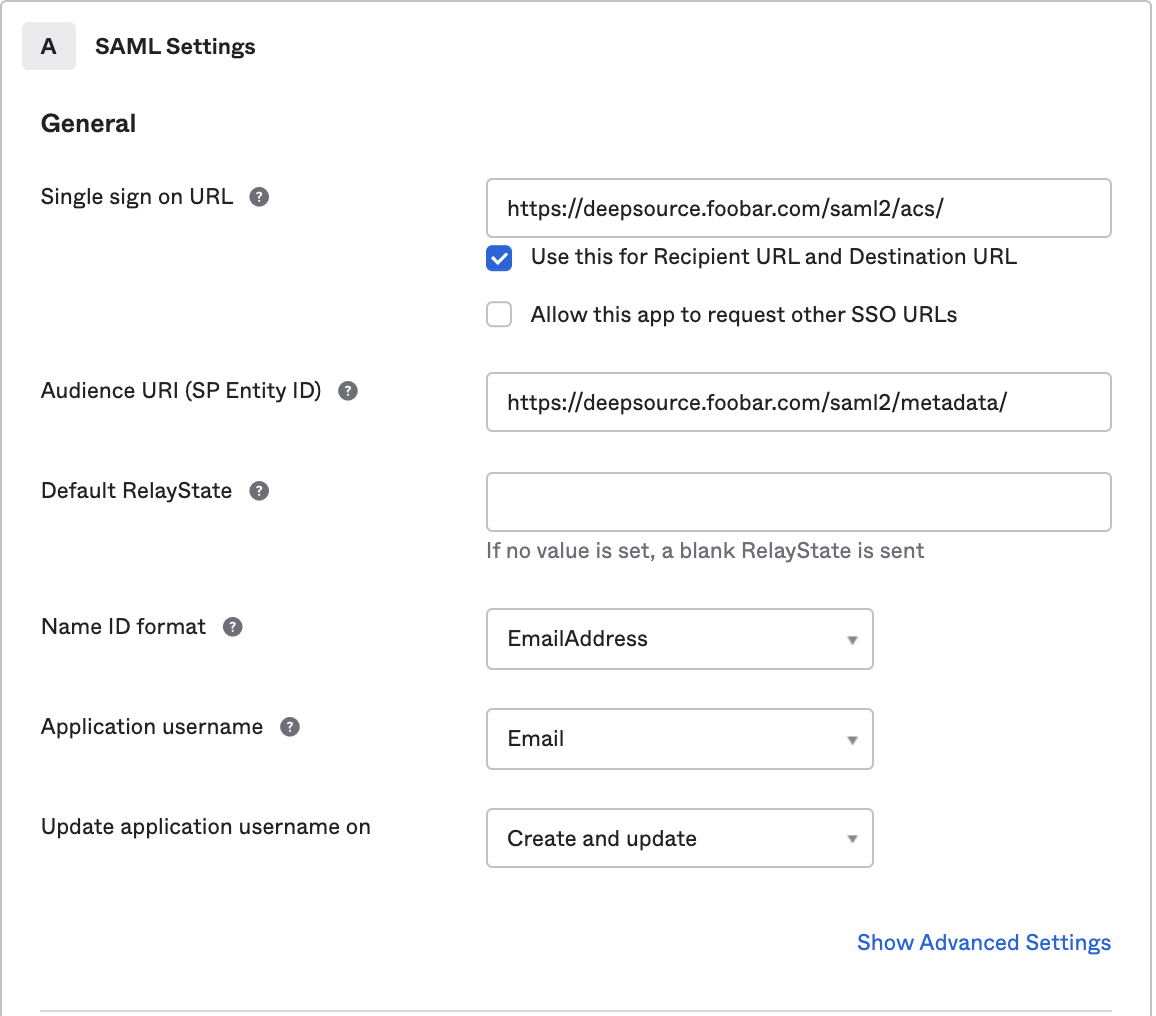
| Field | Values |
|---|---|
| Single sign on URL | https://deepsource.foobar.com/saml2/acs/ |
| Audience URI (SP Entity ID) | https://deepsource.foobar.com/saml2/metadata/ |
| Name ID format | EmailAddress (choose from drop down) |
| Application username | Email (choose from drop down |
- In "Attribute Statements", add the following:
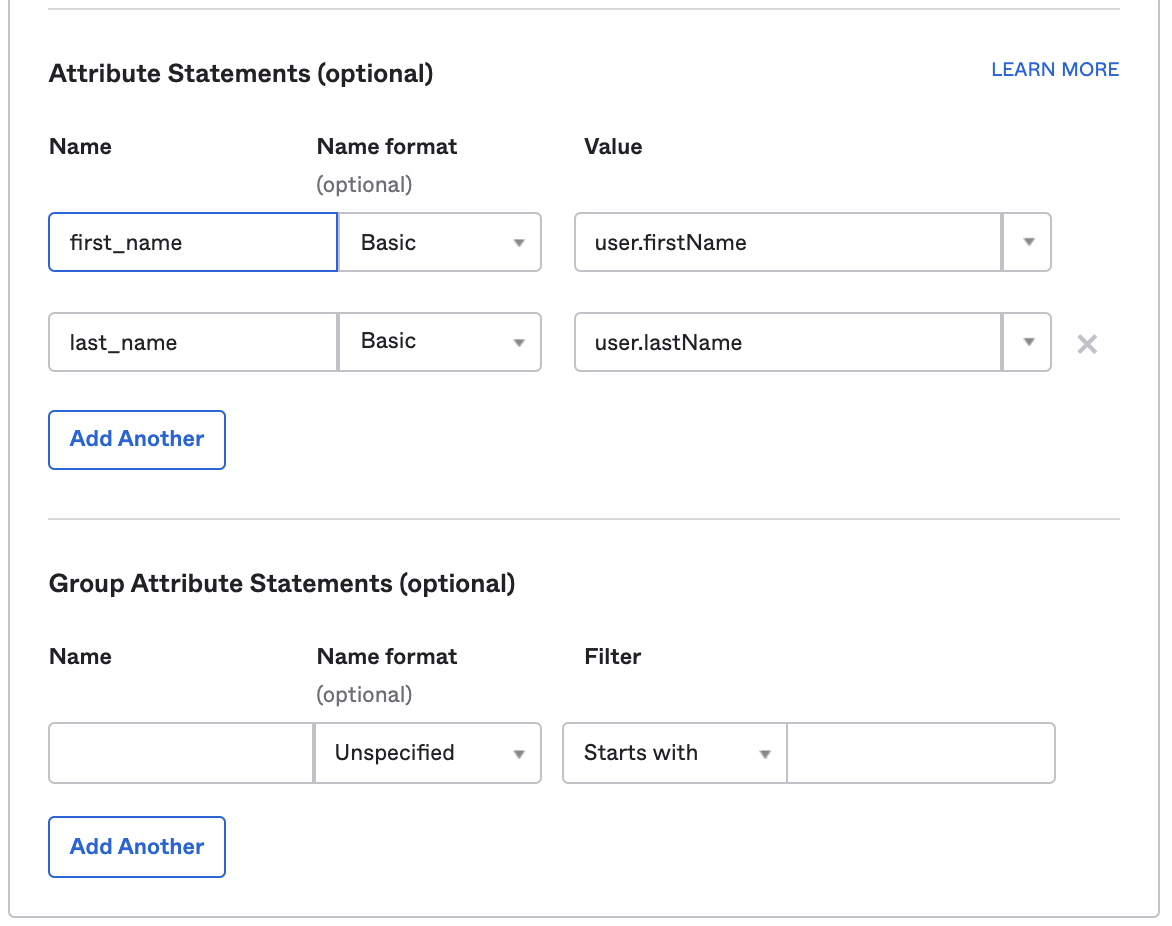
| Field | Name format | Value |
|---|---|---|
| first_name | Basic | user.firstName |
| last_name | Basic | user.lastName |
-
Under Feedback selection, choose:
- For "Are you a customer or partner?", choose "I am an Okta customer, adding an internal app".
- App type: check the box — This is an internal app that we have created. Otherwise, Okta will ask for many other fields. Click on "Finish".
-
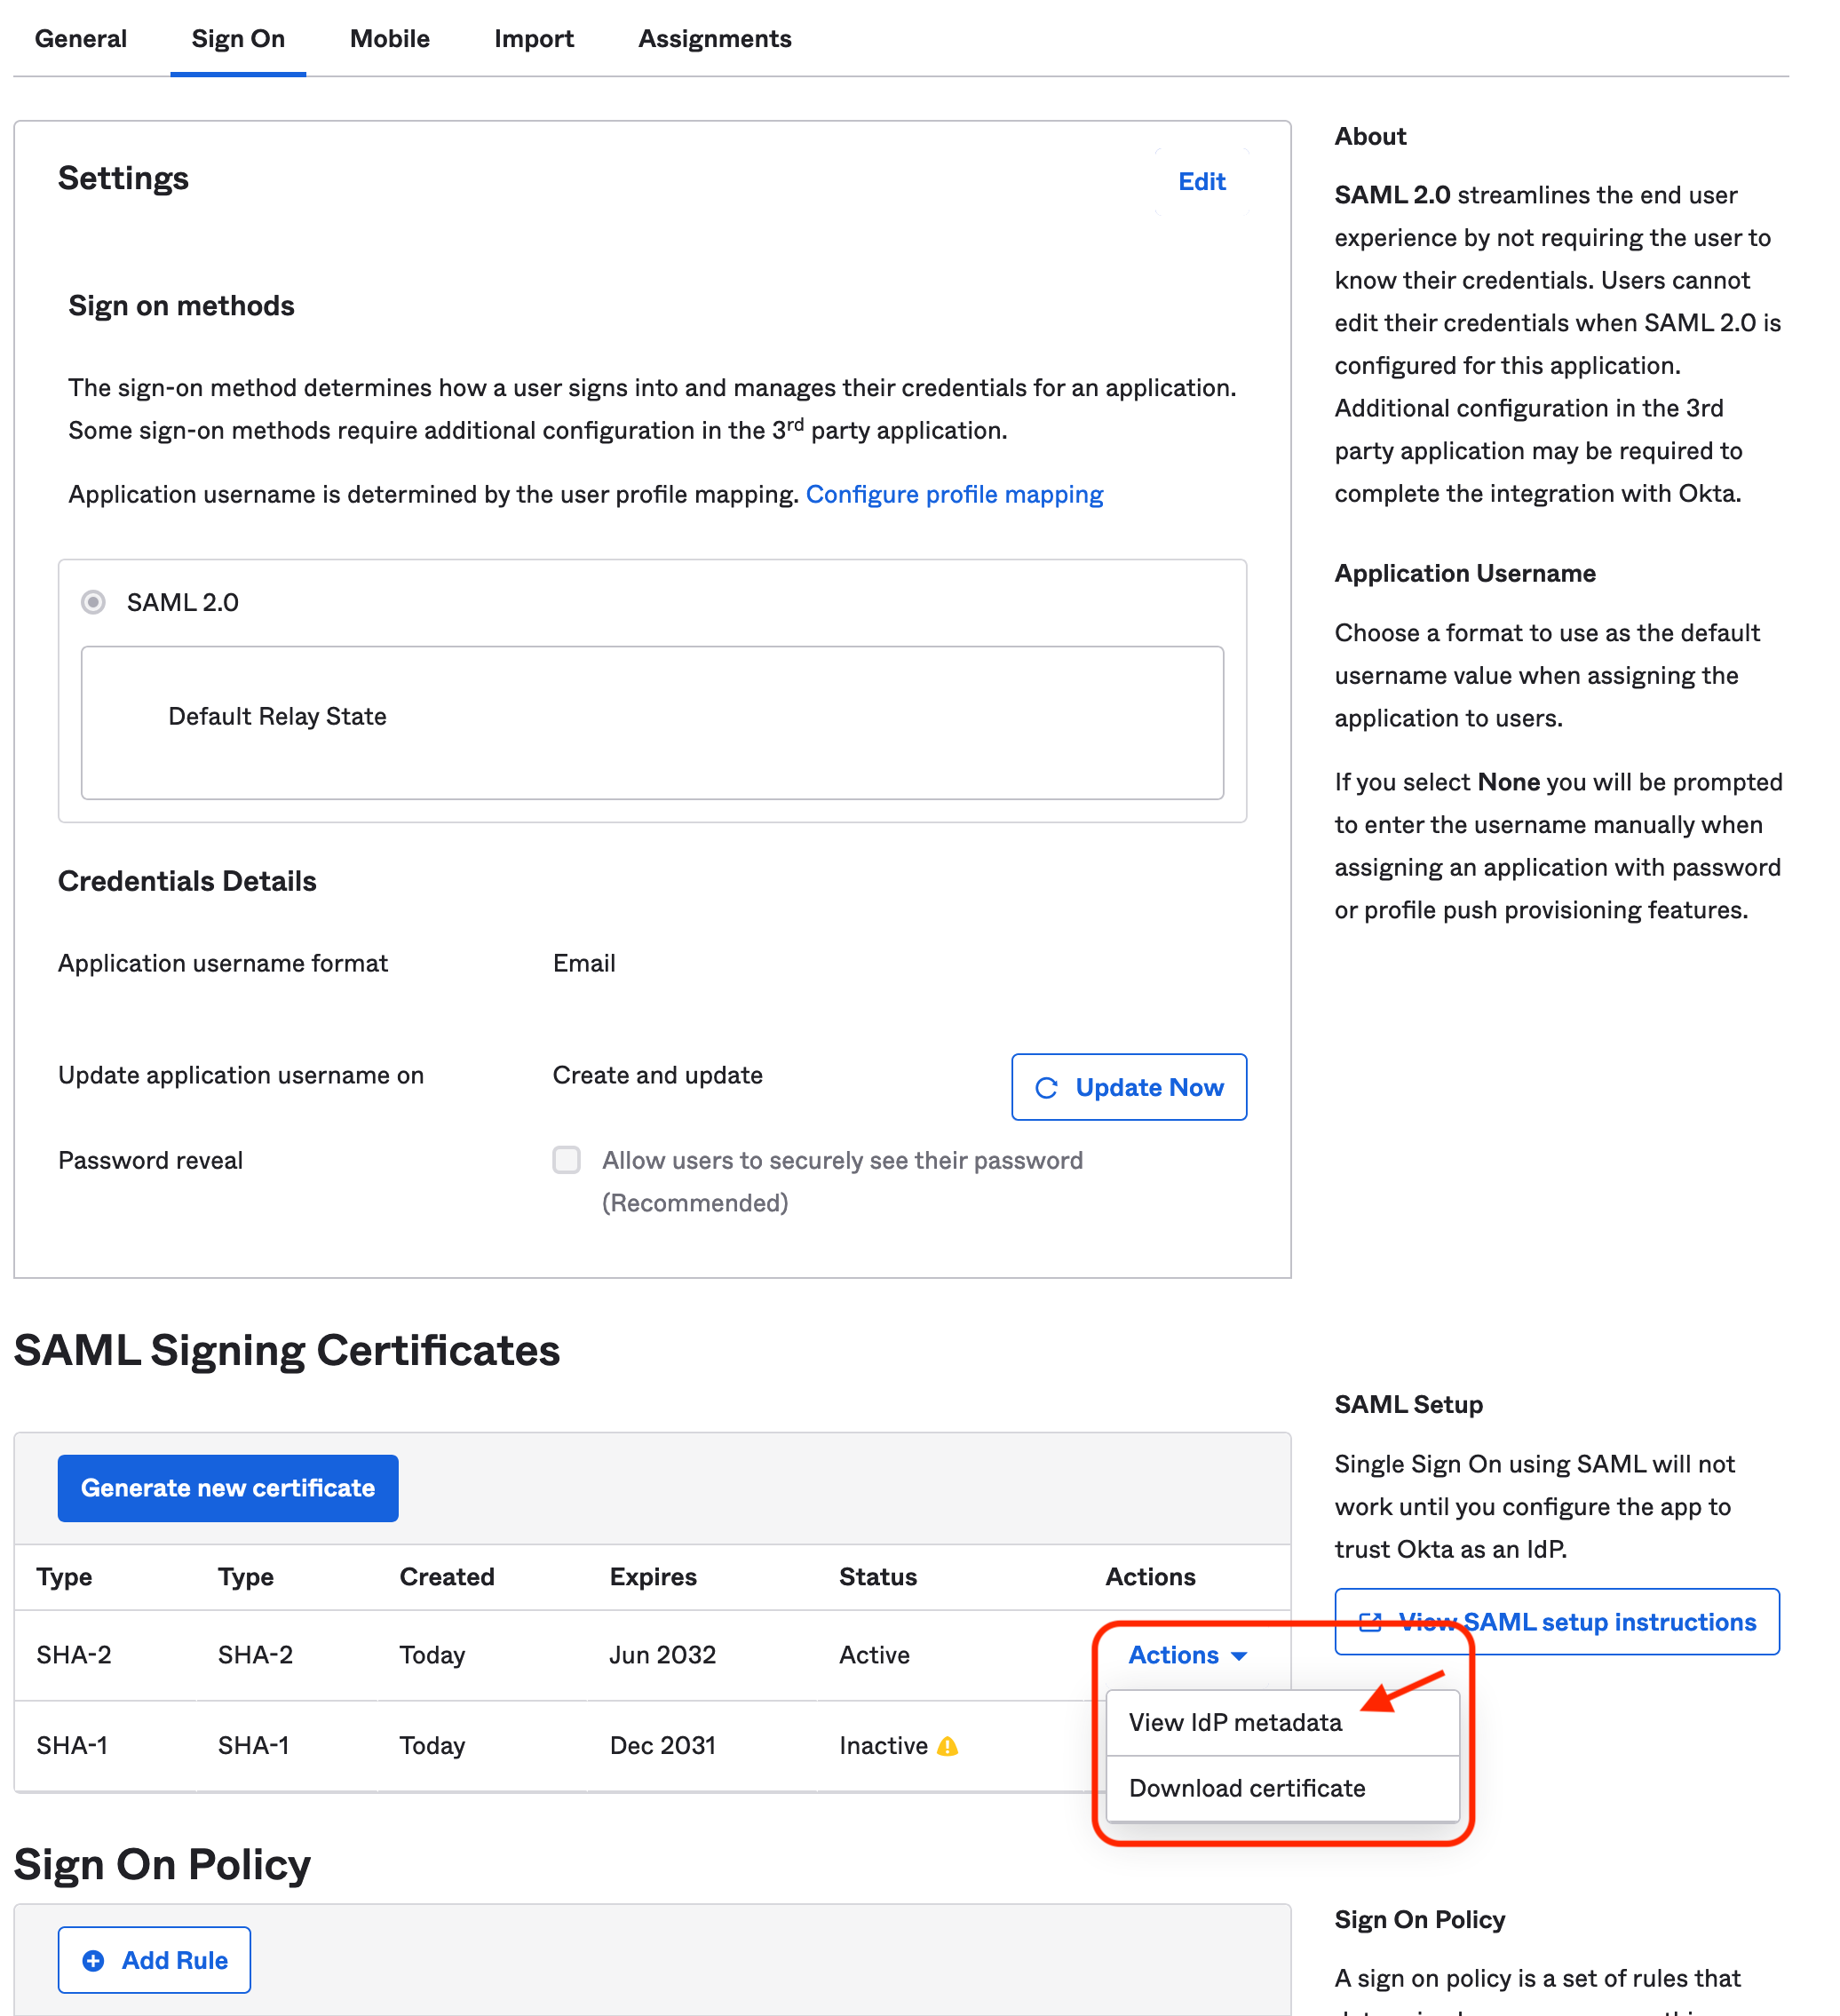
On the next screen, go to the “SAML Signing Certificates” section. Copy the link for "Identity Provider Metadata" by clicking on
Actions -> View IdP metadatafor the “SHA-2 Type” certificate. It should be in the format:https://<customer>.okta.com/app/<app-slug>/sso/saml/metadata.
Configuring SAML SSO on DeepSource
Refer to:
- Setup SAML SSO -> Configuration on DeepSource Enterprise Cloud, or,
- Setup SAML SSO -> Configuration on DeepSource Enterprise Server.
SCIM Provisioning
Configuring SCIM on Okta
- To Enable SCIM Provisioning, select DeepSource application, then go to
General → App Settings → Editand turn onEnable SCIM provisioning.
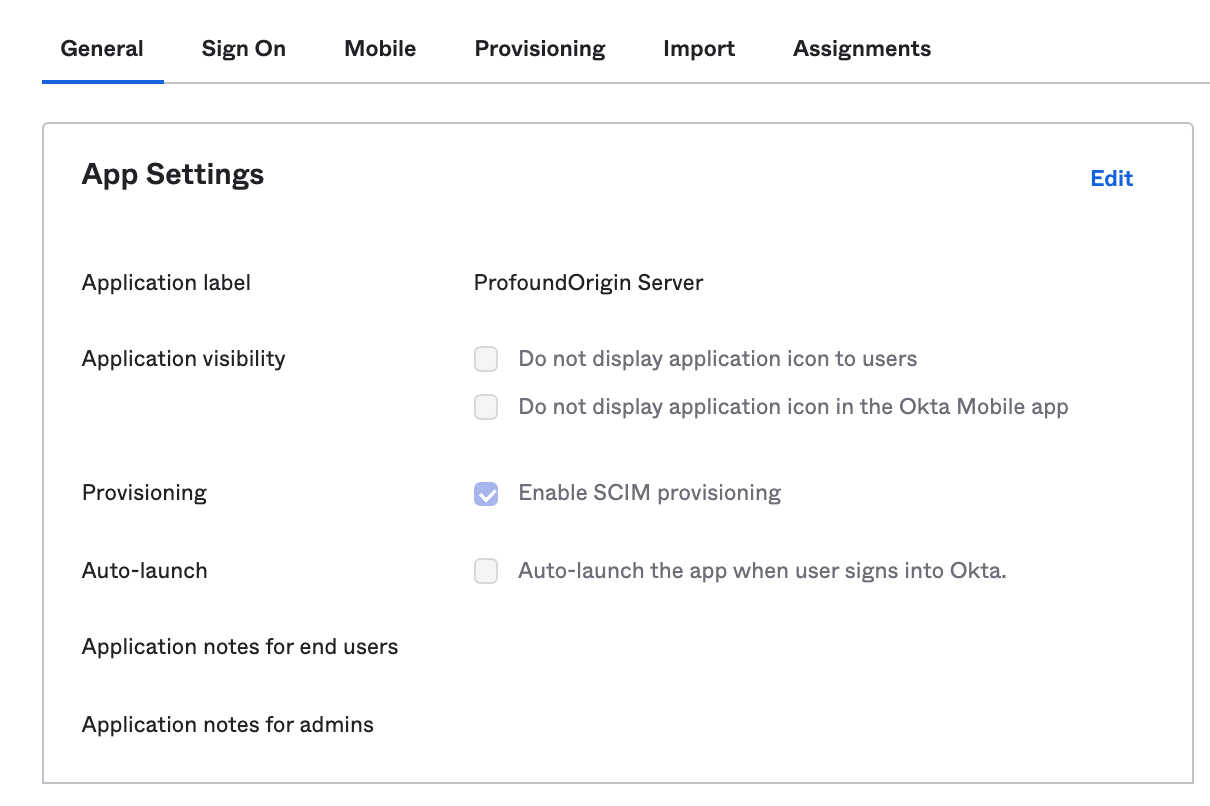
- Click on the Provisioning tab, under SCIM Connection, click on Edit and configure the given parameters.

| Field | Values |
|---|---|
| SCIM connector base URL | https://deepsource.foobar.com/scim/v2/ |
| Unique identifier field for users | |
| Supported provisioning actions | Push New Users, Push Profile Updates, Push Groups |
| Authentication Mode | HTTP Header |
| Authorization bearer token | SCIM Authentication token which you have put in replicated console (kotsadm) |
If you're on DeepSource Enterprise Cloud, use the following values instead of the values defined above.
| Field | Values |
|---|---|
| SCIM connector base URL | https://app.deepsource.com/scim/v2/ |
| Unique identifier field for users | |
| Supported provisioning actions | Import New Users and Profile Updates, Push New Users, Push Profile Updates |
| Authentication Mode | HTTP Header |
| Authorization bearer token | SCIM Authentication token generated from DeepSource |
-
Click on Test Connector Configuration to verify SCIM connection.
-
Click on Save to apply the settings.
-
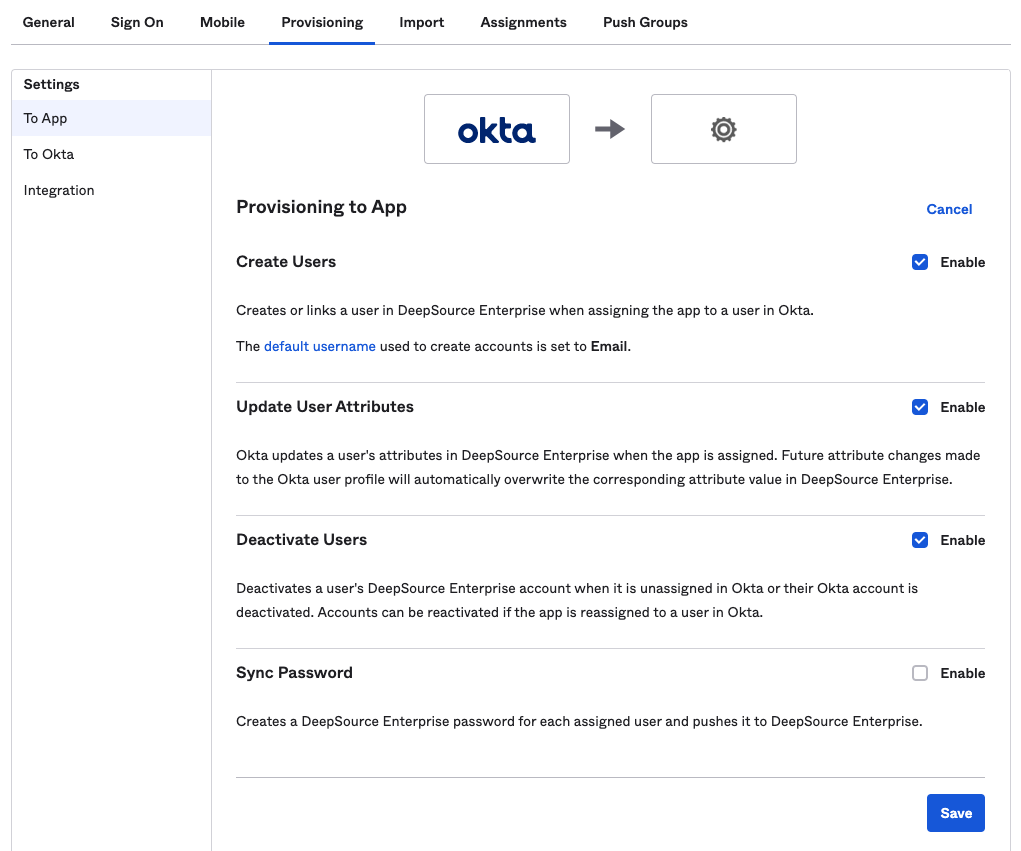
After the integration is saved successfully, go to To App option on the left sidebar under Settings inside Provisioning.
-
Enable the following options:
- Create Users
- Update User Attributes
- Deactivate Users
and, click on Save.
Configuring SCIM on DeepSource Server (Self hosted)
On enabling SCIM for DeepSource Server, user accounts and their relation with groups will automatically be synced between your SCIM provider and DeepSource Enterprise Server Control Panel.
To learn more about how groups help you manage your DeepSource Enterprise installation better, please refer to our User management documentation.
How to setup SCIM
In order to take benefit from SCIM, there is an initial setup (see SCIM Provisioning above) that has to be performed before moving ahead with the steps on this page.
Assigning members
Please refer to the Okta documentation for help on how to assign users to an application.
On assigning users, they will be synced with your DeepSource Enterprise installation regardless of whether they are a part of a group or not.
This is the preferred way of syncing high-level users who should always have access to the DeepSource Enterprise installation regardless of their group memberships.
Assigning groups
Please refer to the Okta documentation for help on how to assign groups to an application.
The users from the assigned group will be immediately synced with your DeepSource Enterprise installation. But, to sync the groups and their memberships to the DeepSource Enterprise installation, an additional step of “Group push” is required.
Enable group push
Please refer to the Okta documentation for help on how to enable group push.
Pushing a group from Okta will create the group and their memberships in DeepSource Enterprise installation.
Removing groups
Please refer to the Okta documentation for help on how to remove a push group.
A user account will be marked as Inactive on your DeepSource Enterprise installation if the sole group that the user was associated with is removed.
Deactivate and delete users
Please refer to the Okta documentation for help on how to deactivate and delete user accounts
Deactivating or deleting a user in Okta will also revoke their access from your DeepSource Enterprise installation and mark them as Inactive.
FAQs & Troubleshooting
-
Why can’t I manage Okta synced groups and users from DeepSource?
DeepSource Enterprise admins can create groups on DeepSource Enterprise installation and invite users to them. But when SCIM provisioning is enabled, the groups and users which are synced with Okta can no longer be edited on DeepSource Enterprise installation. The admin must update them from Okta.
-
What if I assign new users to DeepSource Enterprise installation from Okta and there are no free seats available?
Okta will fail to push a new user and an error will be displayed on Okta:
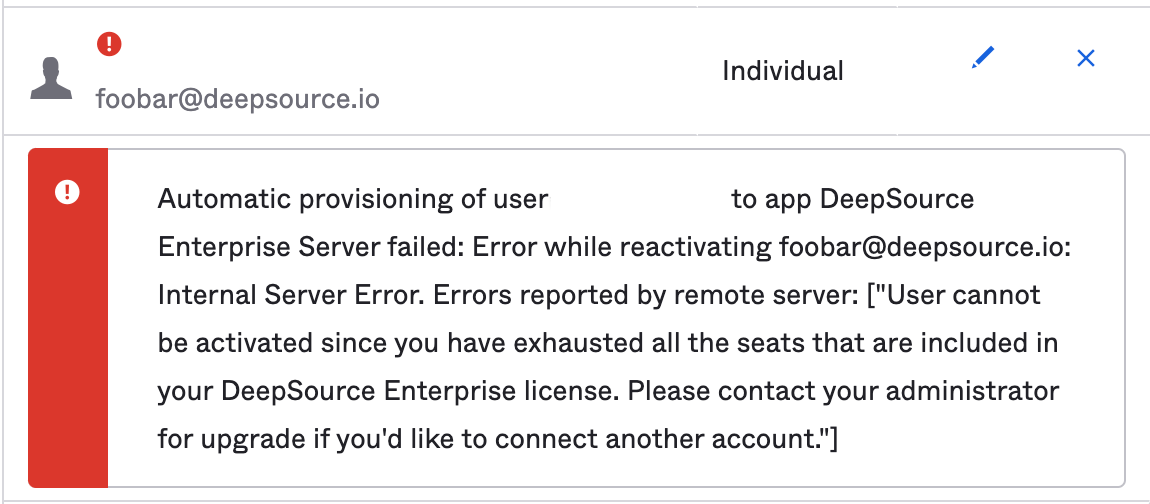
To retry the task once your license has been upgraded, please follow these steps.
-
How do I re-enable SCIM after I disabled it?
If SCIM is disabled, you can manage the group from DeepSource Enterprise installation; i.e you can add and remove users to the group from the DeepSource Enterprise control panel.
In order to re-enable SCIM, ensure the initial setup is done and then perform a Push now. This will overwrite your DeepSource Enterprise installation groups with the data in Okta.
-
What happens if I want to push a Group with the same name as a preexisting group on DeepSource?
On pushing a group, its membership will be pushed immediately. The group membership which was configured on the DeepSource Enterprise installation will be overwritten.