
Repositories
The team repositories page lists all repositories, monorepos, and groups, along with their analysis status.
All Repositories
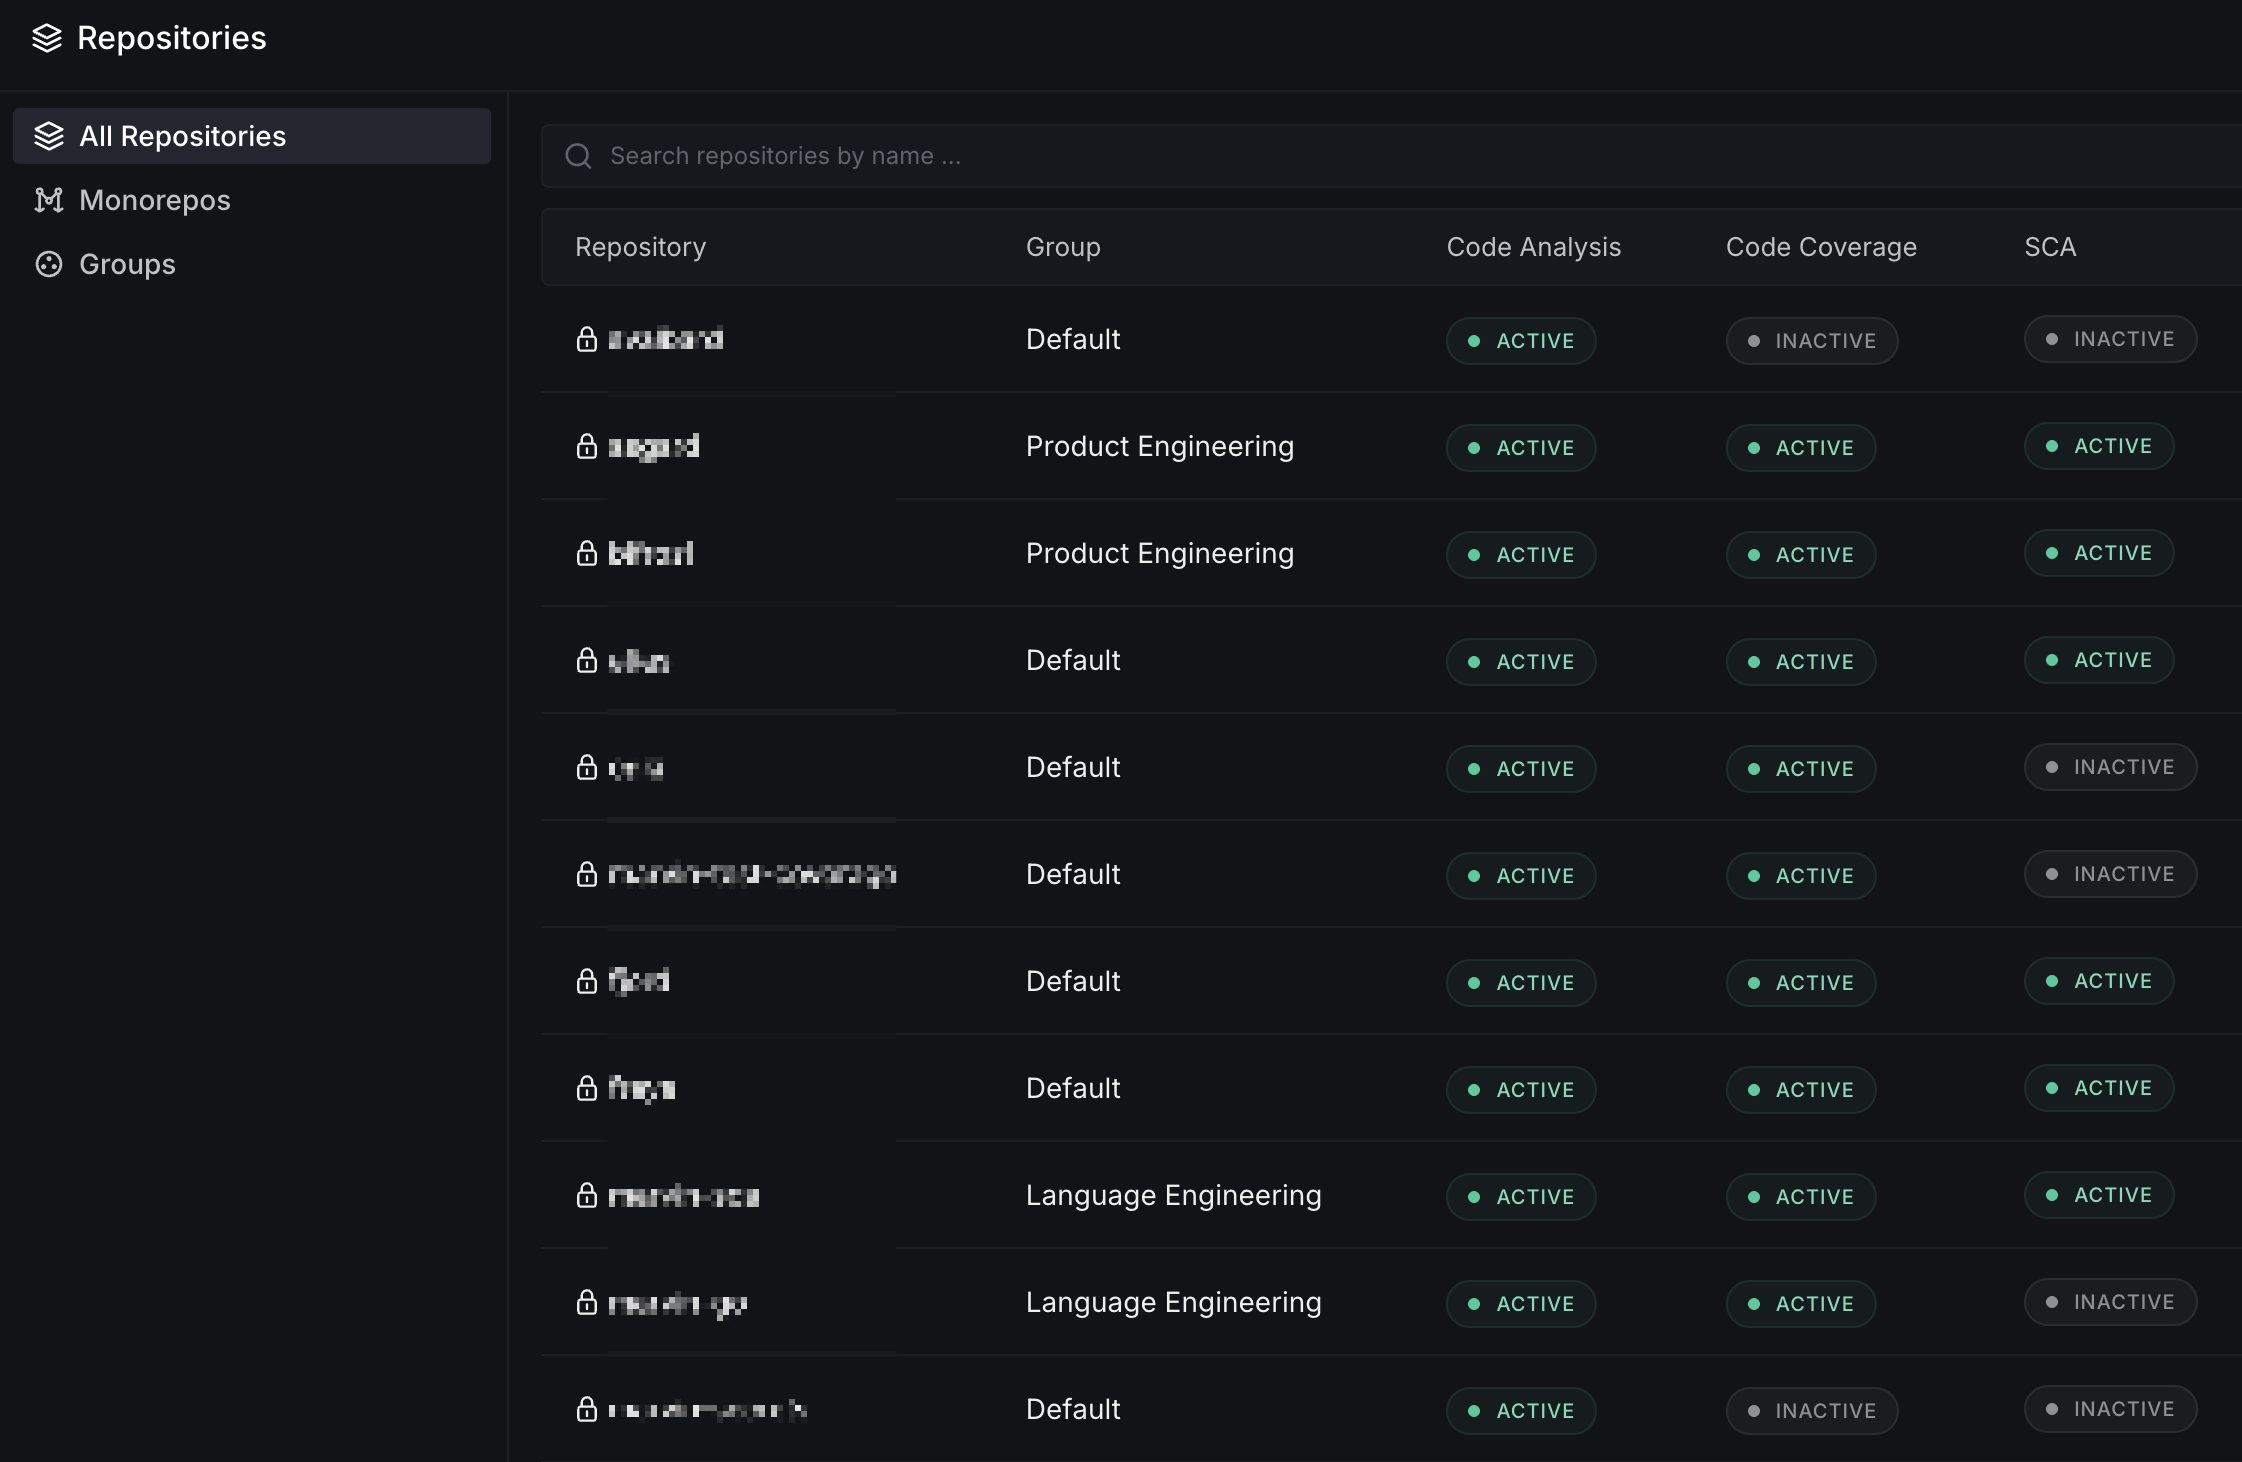
This section shows all repositories in your team, displaying their analysis status at a glance.
- Repository: The repository name
- Group: The group the repository belongs to (e.g., Default, Product Engineering)
- Code Analysis: Shows whether Code Analysis is ACTIVE or INACTIVE
- Code Coverage: Shows whether code coverage tracking is ACTIVE or INACTIVE
- SCA: Shows whether Software Composition Analysis (dependency scanning) is ACTIVE or INACTIVE
- Search: Find specific repositories quickly by name
Monorepos
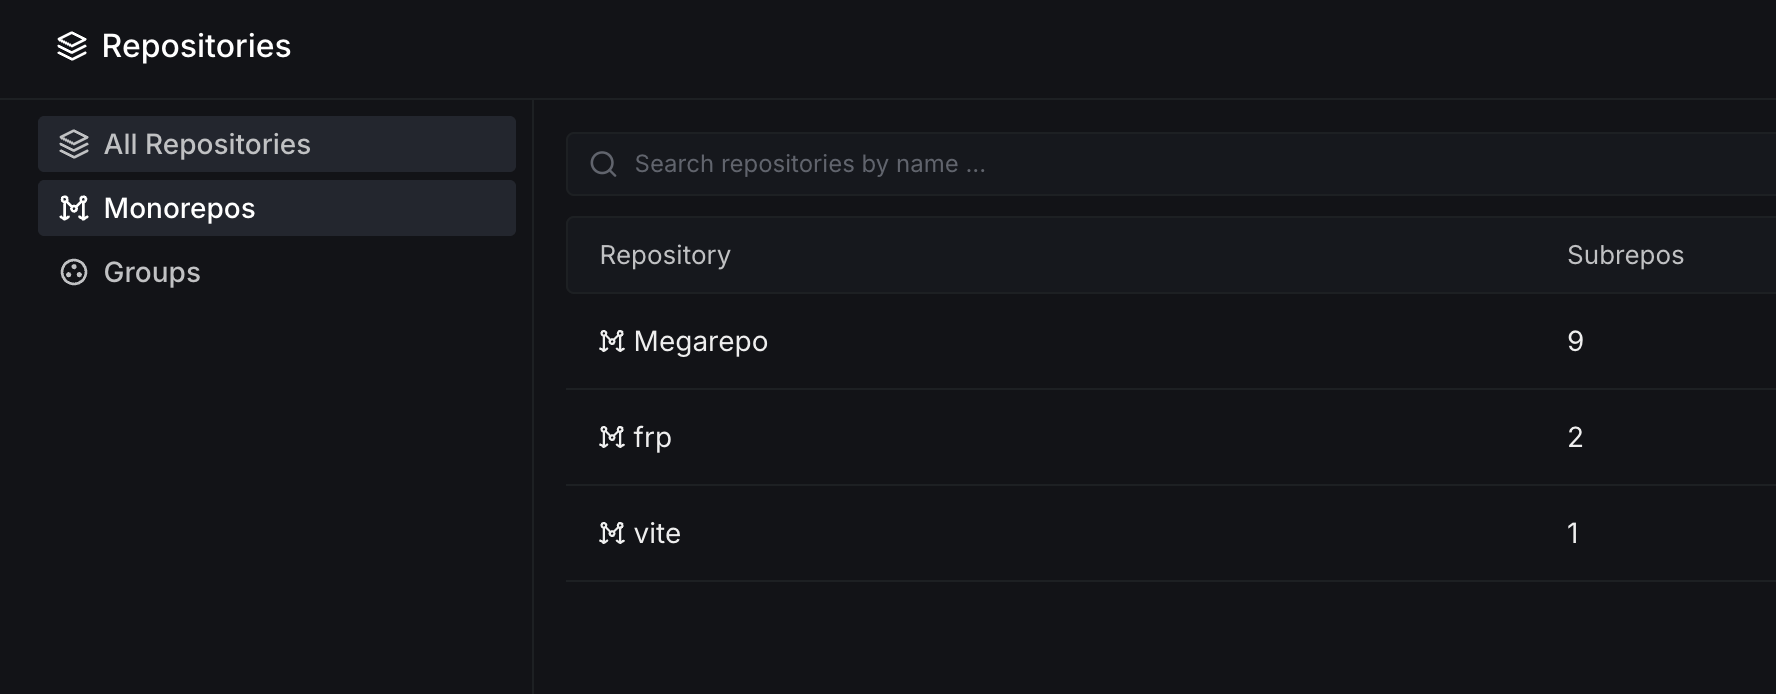
This section manages monorepos, which are repositories containing multiple sub-projects.
- Repository: The monorepo name
- Subrepos: Number of sub-repositories within each monorepo
- Search: Filter to find specific monorepos
Groups
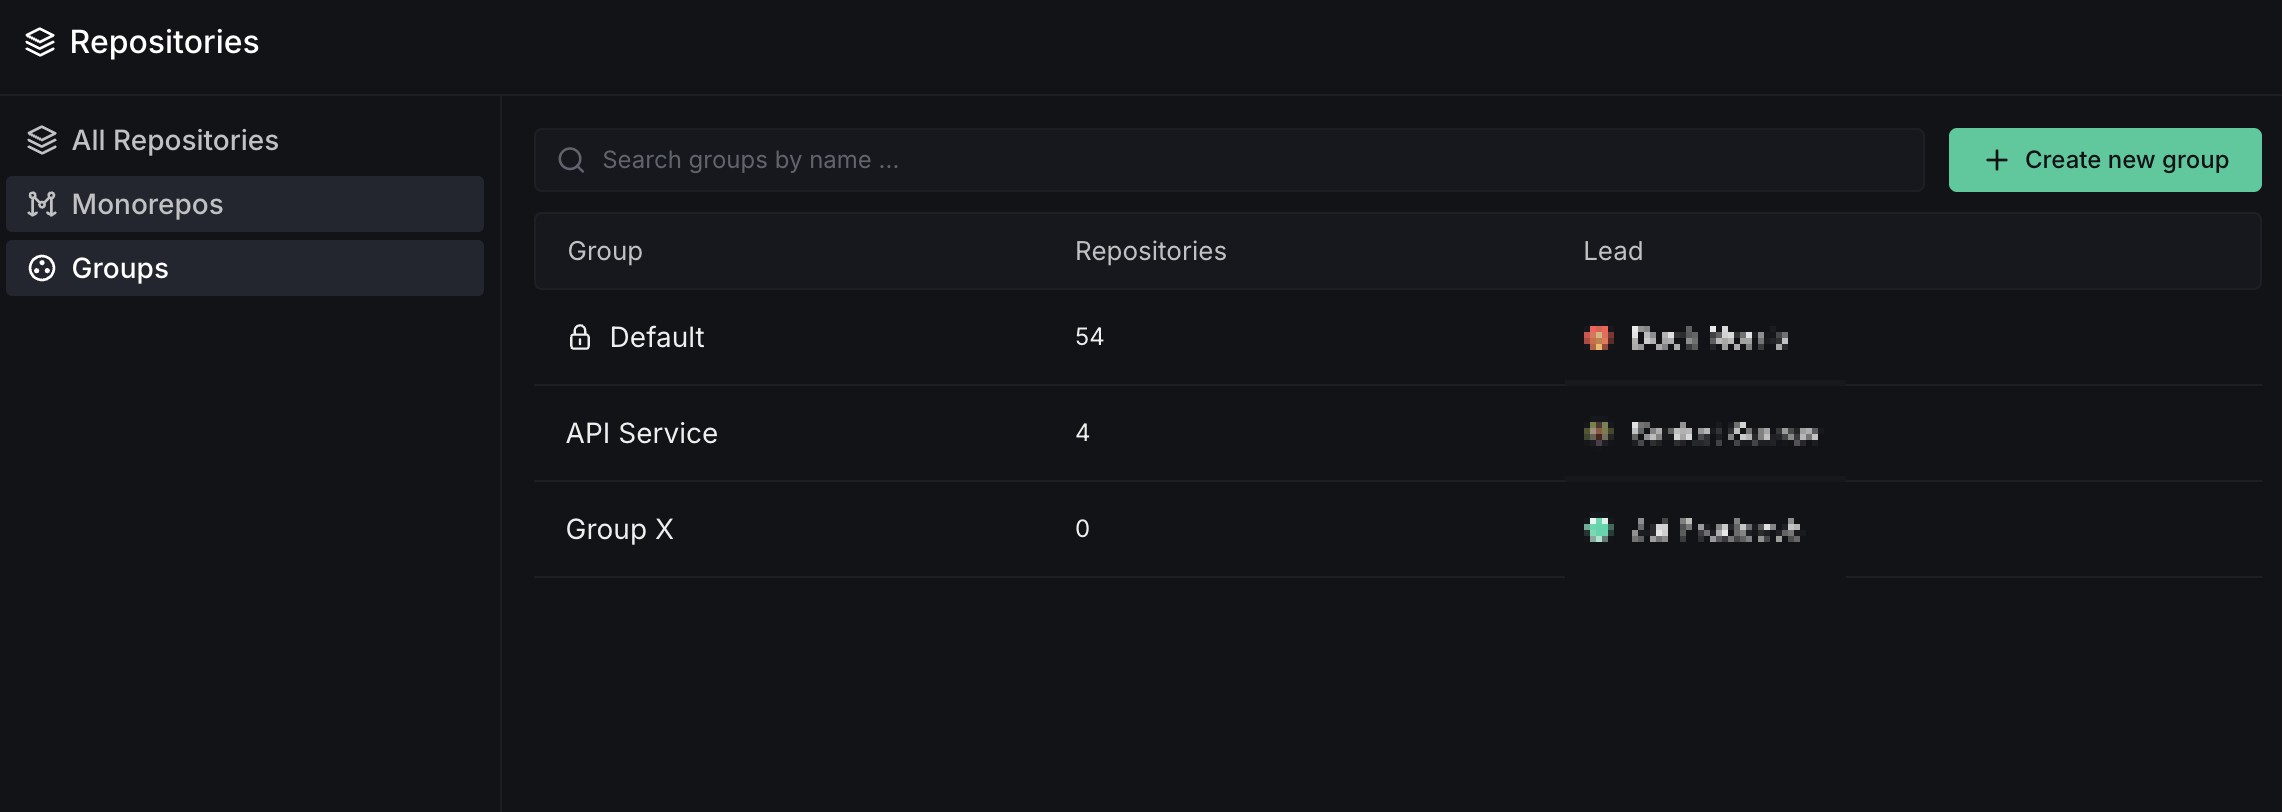
Groups allow you to organize repositories into logical collections, enabling centralized management of settings, reports, and quality gates for subsets of your repositories.
This is useful for larger organizations where teams or business units own different repositories and want to manage them at that level rather than individually.
- Group: The group name (e.g., Default, API Service)
- Repositories: Number of repositories in the group
- Lead: The team member responsible for the group
- Search: Filter to find specific groups
- Create new group: Button to create a new group
Creating a Group
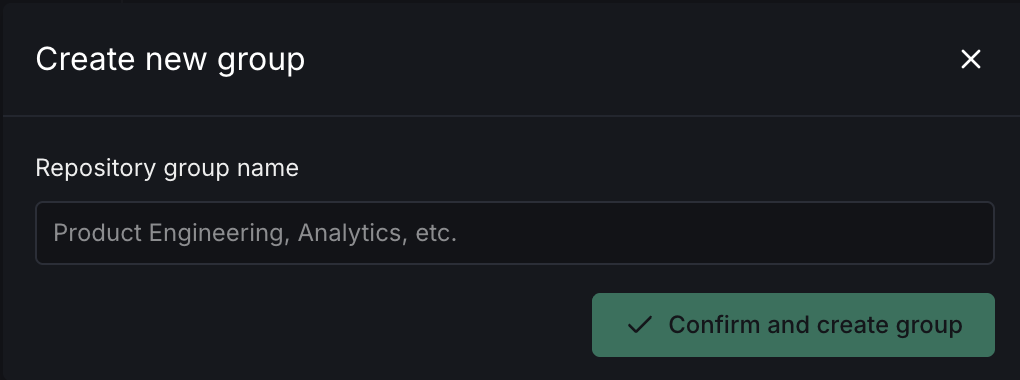
To create a new group:
- Navigate to the Repositories page
- Click on "Groups" in the sidebar
- Click "Create new group"
- Enter a name for your group
- Click "Confirm and create group"
Group Overview
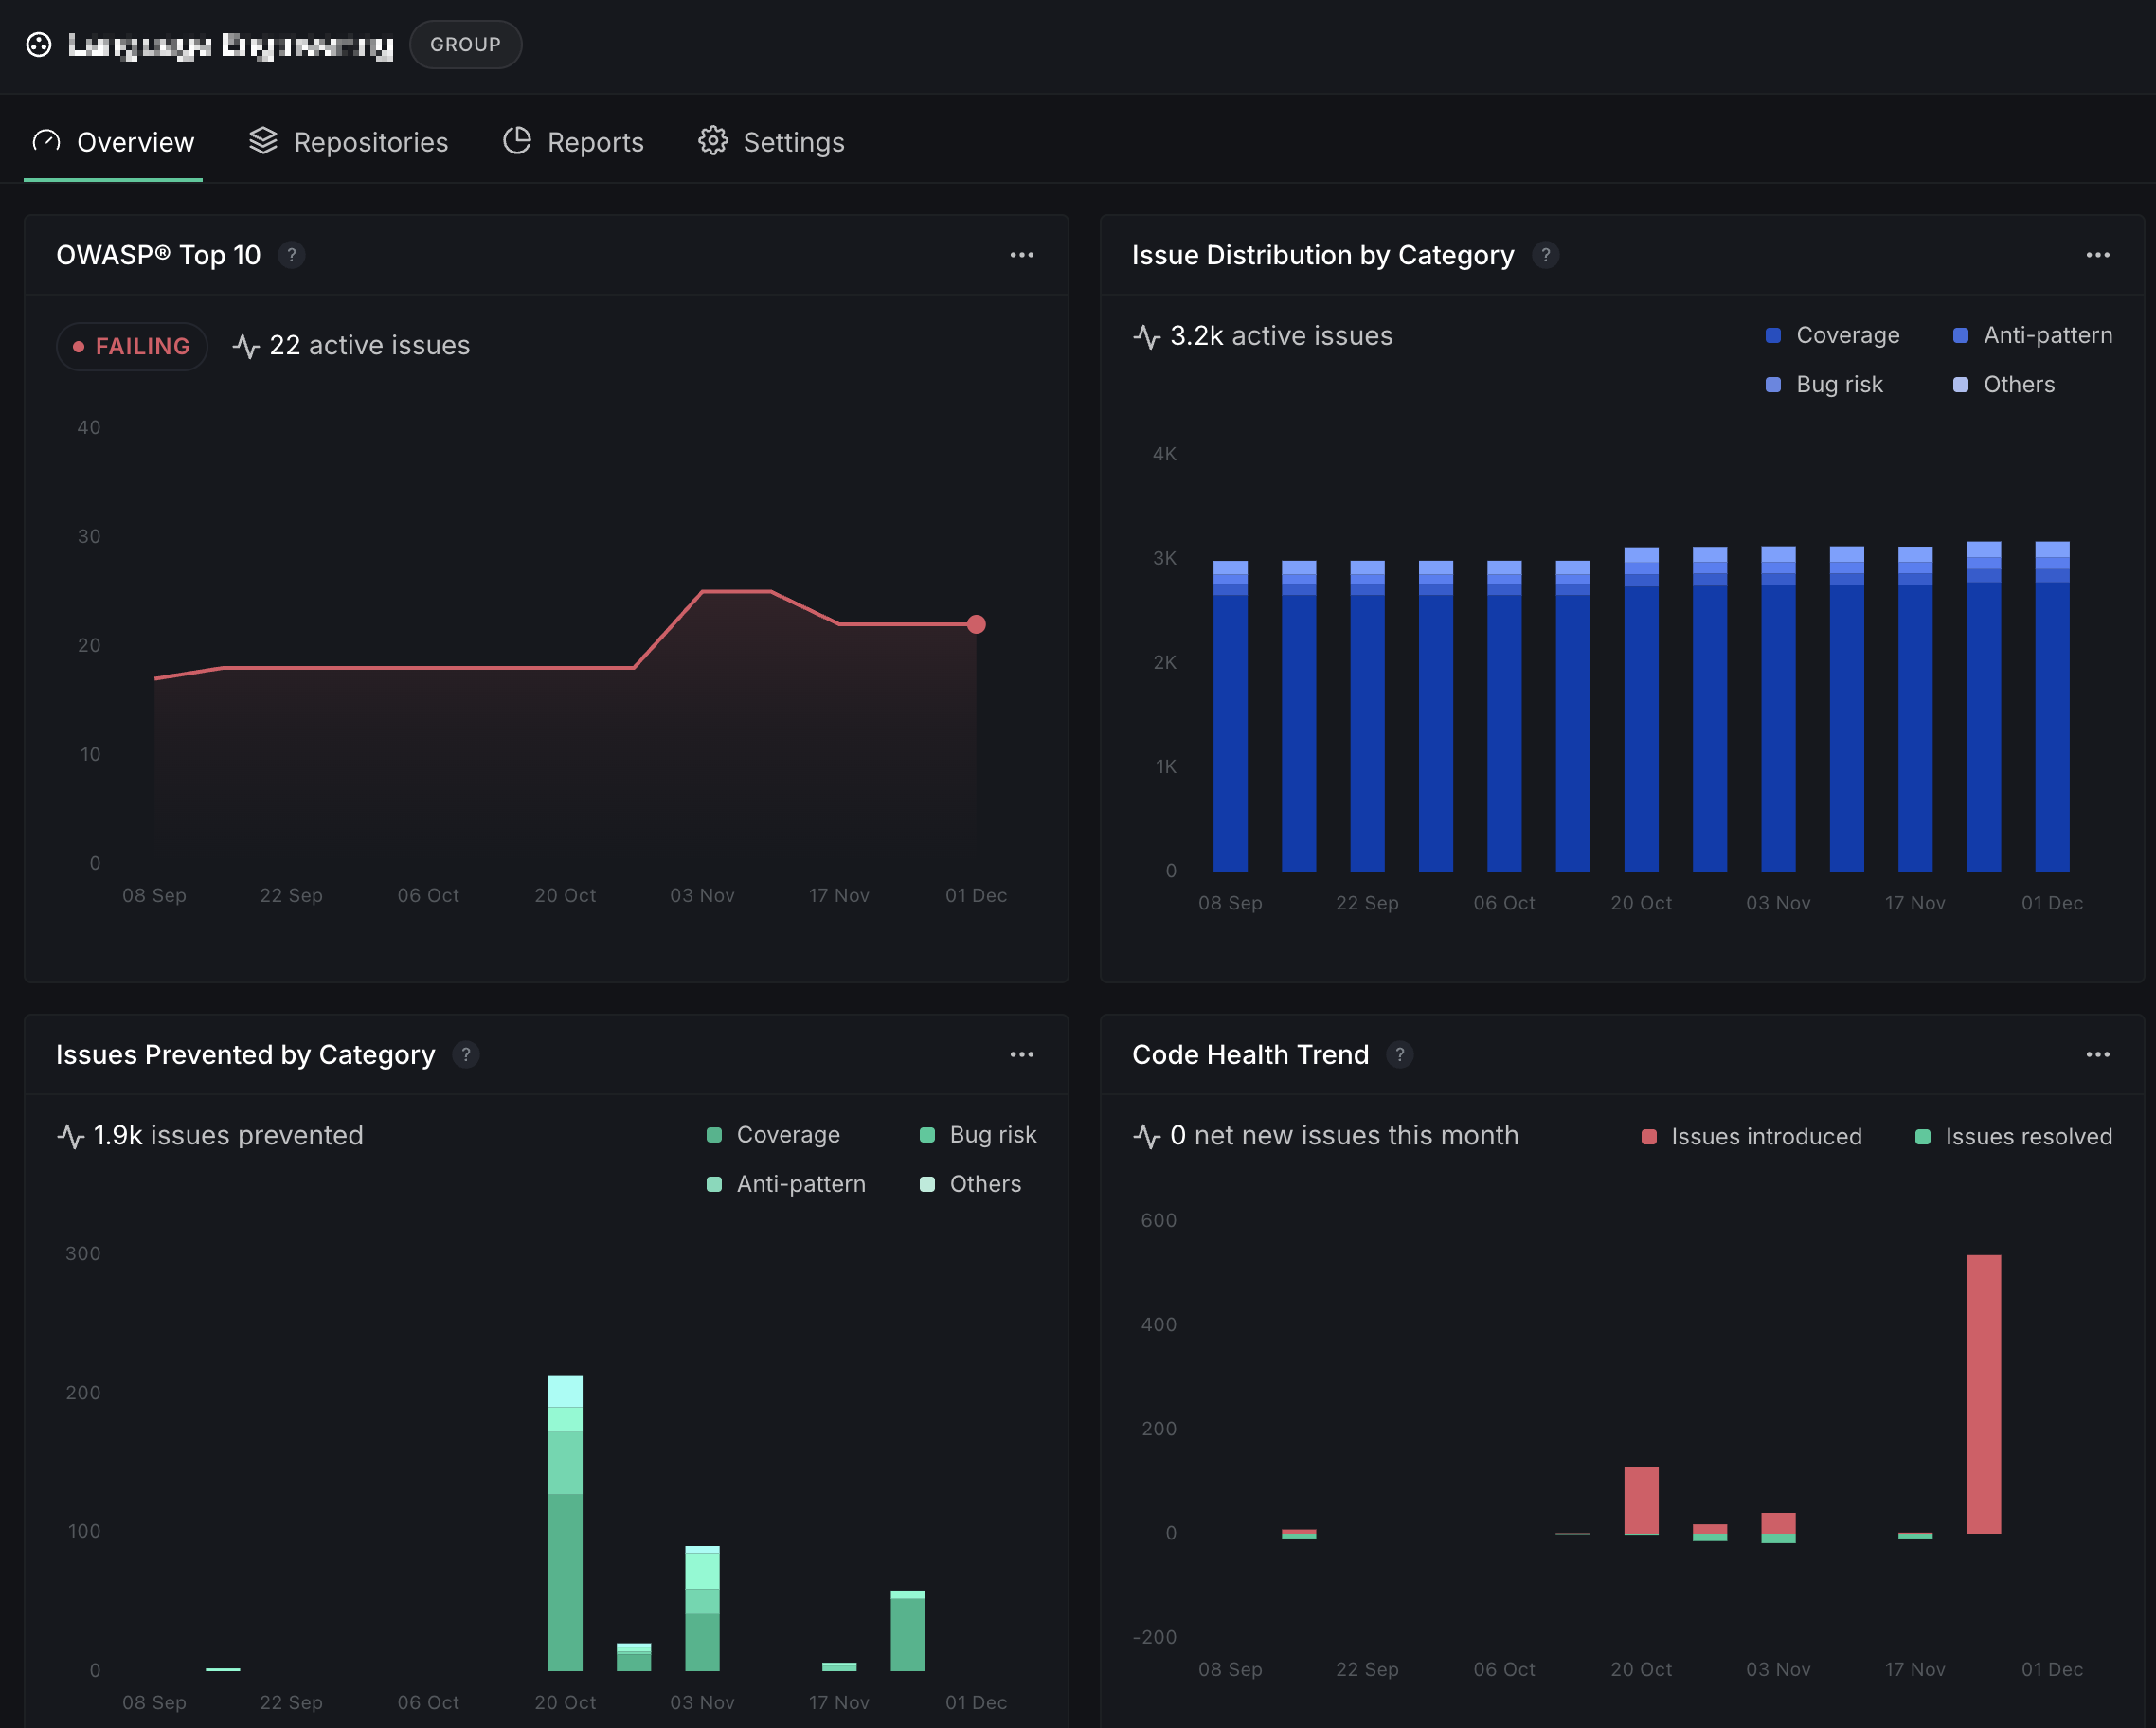
The Overview tab provides an aggregated dashboard for all repositories in the group:
- OWASP Top 10: Security compliance status across group repositories
- Issue Distribution by Category: Breakdown of active issues
- Issues Prevented by Category: Issues caught before merging
- Code Health Trend: Net new issues over time
Group Repositories
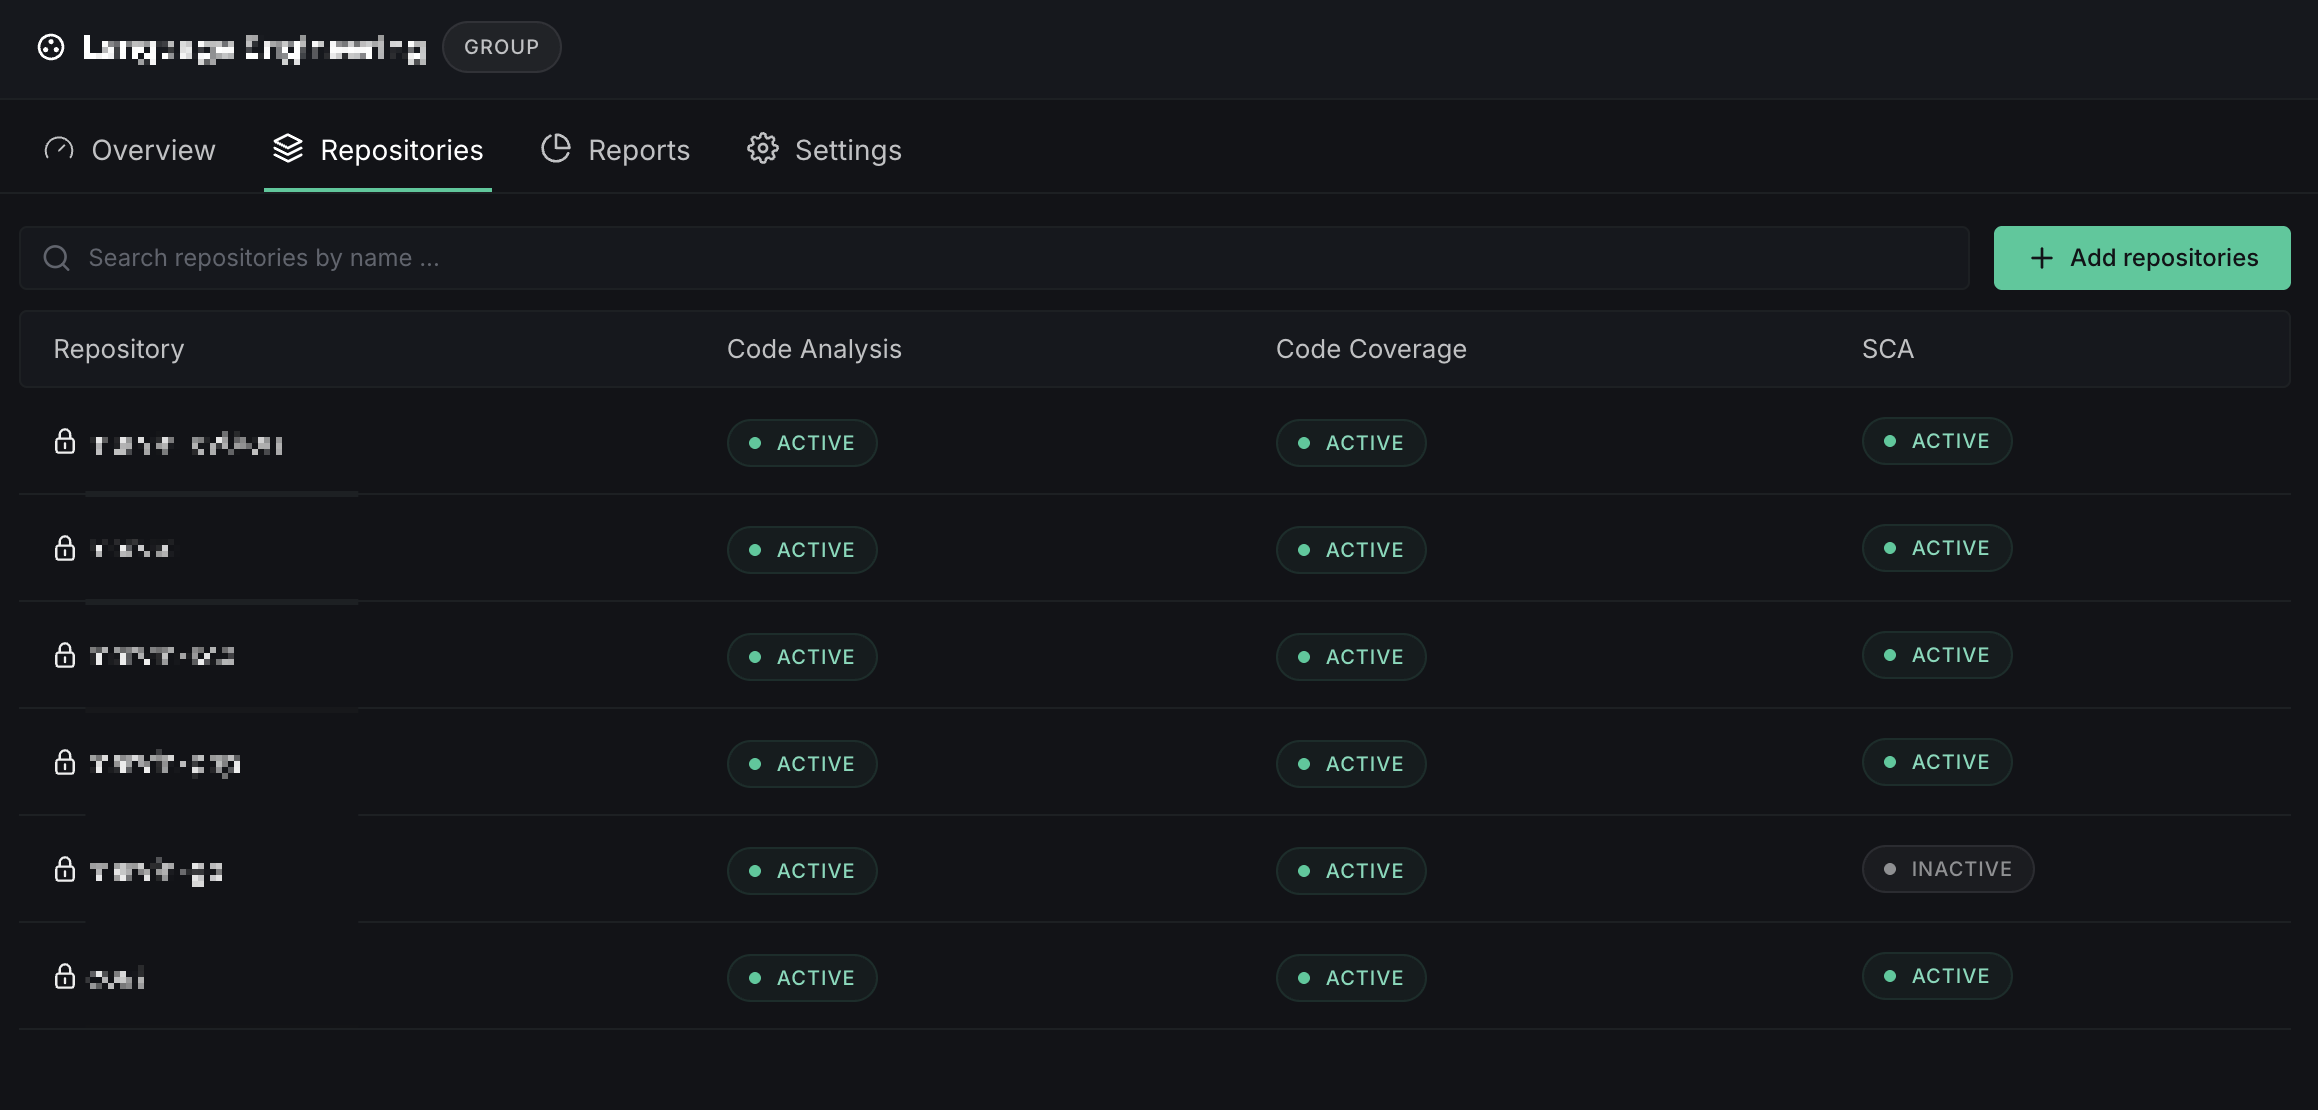
The Repositories tab shows all repositories in the group with their analysis status:
- Repository: Name of the repository
- Code Analysis: ACTIVE/INACTIVE status
- Code Coverage: ACTIVE/INACTIVE status
- SCA: ACTIVE/INACTIVE status
- Add repositories: Button to add more repositories to the group
Group Reports
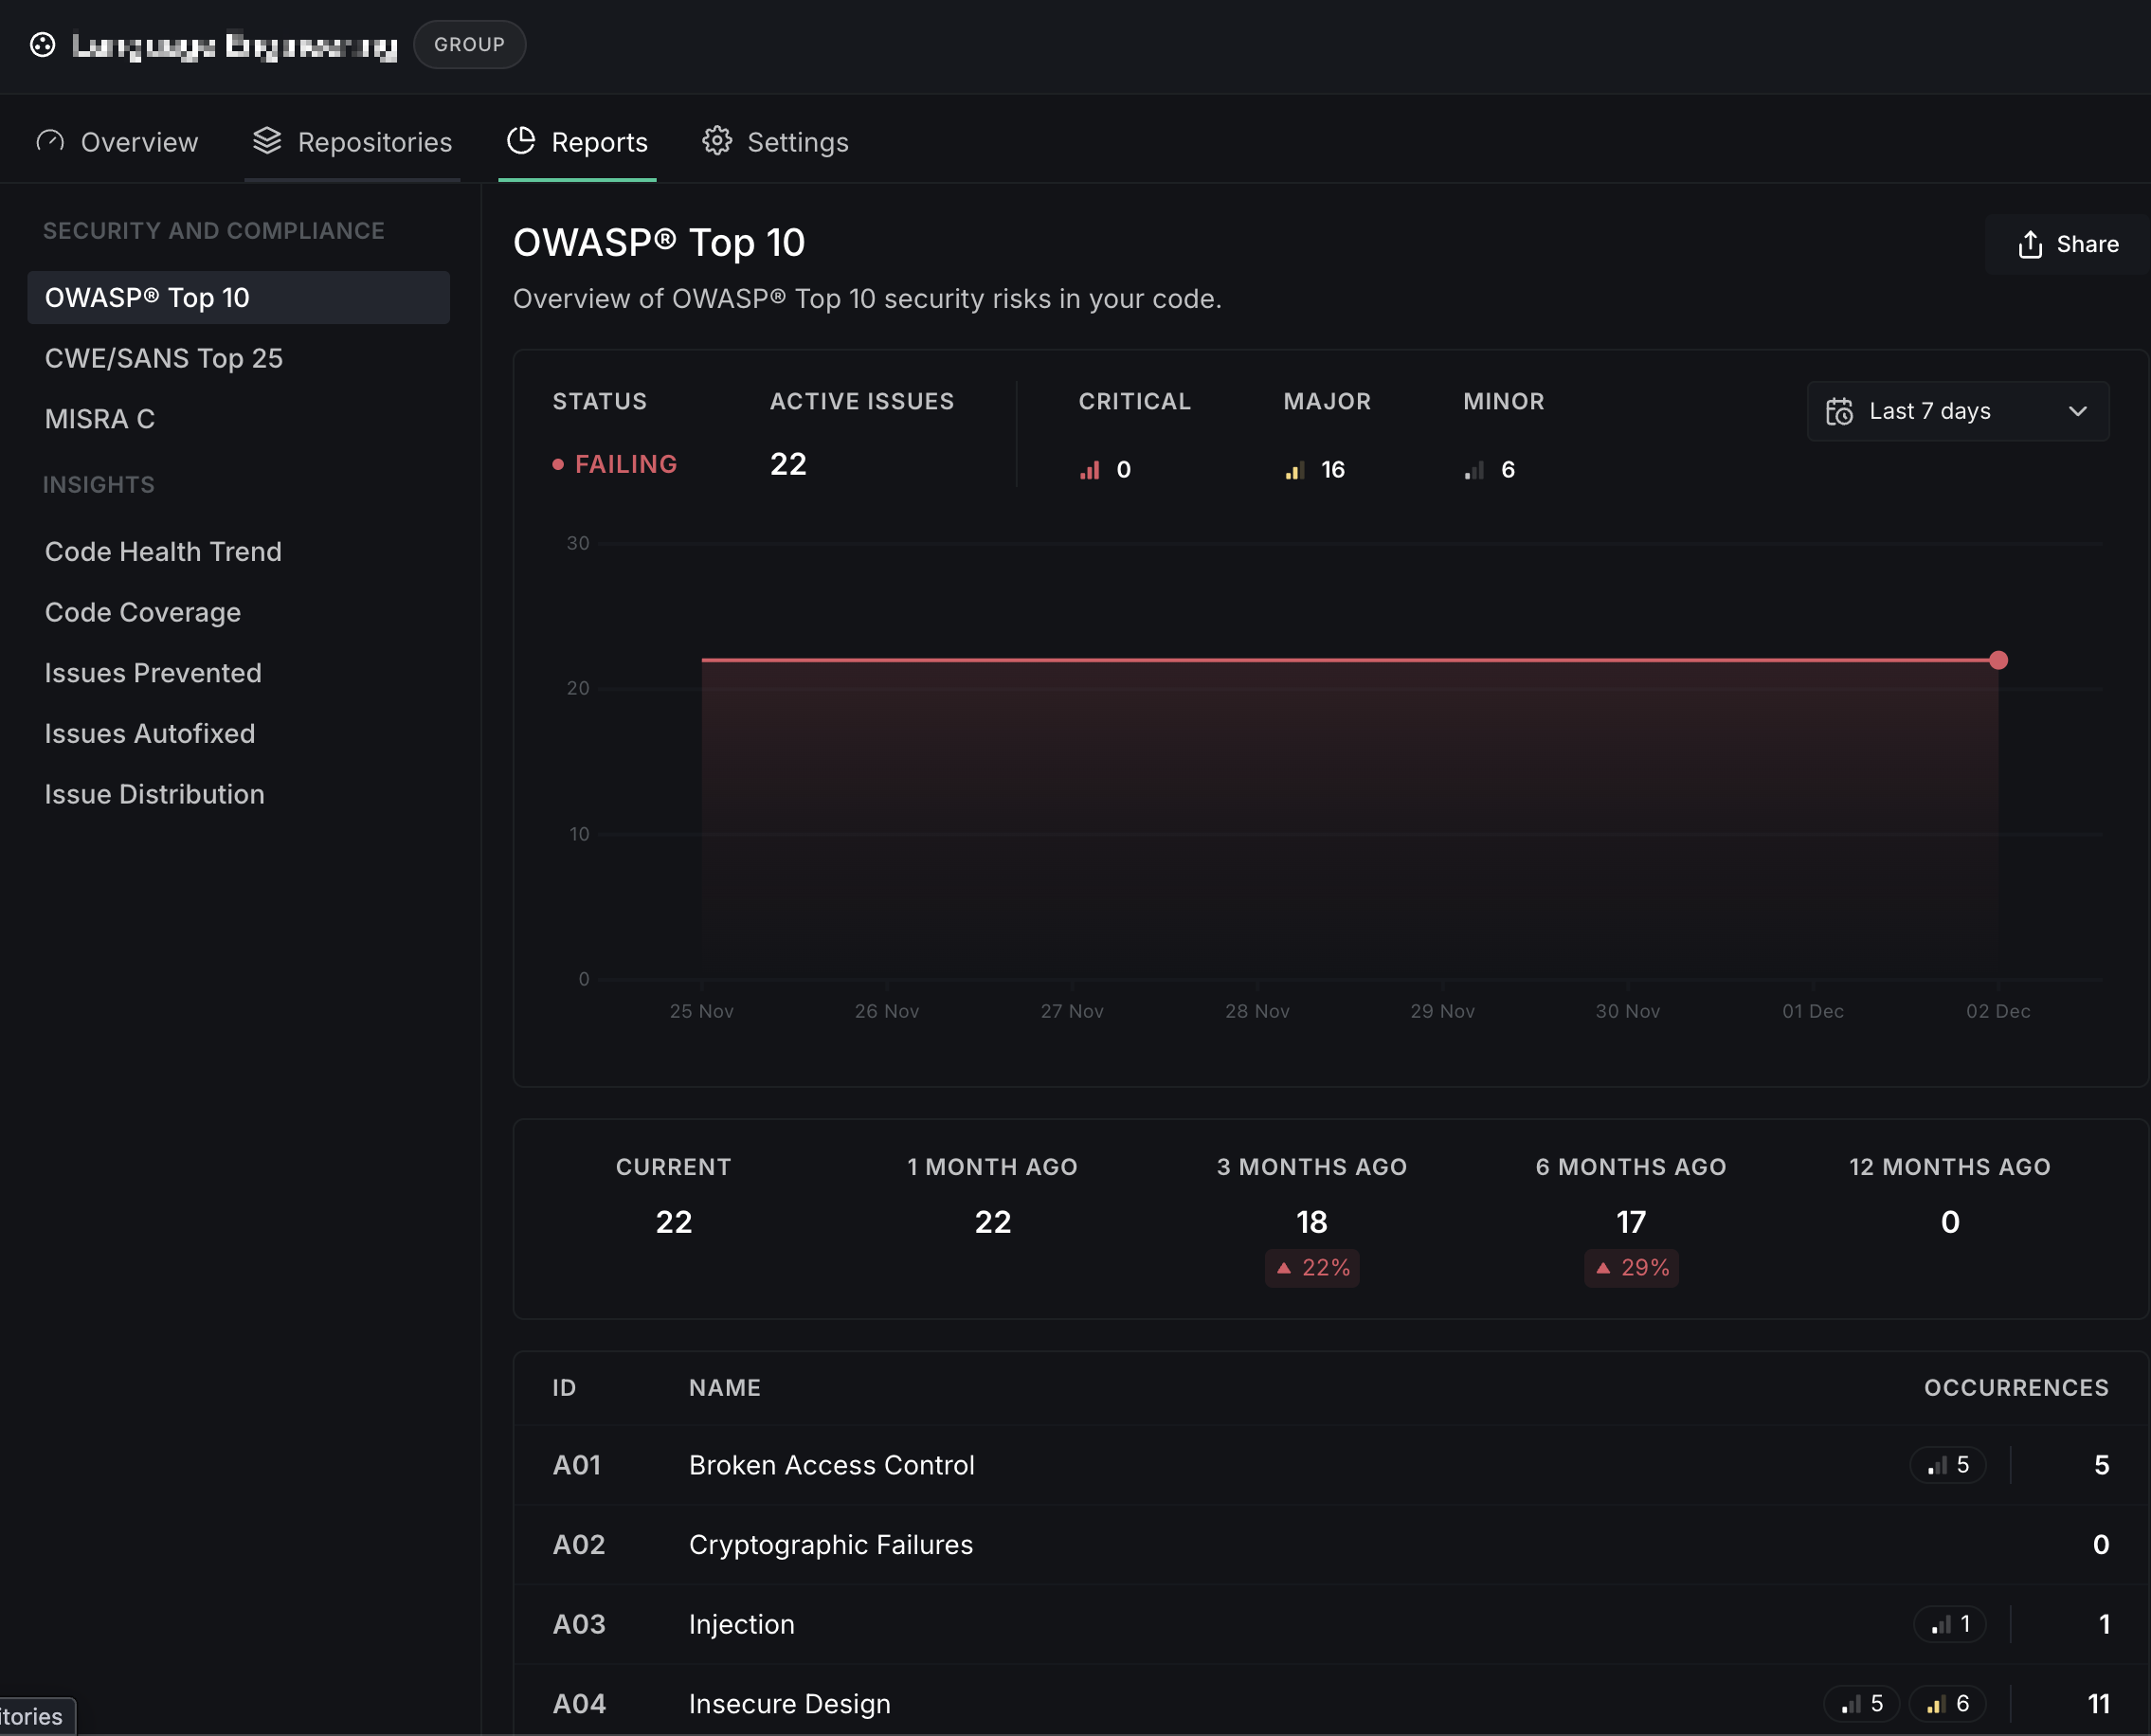
Groups provide the same reports available at the organization level, but scoped to the repositories within the group. See Reports for details on each report type.
Security and Compliance:
- OWASP Top 10
- CWE/SANS Top 25
- MISRA C
Insights:
- Code Health Trend
- Code Coverage
- Issues Prevented
- Issues Autofixed
- Issue Distribution
Group Settings
Group settings allow you to configure settings that apply to all repositories in the group. When enabled, these settings override individual repository settings.
General
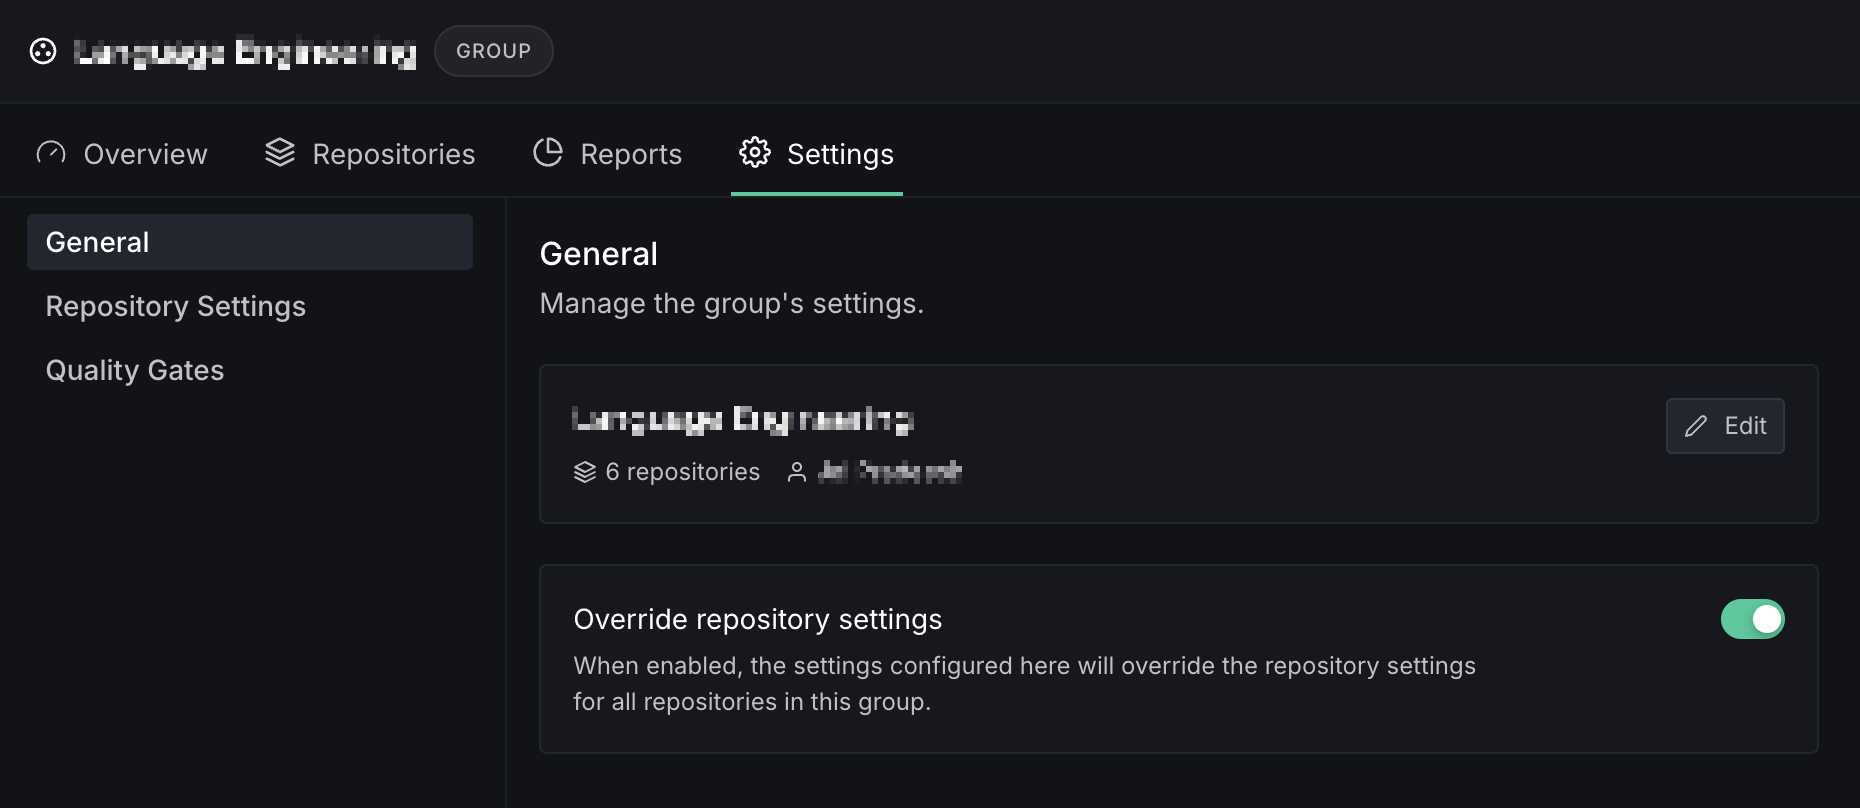
- Group name: Edit the group name
- Lead: The team member responsible for the group
- Override repository settings: When enabled, the settings configured in this group will override the repository settings for all repositories in this group
Repository Settings
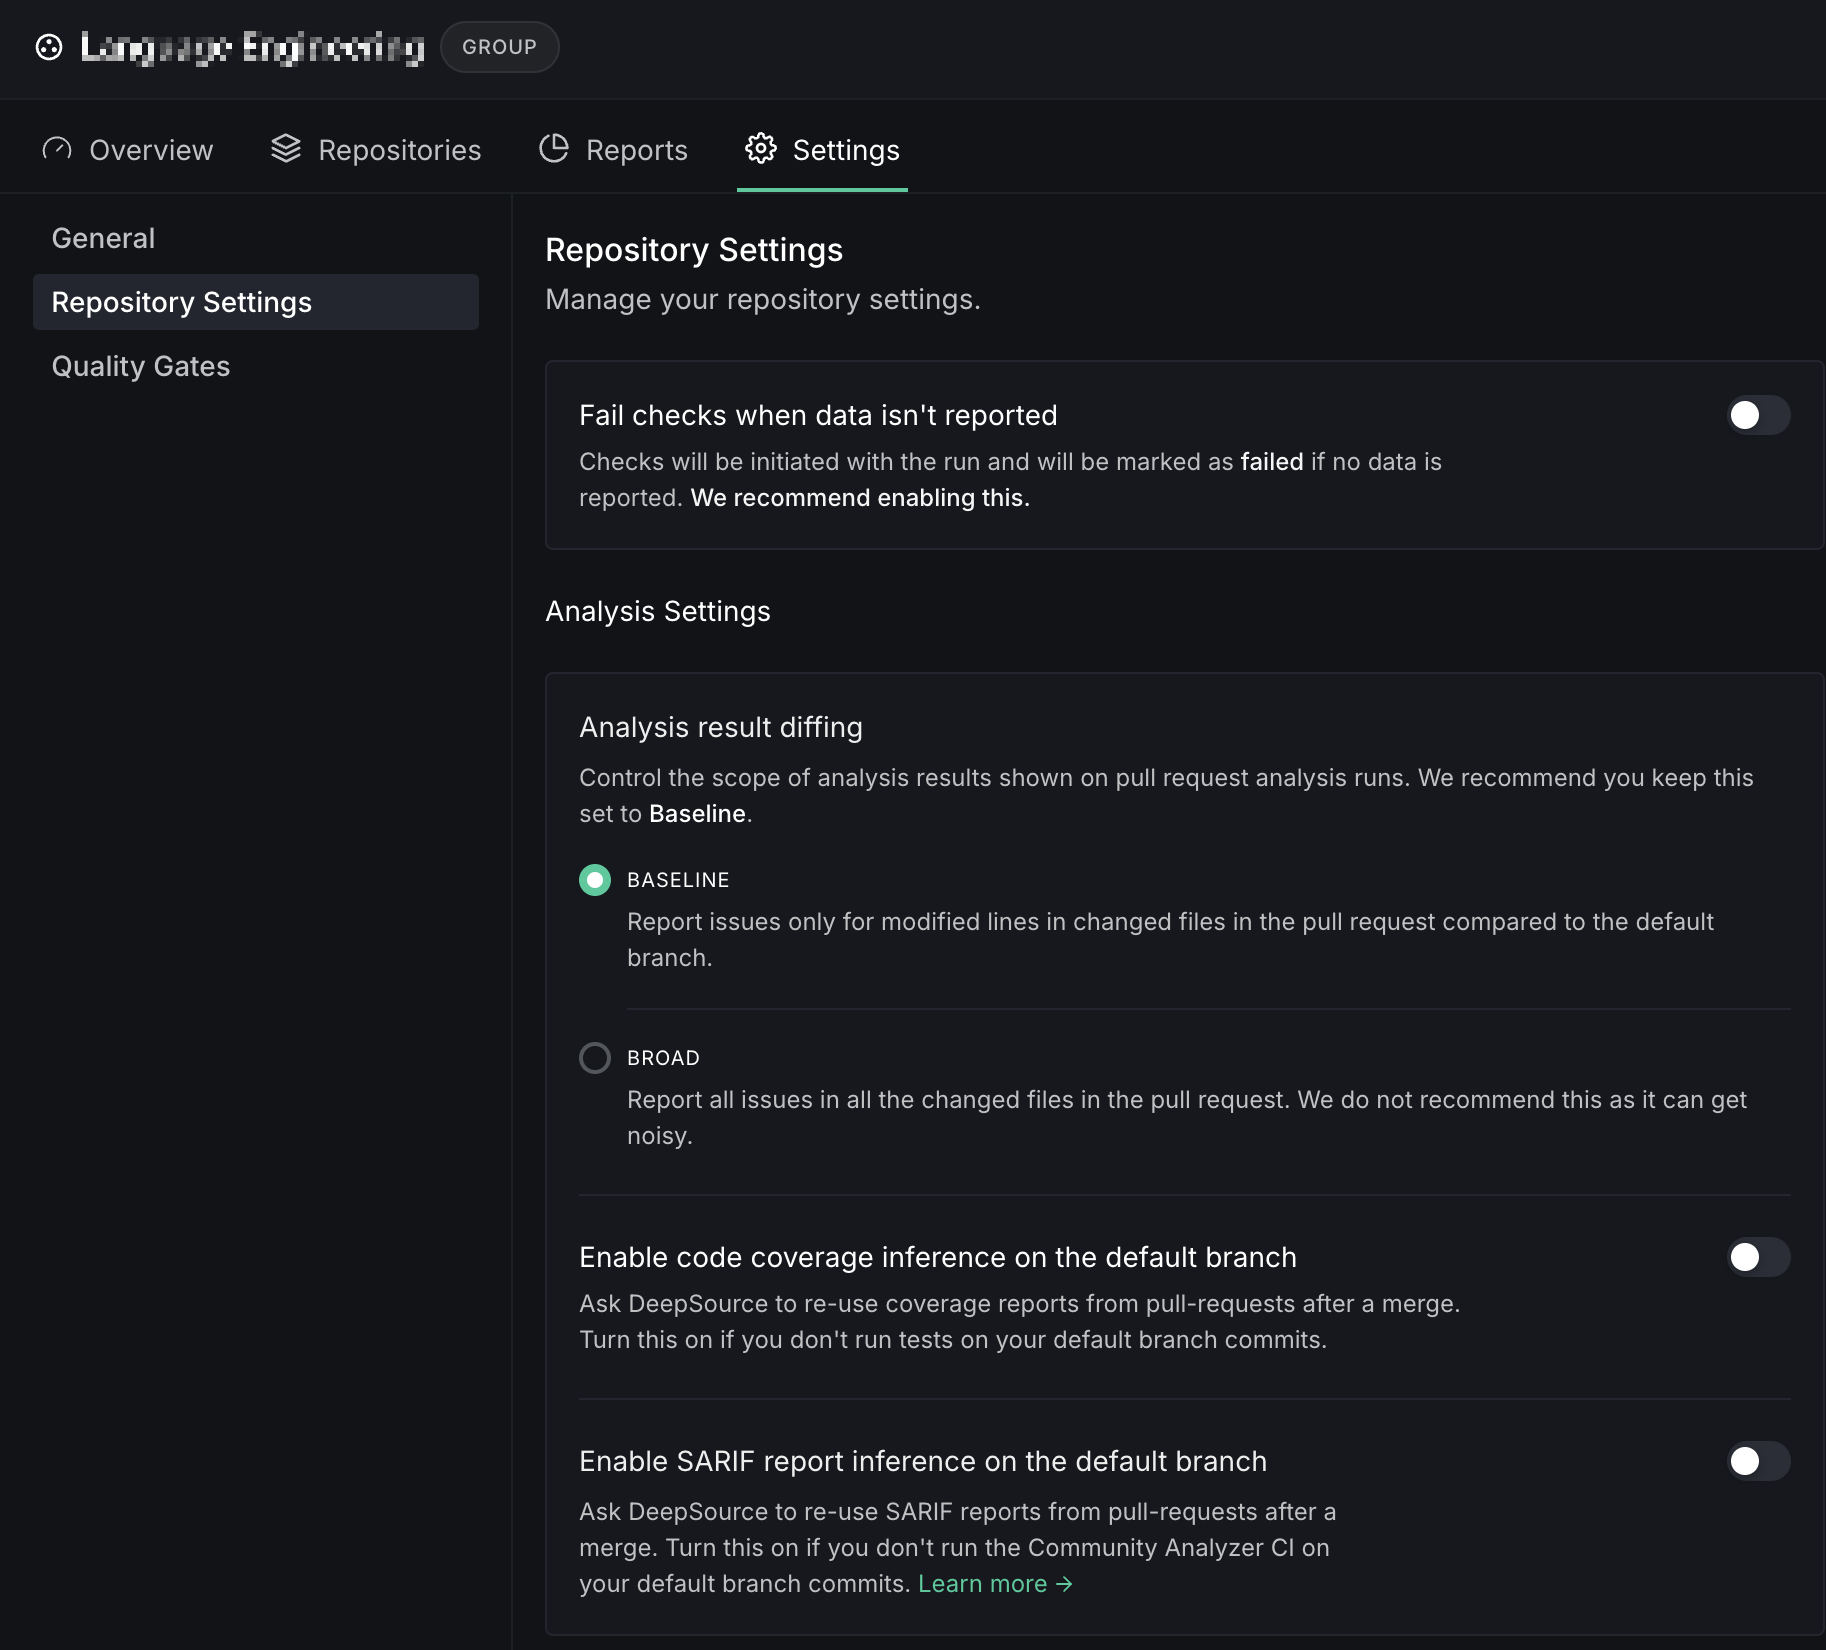
Configure analysis behavior for all repositories in the group. See Repository Settings for details on each setting.
- Fail checks when data isn't reported: Mark checks as failed if no data is reported
- Analysis result diffing: Choose between Baseline (recommended) or Broad mode
- Enable code coverage inference on the default branch: Re-use coverage reports from pull requests
- Enable SARIF report inference on the default branch: Re-use SARIF reports from pull requests
Quality Gates
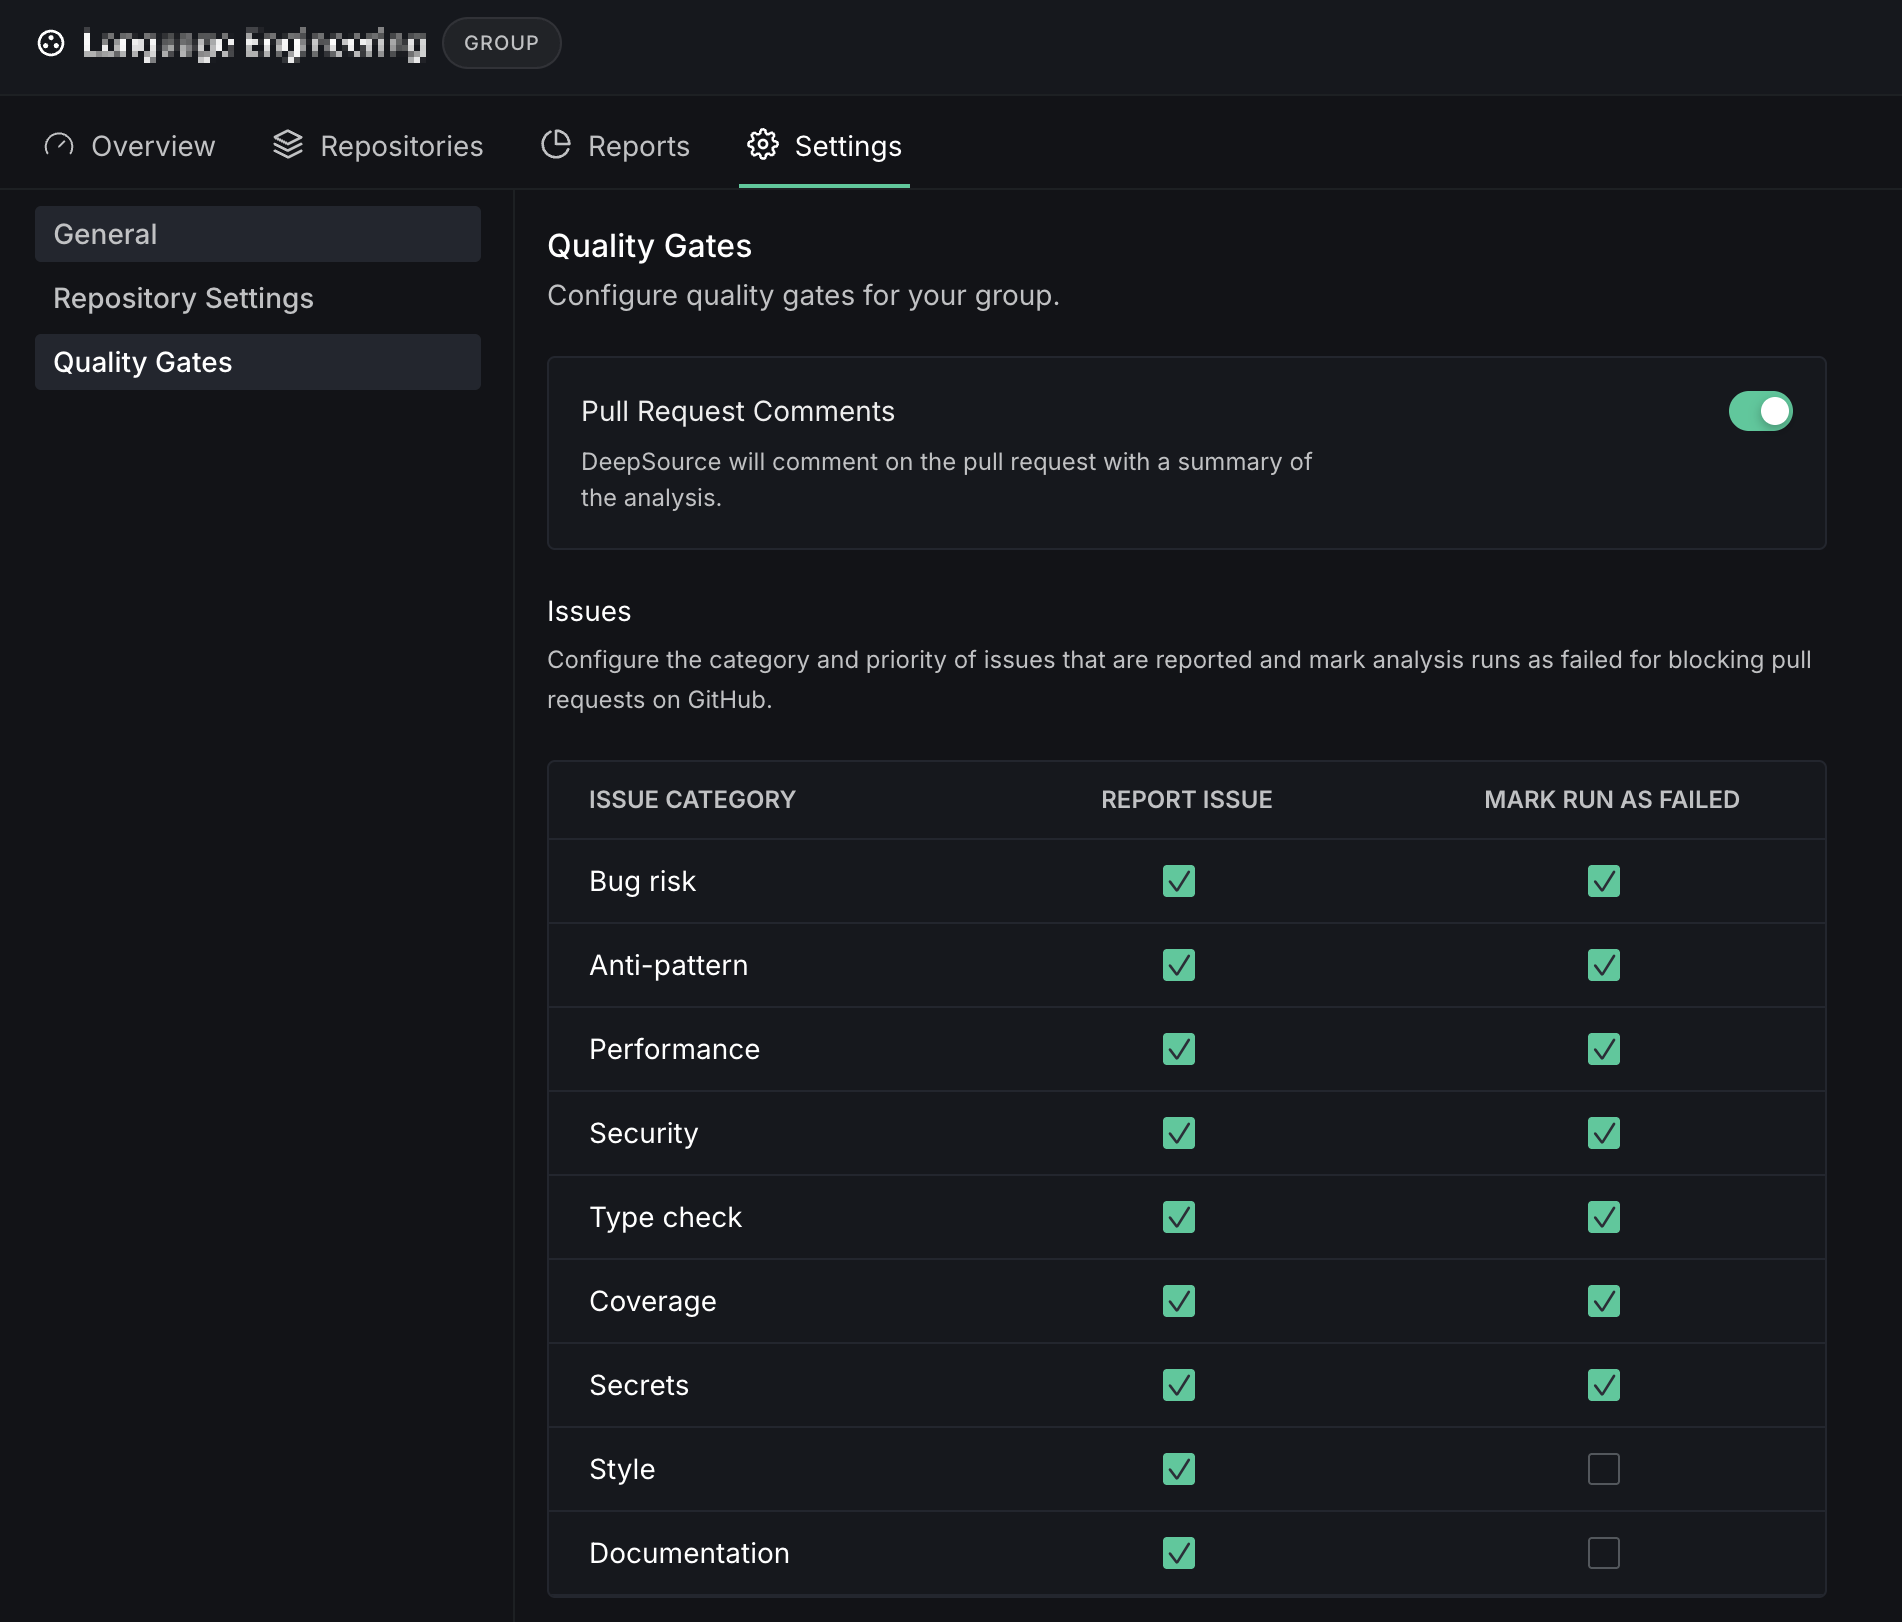
Configure quality gates for all repositories in the group. See Quality Gates for details.
Pull Request Comments: Enable/disable PR comments with analysis summary
Issues: Configure which issue categories to report and which should fail the analysis run:
- Bug risk, Anti-pattern, Performance, Security, Type check, Coverage, Secrets, Style, Documentation
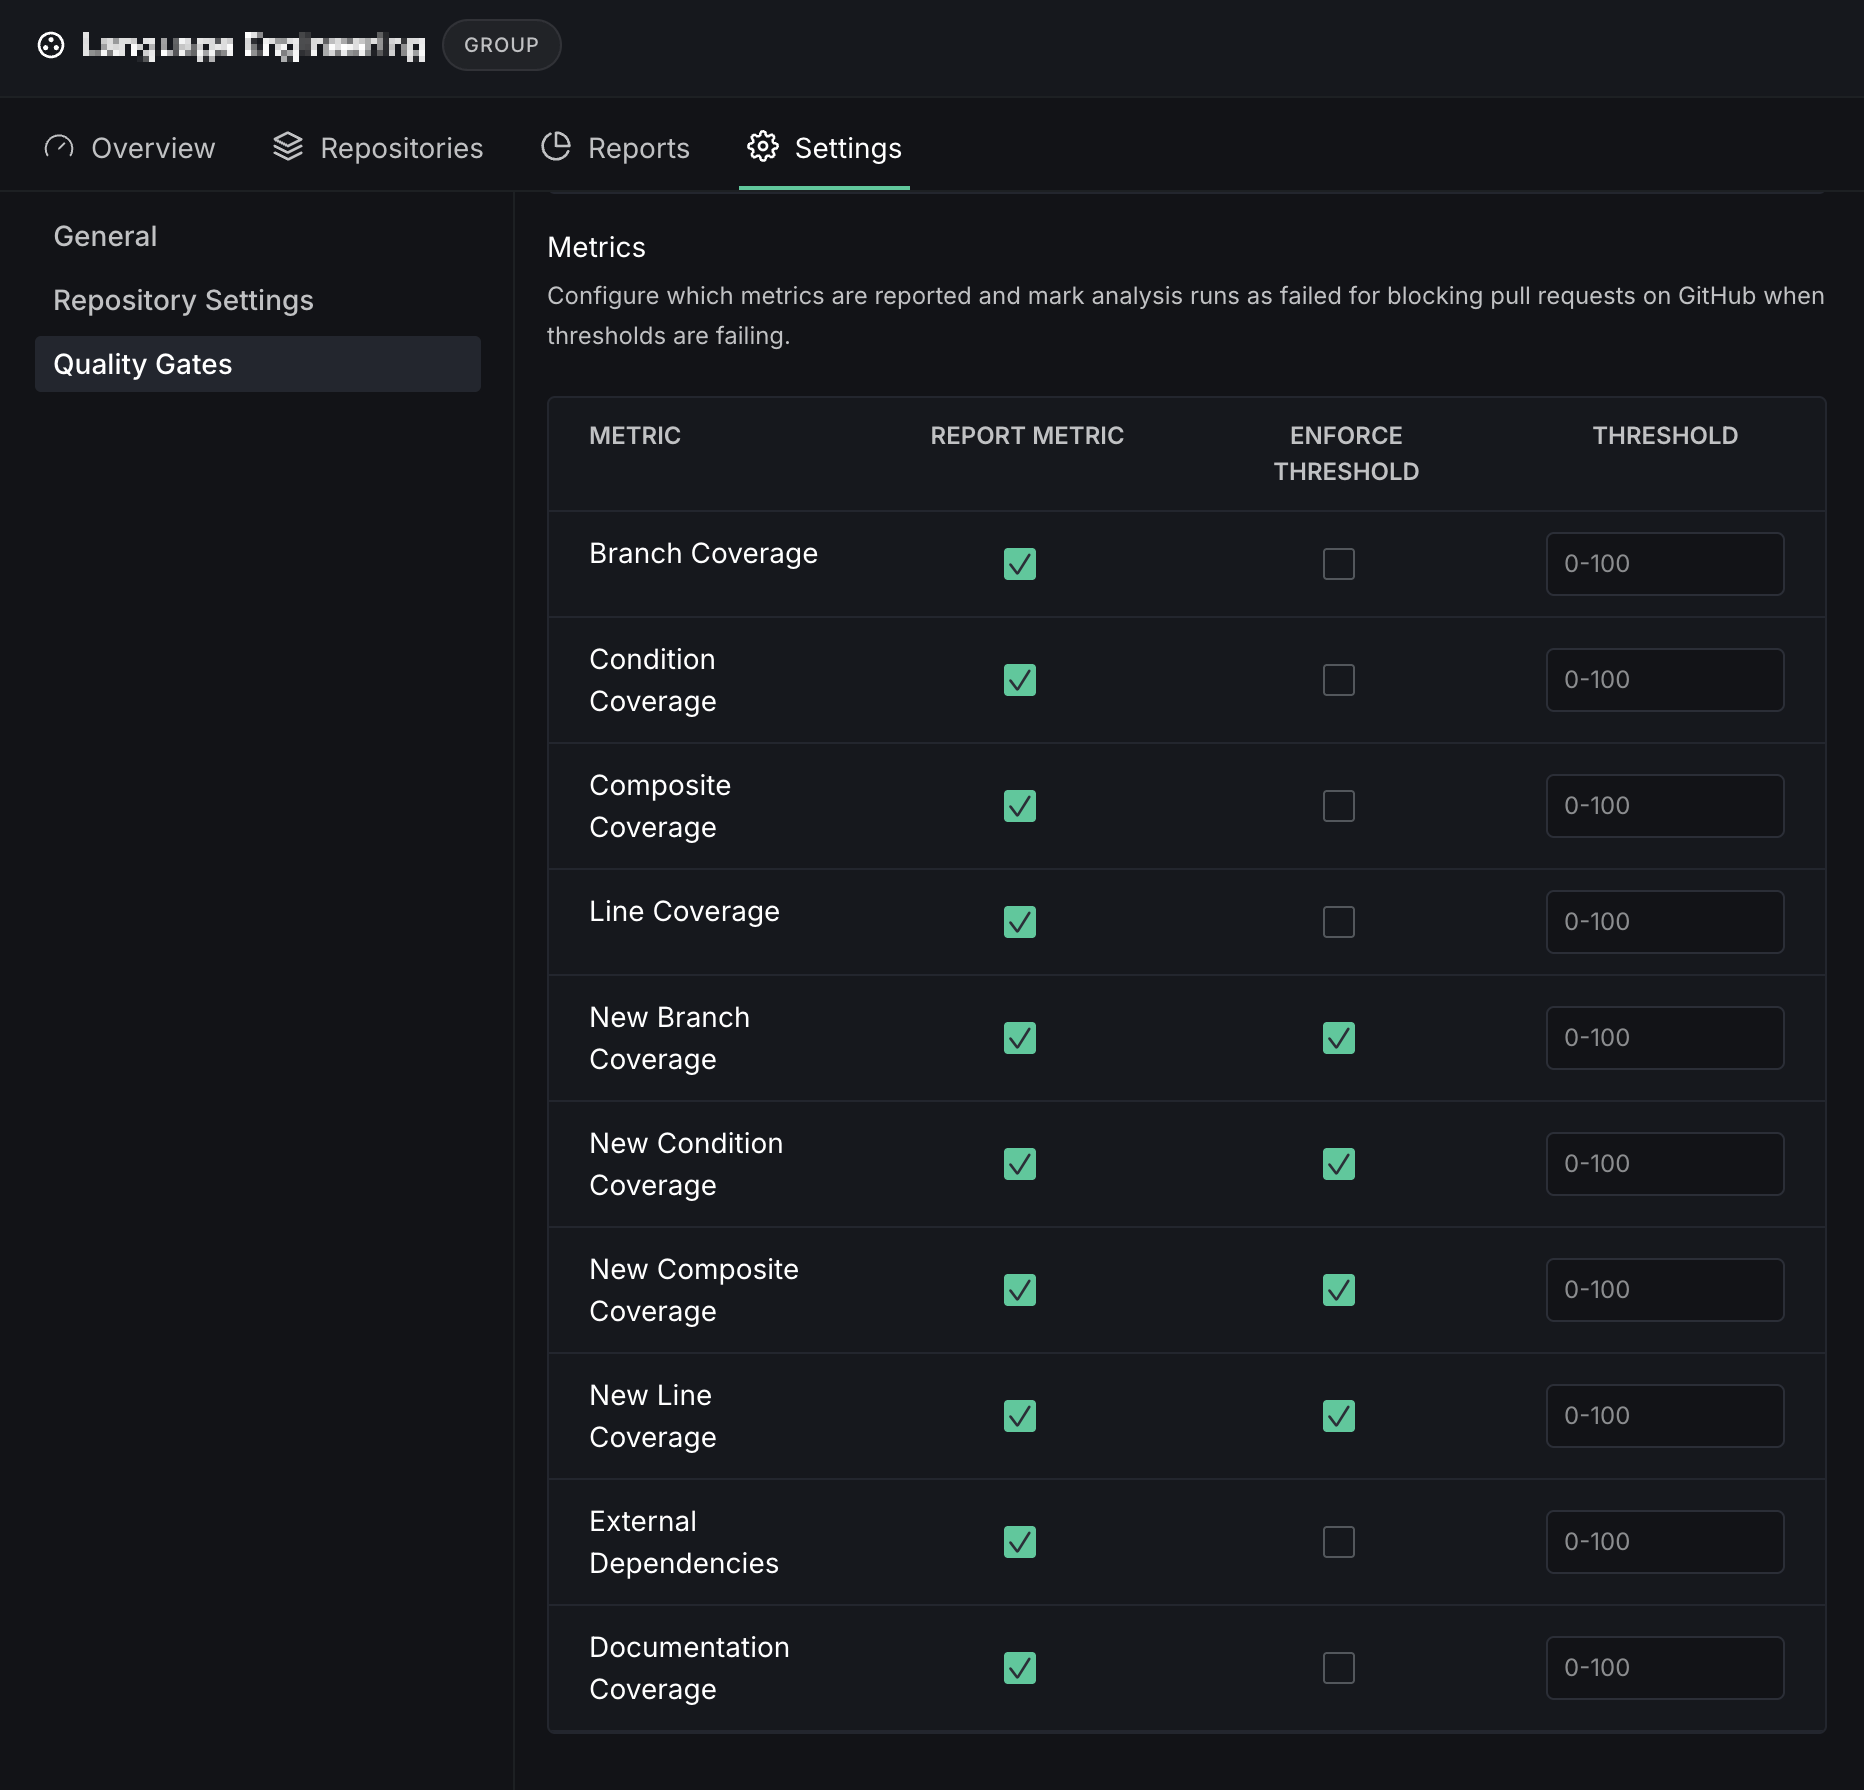
Metrics: Configure which metrics to report, enforce thresholds, and set threshold values:
- Branch Coverage, Condition Coverage, Composite Coverage, Line Coverage
- New Branch/Condition/Composite/Line Coverage
- External Dependencies, Documentation Coverage