Activate new repositories

Activate individual repositories

To activate continuous analysis on additional repositories, follow these steps:

  1. Go to the dashboard and click on “Activate new repo” on the sidebar.

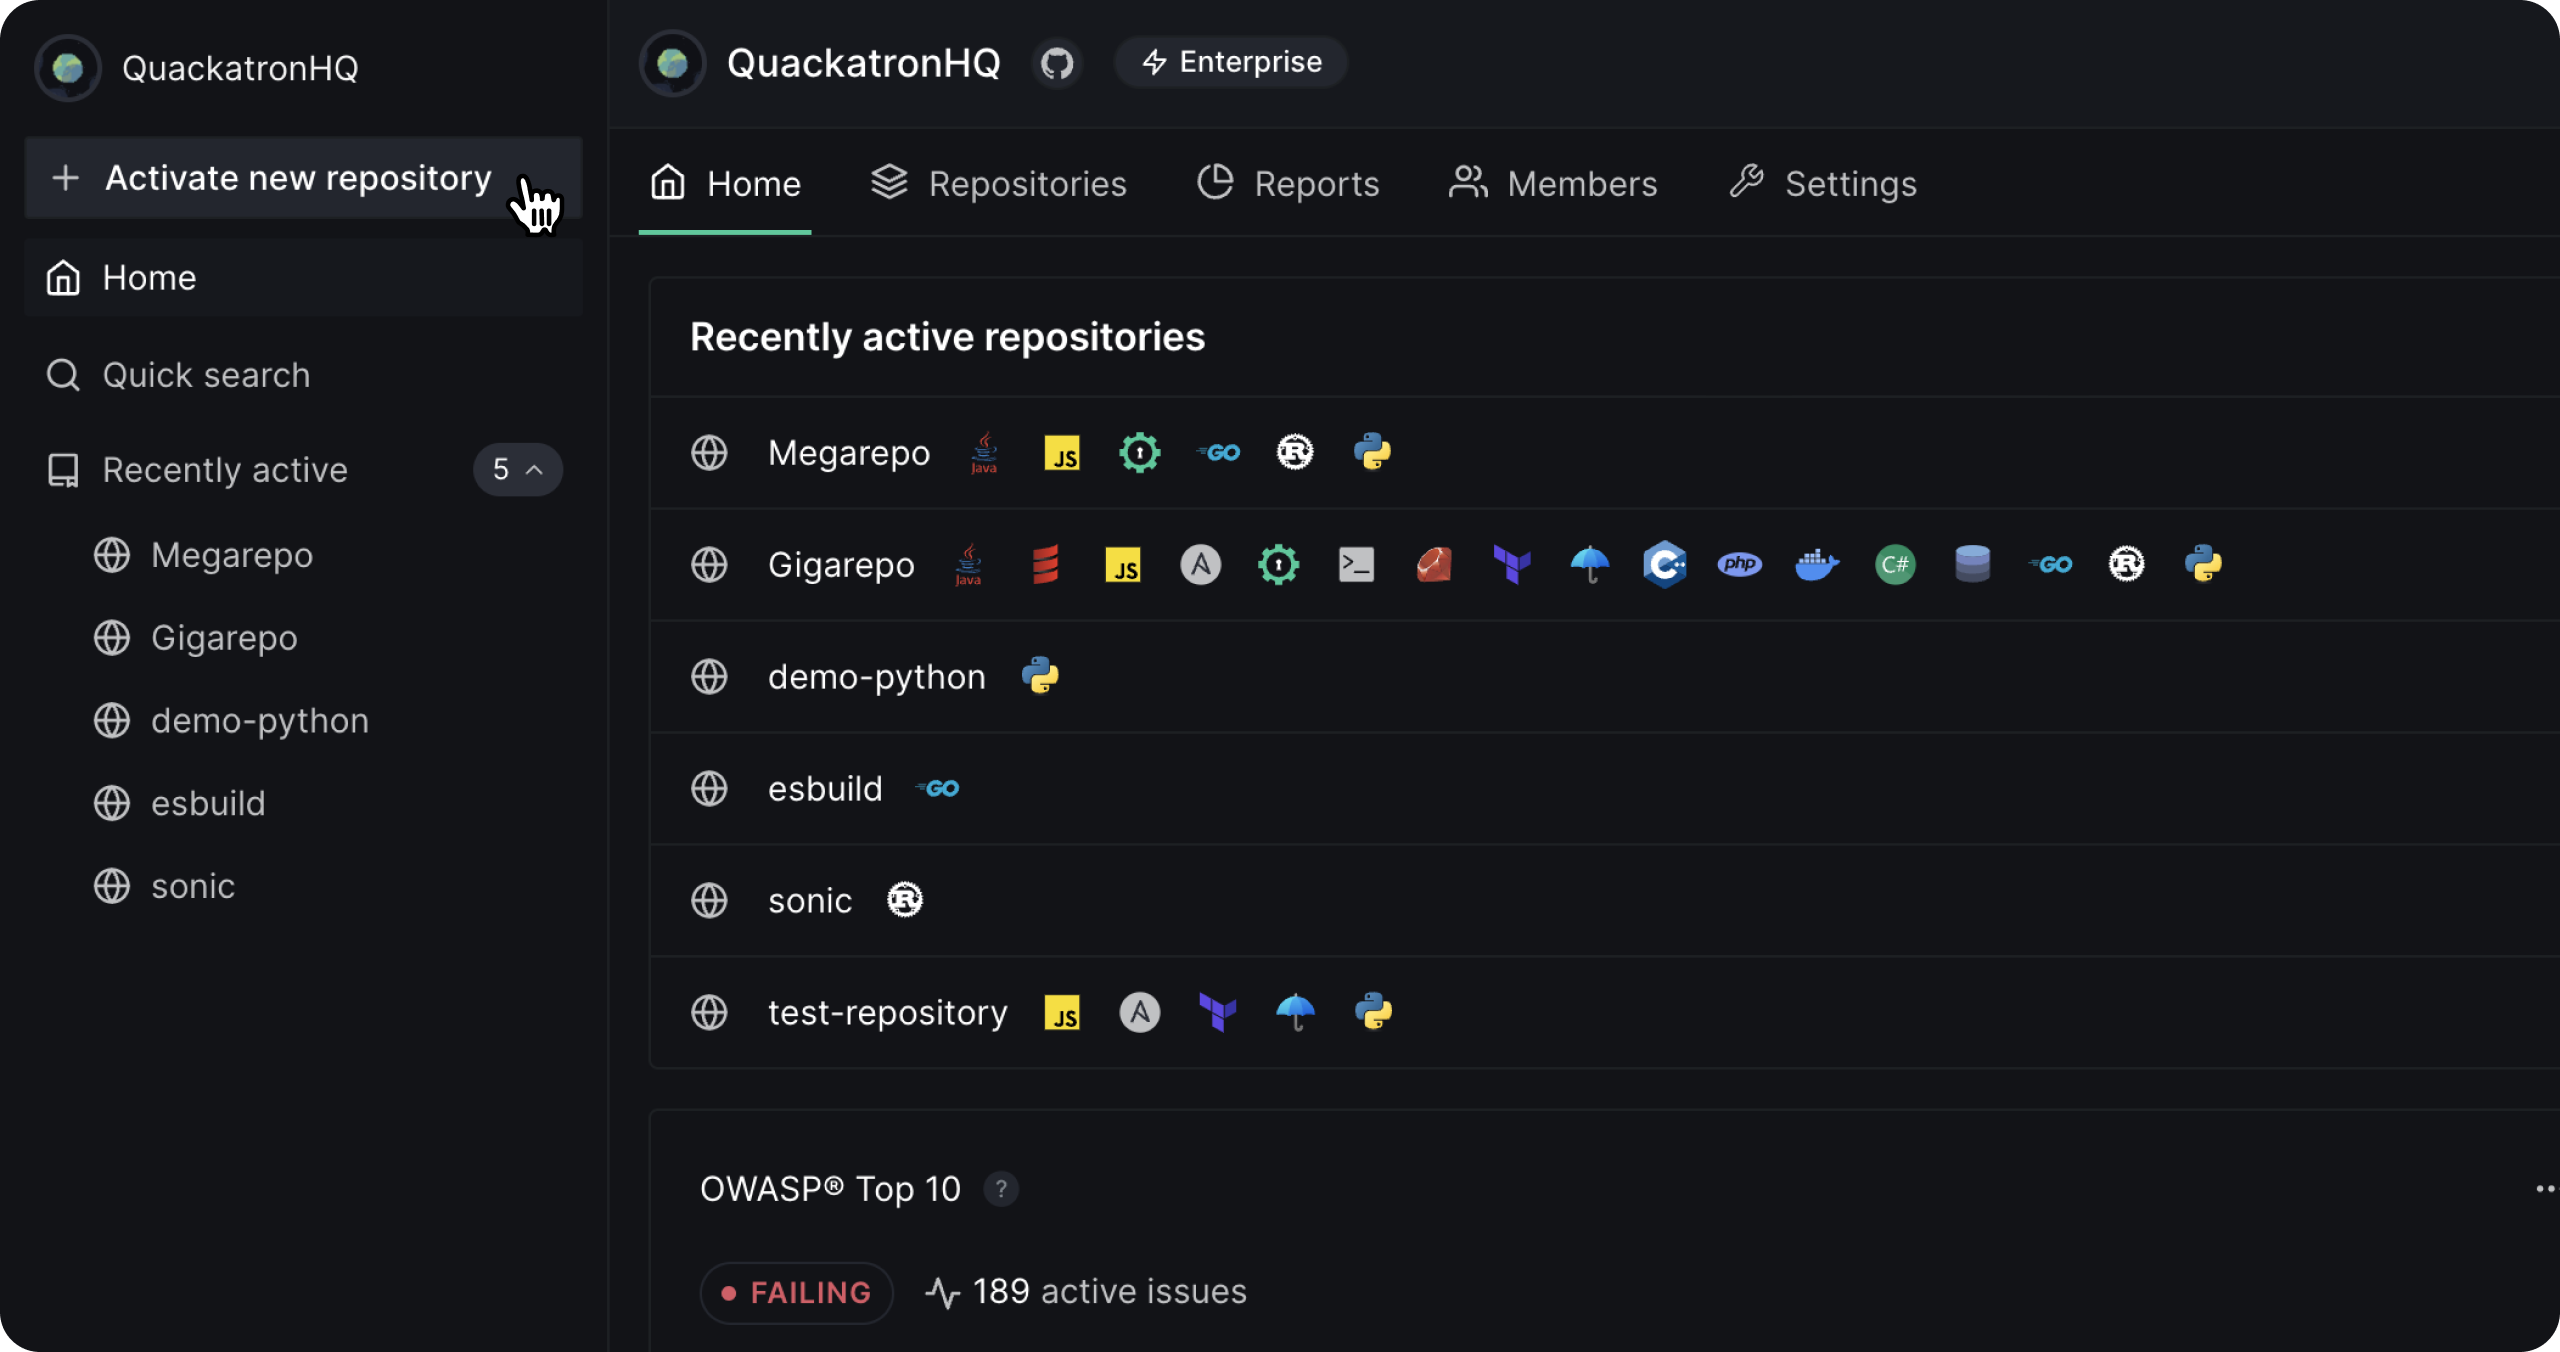
  1. A list of all the repositories synced with your VCS account will appear on the screen.

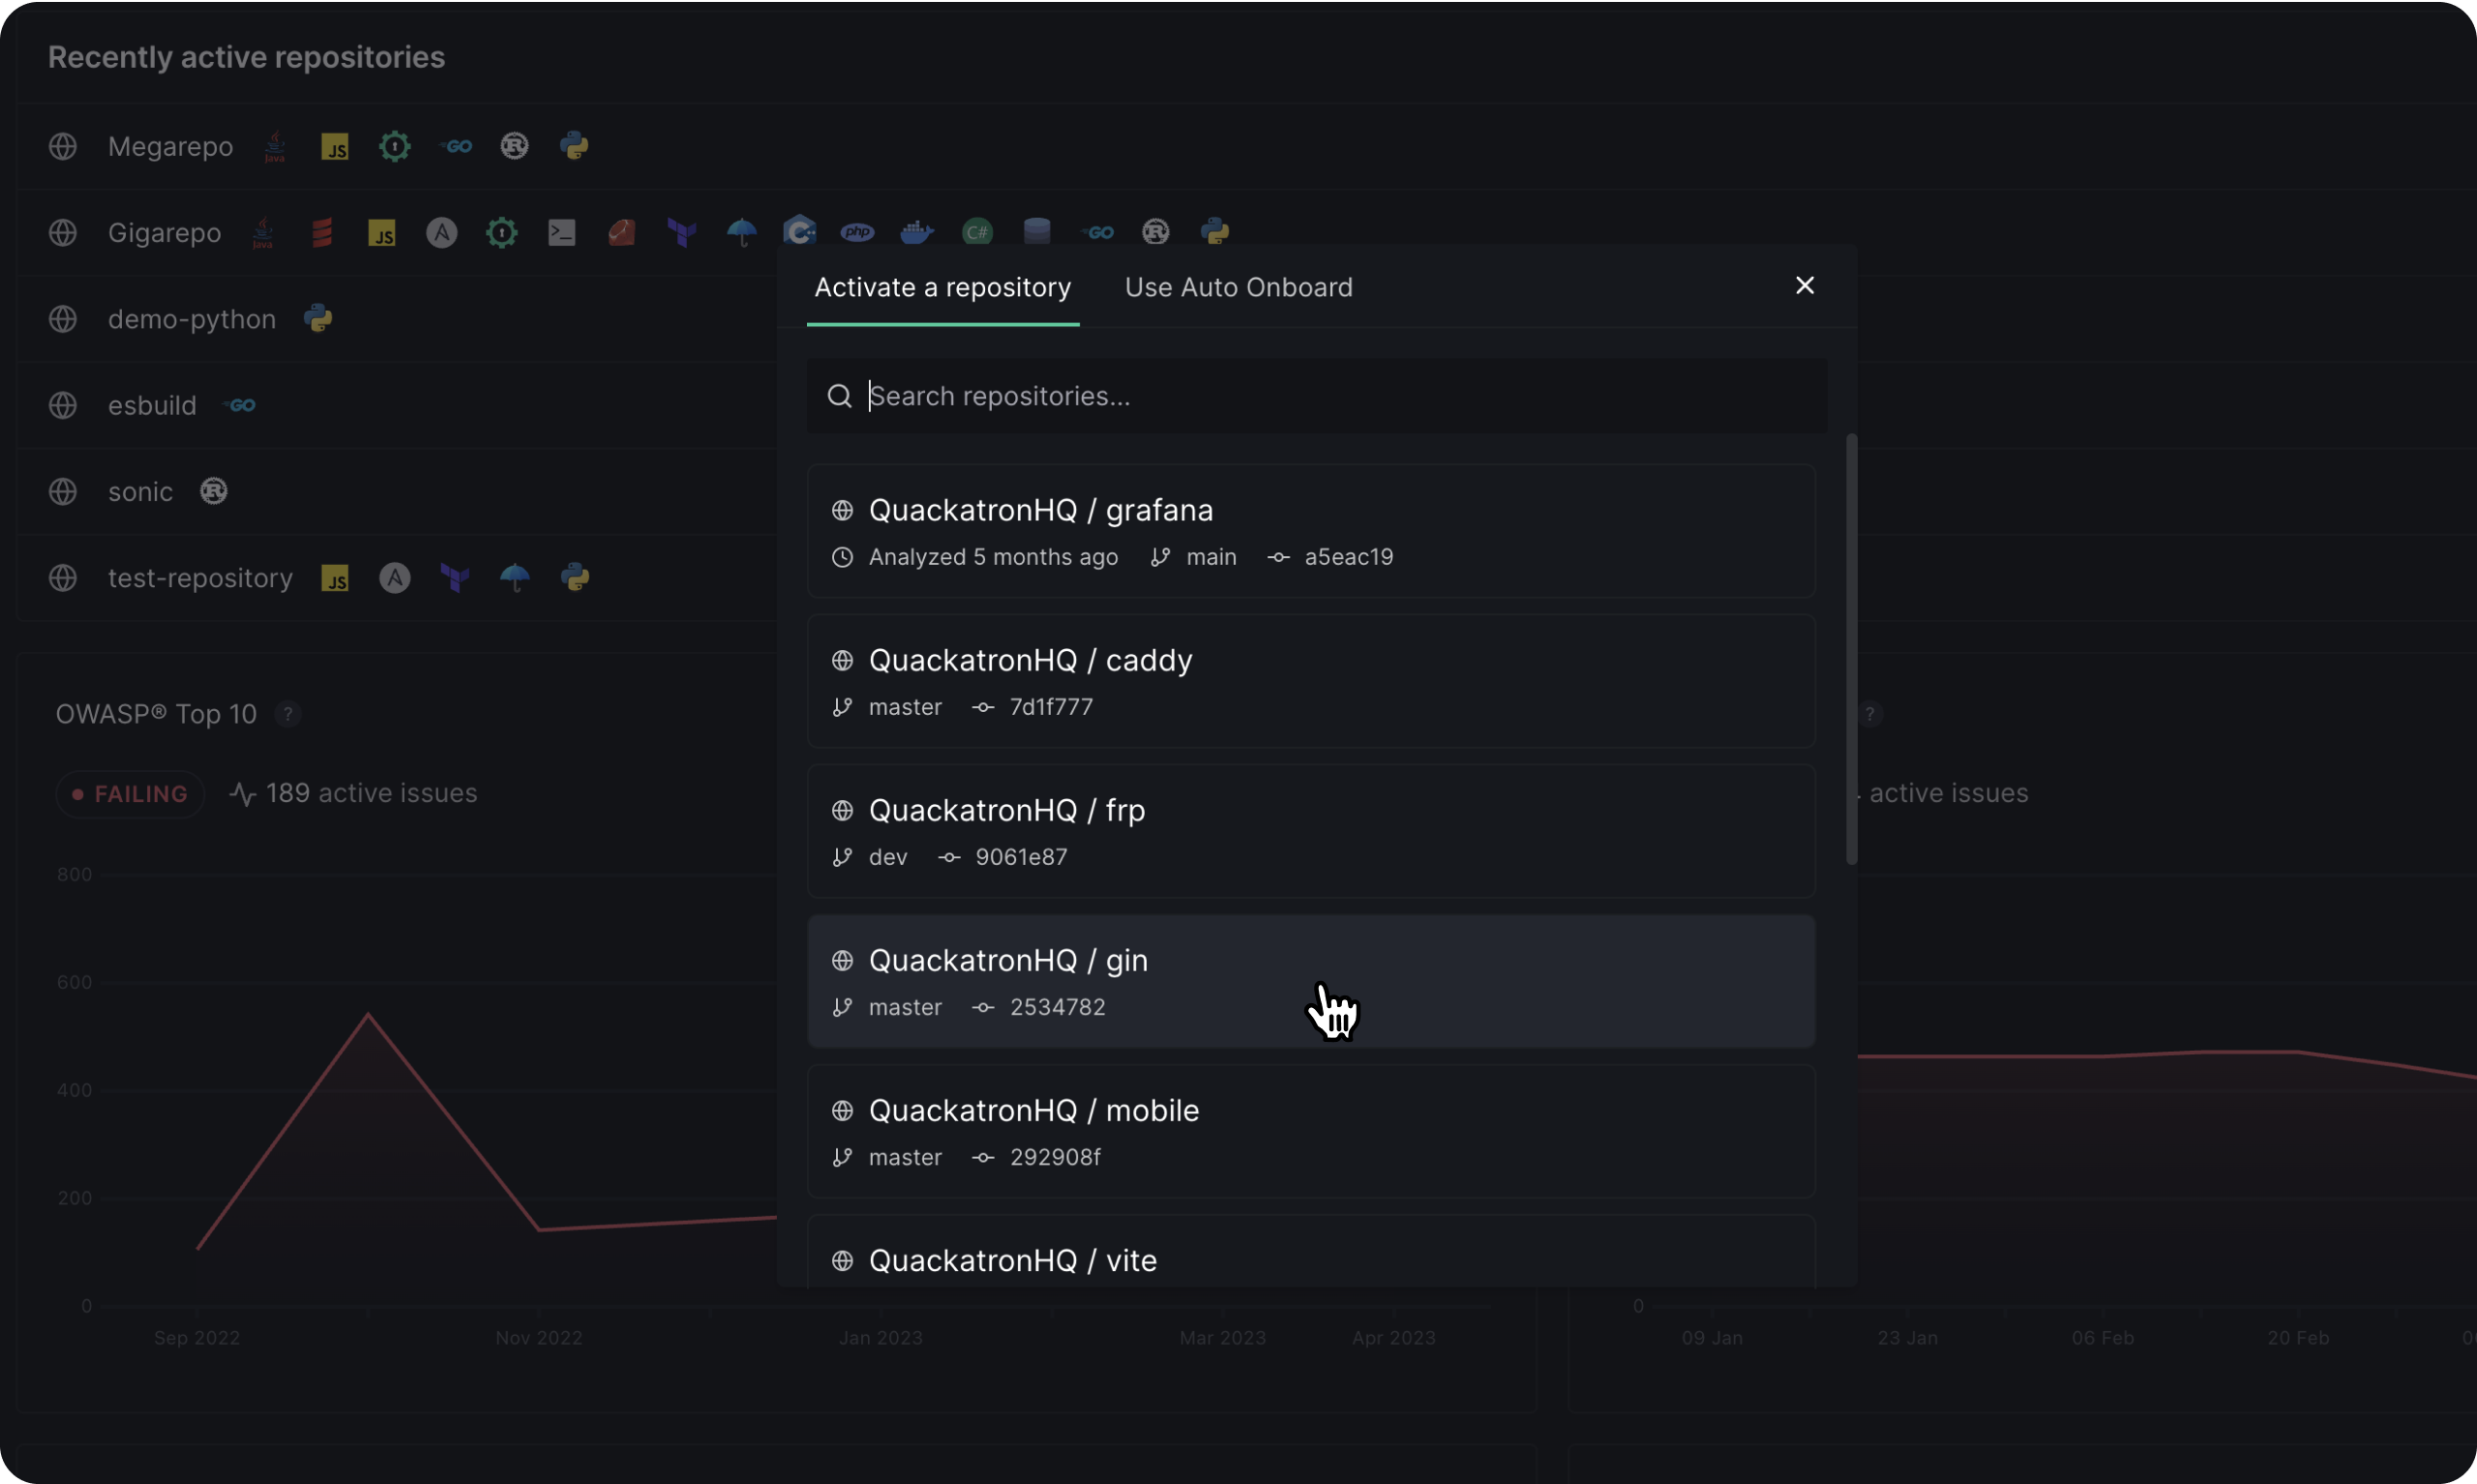
  1. Select the repository you want, and the configuration generator will appear.
  2. Select the Analyzers you want to enable based on your requirements. You can read more about the configuration options for each Analyzer here.

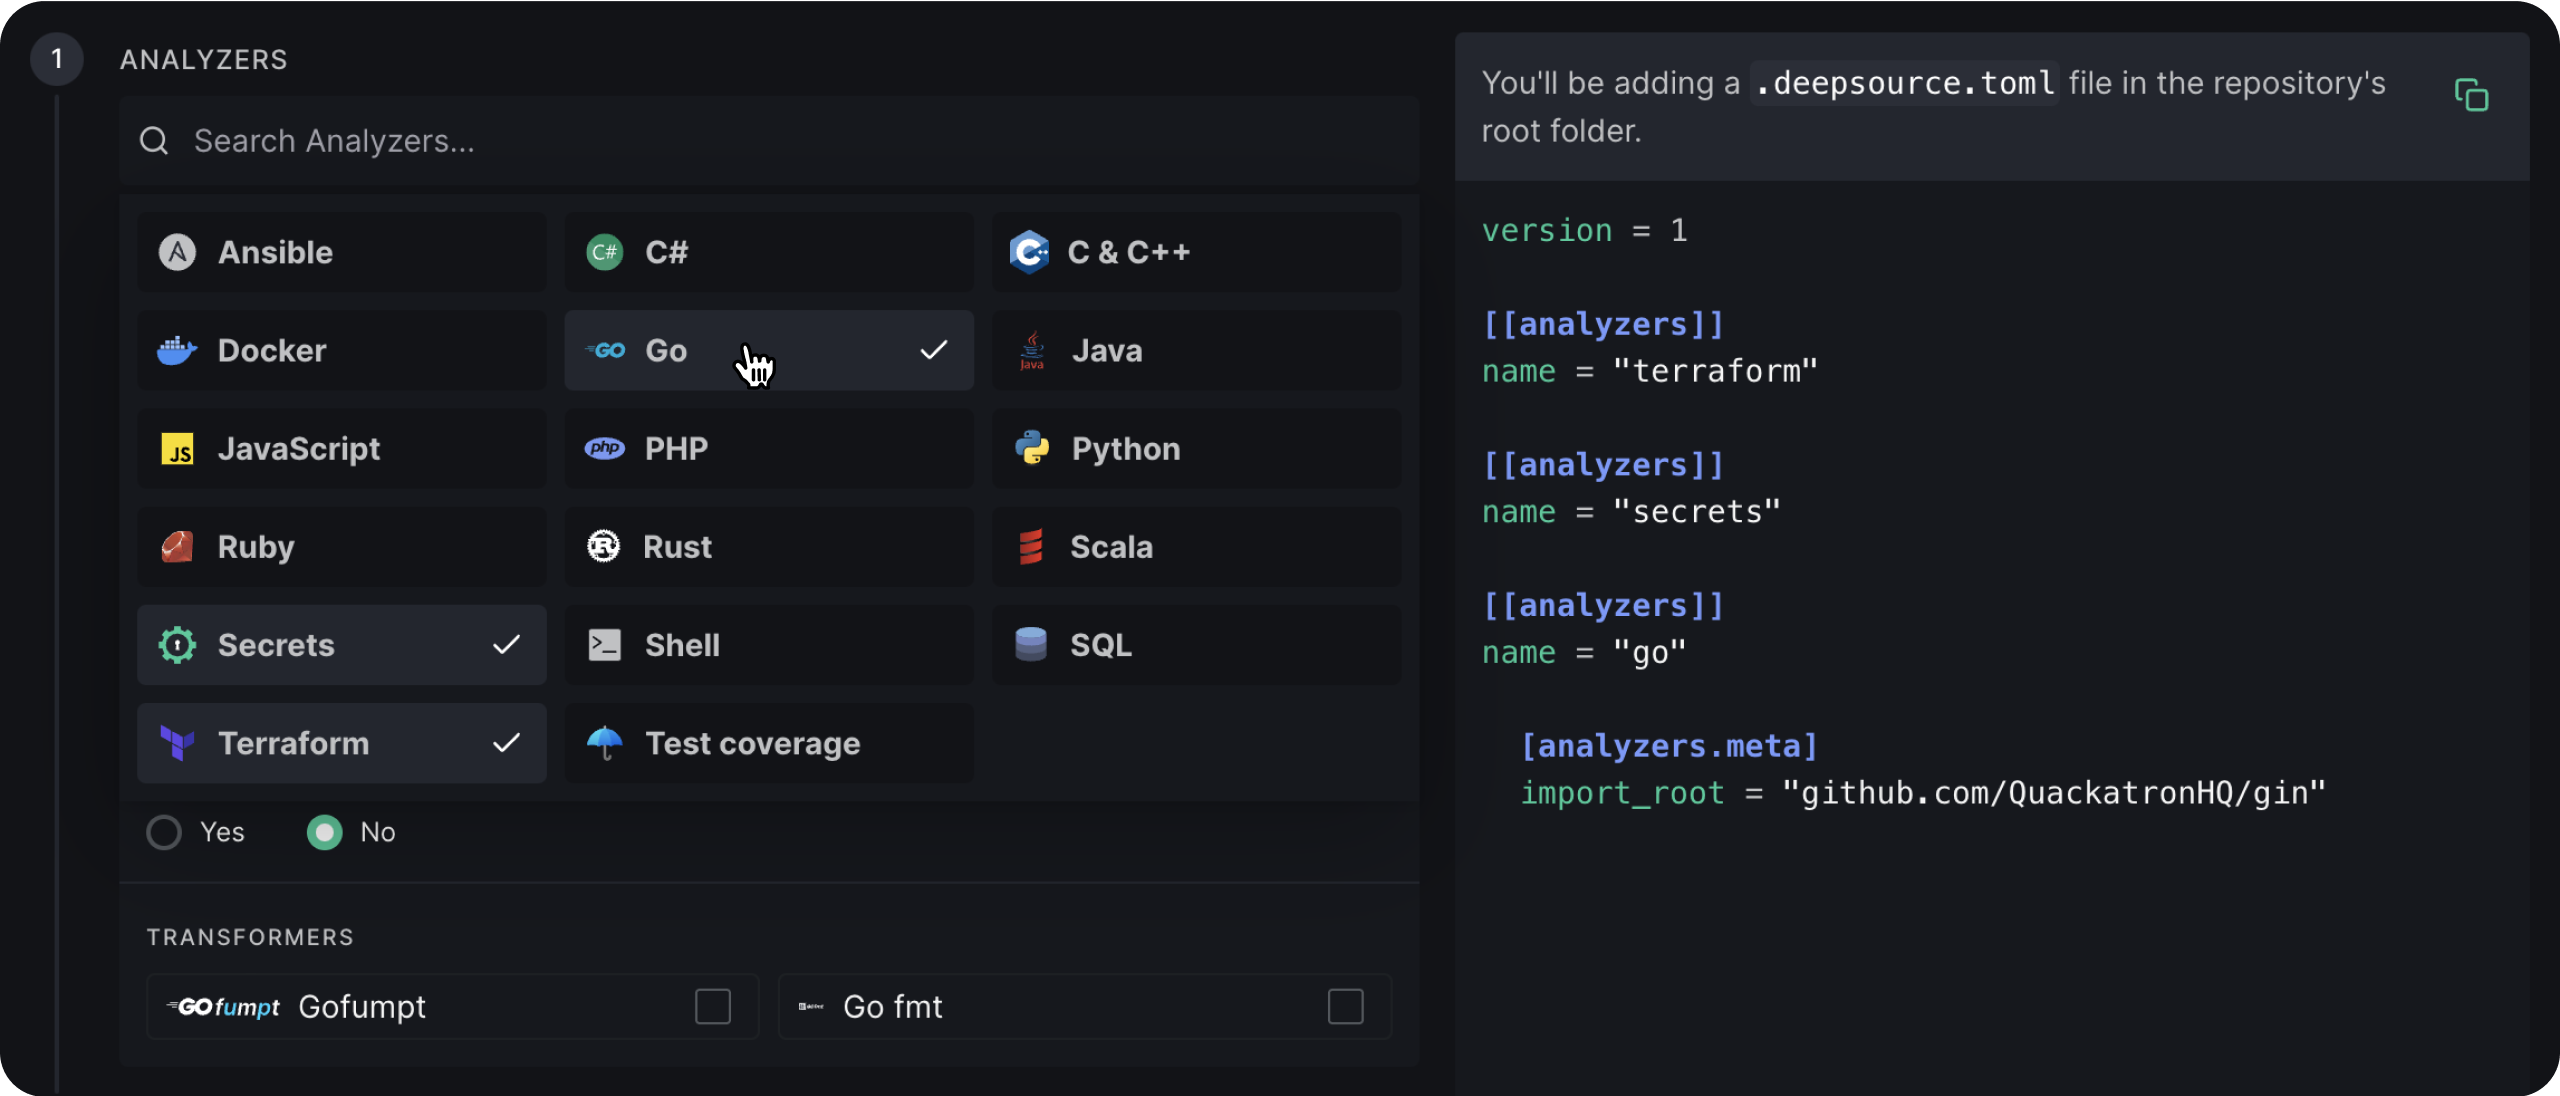
  1. Once you’ve selected the Analyzers you want, DeepSource will generate a .deepsource.toml file that serves as the analysis configuration’s source of truth.

📘

.deepsource.toml

The analysis configuration for a repository on DeepSource is defined in a .deepsource.toml file in the repository's root. This file must be present at the said location for analysis to be run.

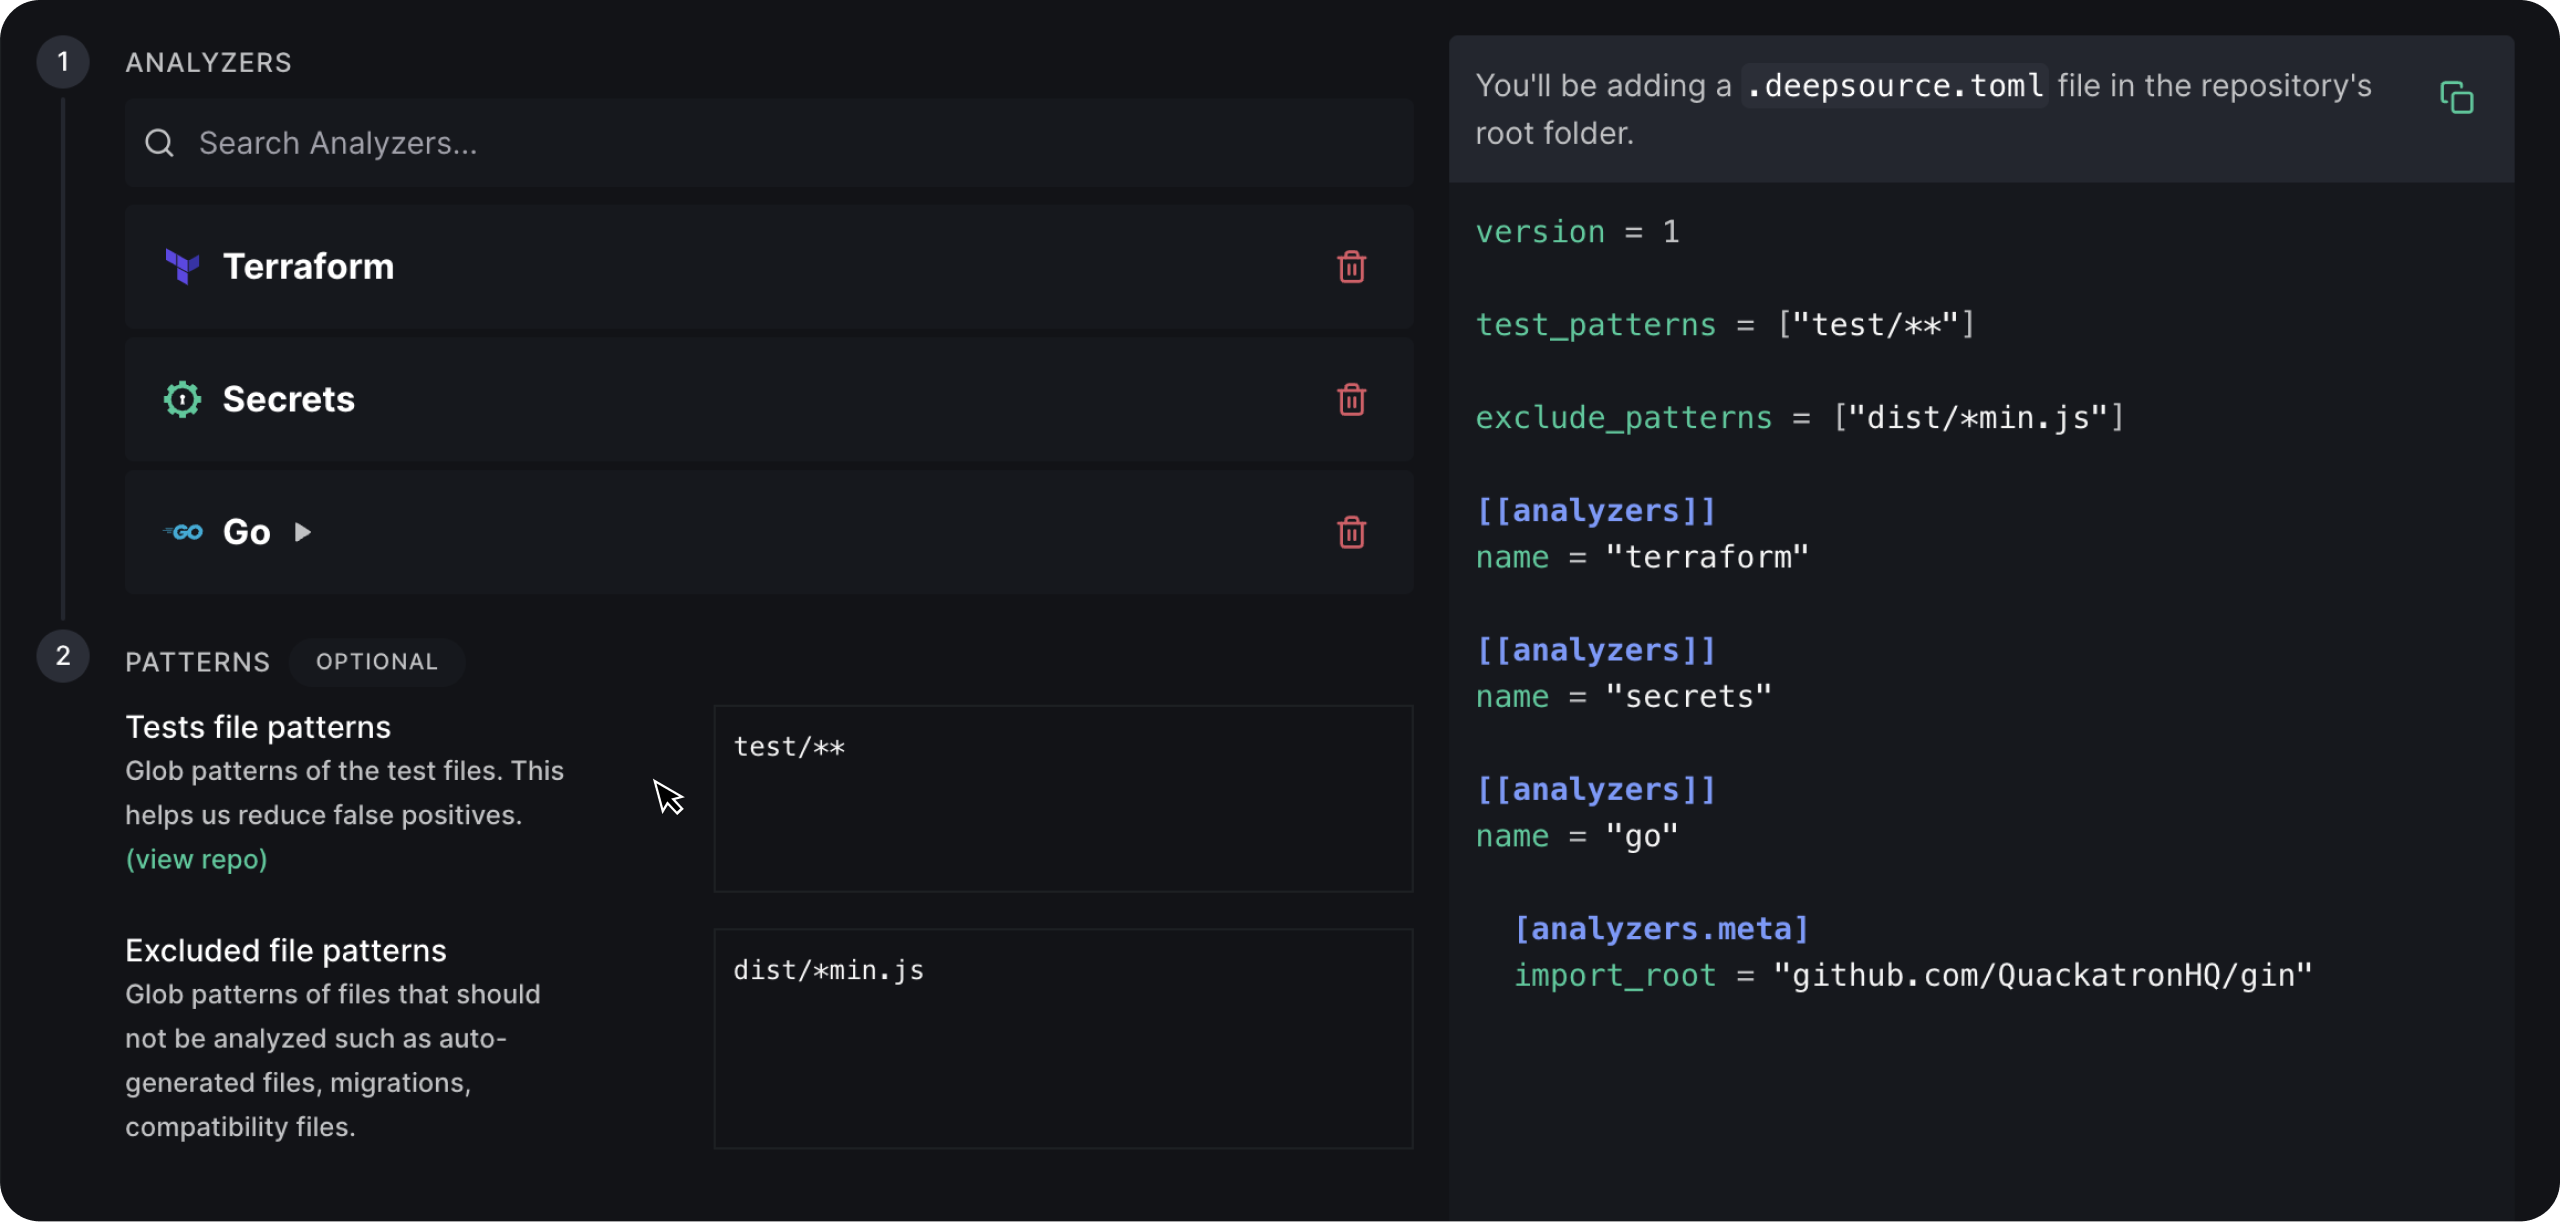
  1. In the ‘Test file patterns’ section, you can add a list of glob patterns to identify as test files. This will help reduce the number of false positive issues after analysis.
  2. In the ‘Exclude file patterns’ section, you can add a list of glob patterns to exclude certain files from analysis, such as generated binaries, minified JavaScript code, and third-party modules.

  1. Based on your repository’s branch permissions, you can directly commit the .deepsource.toml file to your default branch from DeepSource, create a pull request that you can merge from your VCS provider, or manually add this file in your repository’s root.
  2. Once the file has been committed, the analysis will run on the default branch of the repository and analyze all the files.

Set up automatic code formatting with Transformers

In addition to detecting issues, DeepSource lets you automatically format source code with Transformers on every commit. This ensures that your code is consistently formatted without any conflicts.

Here's how to use Transformers:

  1. In the configuration generator, select the Transformers you want to use.

  1. The .deepsource.toml file will be updated automatically.
  2. Alternatively, you can manually copy the configuration from the DeepSource Directory and add it to the .deepsource.toml file.
  3. When you create a pull request, all Transformers enabled in the .deepsource.toml file are run, and the changes detected are committed back to that branch. If the changes are committed directly to the default branch, a new pull request is created with the transformations.

Auto Onboard

Configuring the .deepsource.toml file and enabling DeepSource on numerous repositories can be a daunting task for large teams, particularly for our Enterprise customers. To address this issue, we developed Auto Onboard. With Auto Onboard, you can create configuration templates that serve as blueprints and use them to activate analysis on multiple repositories with just one click.

Config templates

You have the flexibility to create custom configuration templates based on the programming languages or tech stack used in your projects. For instance, you can create a template for your web server repositories by incorporating Python and JavaScript analyzers. In addition, you can include Test Coverage and Secrets analyzers to monitor coverage outcomes and ensure that no confidential information is committed.

To create a configuration template, follow these steps:

  1. Navigate to the 'Settings' page from the dashboard. (Note: Auto Onboard is currently not available for individual accounts.)
  2. Under the 'Auto Onboard' section, click on 'Add new template'.
  3. Provide a descriptive name and summary.
  4. Add all the necessary analyzers and transformers.

Activating DeepSource in multiple repositories

To activate DeepSource in multiple repositories using Auto Onboard, follow these simple steps:

  1. Click the "Activate new repository" button located in the sidebar.
  2. Select the "Use AutoOnboard" option and choose the template you want to use. Alternatively, you can directly click the "Use this template" button from the template page.
  3. Select all the repositories you want to onboard, and then click the "Start onboarding" button.


What’s Next